Models > JGS9900BDB15

JGS9900BDB15 Jenn-Air Range - Overview

Sections of the JGS9900BDB15

[Viewing 8 of 8]
Keep searches simple, eg. "belt" or "pump".
Touch-Up Paint - White – Part Number: 72017
Touch-Up Paint - White
★★★★★
★★★★★
(16)
PartSelect #: PS385132
Manufacturer #: 72017
This 18 ml bottle of white appliance touch-up paint is used to cover scratches or marks on your appliance. The white touch-up paint can be used on refrigerators, microwaves, ranges, clothes dryers, an...
$10.20
  In Stock
Short Oven Sensor Kit – Part Number: 12001655
Short Oven Sensor Kit
★★★★★
★★★★★
(21)
PartSelect #: PS2003225
Manufacturer #: 12001655
This temperature sensor detects the temperature within the oven cavity.
$59.08
  In Stock
Burner Electrode – Part Number: WP74009336
Burner Electrode
★★★★★
★★★★★
(6)
PartSelect #: PS11744318
Manufacturer #: WP74009336
This part has a male spade and helps your burner ignite and produce flame. If a wire lead is needed, you can purchase locally.
$53.01
  In Stock
Bi-Pin Halogen Bulb – Part Number: WP74009925
Bi-Pin Halogen Bulb
★★★★★
★★★★★
(14)
PartSelect #: PS11744355
Manufacturer #: WP74009925
This part is a replacement halogen lamp for your oven. The bulb is 25 watts and 120 volts. If your light bulb is burned out, this is the part that replaces it. Be sure to turn off power to your range ...
$32.85
  In Stock
Door Gasket – Part Number: WPW10162384
Door Gasket
★★★★★
★★★★★
(19)
PartSelect #: PS11749287
Manufacturer #: WPW10162384
This oven door gasket comes with built in retaining clips.
$111.22
  In Stock
IGNTR-OVEN – Part Number: W11596211
IGNTR-OVEN
★★★★★
★★★★★
(20)
PartSelect #: PS16744717
Manufacturer #: W11596211
This part ignites to help bake your food. This bake or broil igniter ignites the gas for the oven burner by glowing white. If any of the following symptoms occur, it is best to replace this part: litt...
$74.95
  In Stock
Screw – Part Number: W11233072
Screw
★★★★★
★★★★★
(5)
PartSelect #: PS12349731
Manufacturer #: W11233072
This is a multi-use and multi-appliance screw. It can be used on a microwave, refrigerator, range/oven, air conditioner, dehumidifier, washer, or dryer. The measurements of this screw are 8 x 1/2 inch...
$26.51
  In Stock
Inner Door Glass Pane – Part Number: 74003645
Inner Door Glass Pane
★★★★★
★★★★★
(15)
PartSelect #: PS2081701
Manufacturer #: 74003645
Glass only.
$130.28
  In Stock
Oven Rack – Part Number: WP7801P173-60
Oven Rack
★★★★★
★★★★★
(4)
PartSelect #: PS11744745
Manufacturer #: WP7801P173-60
Used in the lower oven. Sold individually.
$115.55
  In Stock
Insulation – Part Number: WPW10208653
Insulation
★★★★★
★★★★★
(6)
PartSelect #: PS11750415
Manufacturer #: WPW10208653
Oven Wrap Insulation.
$77.41
  In Stock
Burner Knob – Part Number: WP74011666
Burner Knob
★★★★★
★★★★★
(7)
PartSelect #: PS11744467
Manufacturer #: WP74011666
Sold individually. This knob accepts a D-shaped shaft.
$42.74
  In Stock
Meat Probe – Part Number: WP7430P038-60
Meat Probe
★★★★★
★★★★★
(7)
PartSelect #: PS11744536
Manufacturer #: WP7430P038-60
Also known as Heat Probe or Gauge. This probe is used to check the internal temperature of the meat to ensure proper temperature is reached.
$212.65
  In Stock

Questions And Answers for JGS9900BDB15

Be the first to ask our experts a question about this model!

Common Symptoms of the JGS9900BDB15

[Viewing 9 of 9]
Little to no heat when baking
Fixed by
these parts
Fixing Fixing Fixing
Show All
Will Not Start
Fixed by
these parts
Fixing Fixing Fixing
Show All
Gas igniter glows, but will not light
Fixed by
these parts
Fixing Fixing Fixing
Show All
Oven not heating evenly
Fixed by
these parts
Fixing Fixing
Show All
Element will not heat
Fixed by
these parts
Fixing Fixing Fixing
Show All
Oven is too hot
Fixed by
these parts
Fixing Fixing
Show All
Door won’t close
Fixed by
these parts
Fixing Fixing
Show All
Touchpad does not respond
Fixed by
these parts
Fixing Fixing
Show All
Little to no heat when broiling
Fixed by
these parts
Fixing
Show All
Keep searches simple. Use keywords, e.g. "leaking", "pump", "broken" or "fit".
F1 code - gas over would not heat.
Repair tech checked oven and said the control panel was bad and needed to be replaced. The new control panel would cost over $450.00! I found that the oven sensor was bad and replaced it for $30.00. The old oven sensor had failed following a self cleaning cycle. I found that the wires coming out of it were burnt.

Replacing the oven sensor was very easy. I removed the back panels 6 screws to gain access to the sensor's connection. I then removed the 2 screw that hold the sensor in place inside the oven and pulled the old sensor out through the oven. I reversed this process to place the new sensor in the oven.
Parts Used:
Short Oven Sensor Kit
  • george from birmingham, AL
  • Difficulty Level:
    Easy
  • Total Repair Time:
    15 - 30 mins
  • Tools:
    Screw drivers
170 of 182 people found this instruction helpful.
Was this instruction helpful to you?
Thank you for voting!
Ignitor stopped working on gas cooktop
As others reported, there are 2 torx screws that need to be removed so that the burner element can be removed. One came out with a little effort, the other one did not as it was corroded. After breaking a torx bit, a second torx bit succeeded in breaking off the screw head. This then required a drill to drill out the broken shaft and then rethreading the screw hole. On to the ignitor replacement. The tiny screw holding the ignitor was corroded and would not come out. It too had to be drllled out and rethreaded. It was a 1/3" #4 screw with fine threads. Had to get it an appliance repair store as the local hardware places don't carry fine threaded screws. Finally got it all put back together after a week. My advice before ordering an ignitor is make sure you can take the current burner off the cooktop first to do the repair in the first place. BTW, the ignitor I ordered came quickly and was the correct part!
Parts Used:
Burner Electrode
  • Jeff from Lake Orion, MI
  • Difficulty Level:
    Difficult
  • Total Repair Time:
    More than 2 hours
  • Tools:
    Pliers, Screw drivers, Wrench set
83 of 86 people found this instruction helpful.
Was this instruction helpful to you?
Thank you for voting!
mice had made nests in the insulation wrap in the range
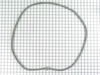
I numbered every part. ex: 1 L., for first part removed left side. I used a magic marker to circle the holes and wrote the number of screws used on the part, set the srews in a separete place, so that I new where these screws went to. The cleanup was pretty time consuming, but I was able to keep my stove, when every repairman I called to fix my stove told me I was better off buying a new stove. ($600.00 stove 2 years old)Please Note: The insulation blanket needed for the entire stove is two pieces, the sides and top are one part # and the bottom and back, are another part #. I did not know this. I just purchased the top and sides. I got lucky, the back and bottom were still in good shape. So I guess I should have read the description of the part more carefully to see what it covers, before I ordered it. It took two people two hours to do the work, it was really nice to have an extra set of eyes, to remember what direction pieces of metal from the stove went. I would do it all over in a heart beat instead of buying a new stove.
Parts Used:
Insulation
  • Wendy from Red Hook, NY
  • Difficulty Level:
    Easy
  • Total Repair Time:
    More than 2 hours
  • Tools:
    Screw drivers
98 of 133 people found this instruction helpful.
Was this instruction helpful to you?
Thank you for voting!