This is the replacement large surface element for your cooktop or range. It is approximately 10-inches in diameter and is 1200/2500 watts. The large surface element is installed under the cooktop and ...
This 18 ml bottle of white appliance touch-up paint is used to cover scratches or marks on your appliance. The white touch-up paint can be used on refrigerators, microwaves, ranges, clothes dryers, an...
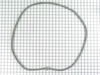
Sold individually. This is a radiant surface element with a limiter, and it works in conjunction with your range. The function of this part is to give heat to the surface directly above it, on cooking area stovetop.
Ask our experts a question about this model and we'll get back to you as soon as possible!
1 question answered by our experts.
< Prev
1
Next >
Sort by:
Search filter:
Clear Filter
Your search term must have 3 or more characters.
Keep searches simple. Use keywords, e.g. "leaking", "pump", "broken" or "fit".
Sorry, we couldn't find any existing answers that matched.Try using some different or simpler keywords, or submit your new question by using the "Ask a Question" button above!
Jan
January 14, 2022
How do i replace a burned out burner on indicator light
For model number JES8750CAB00
Hello Jan, Thank you for your inquiry. To change the indicator light switch, first unplug the unit and pull the range away from the wall so you can access the rear of the appliance. Use a Philips head
screwdriver or a quarter-inch nut driver to unthread the lower screws to release
the upper rear access panel brace. Next unthread the upper screws securing the
panel disconnect the wire connector from the control board to fully release the
panel. Lift the appropriate indicator light off of the jewel and note the orientation of the wires connected to the old light then disconnect them. Install the new indicator light by first connecting the wires to the terminals align the light on the jewel and snap it into place. Reinstall the upper rear access panel by first connecting the wire connector to the control board. Align the panel and replace the upper screws, realign the brace then thread the lower screws, then plug the range back in. Good luck with your repair.
Was this helpful?
Thank you for voting!
< Prev
1
Next >
✖
Ask a Question
Ask our experts a question on this model and we'll respond as soon as we can.
Removed the oven door by opening slightly, then pic door up to remove. Remove 2 screws holding oven sensor in place, gently pull on sensor to remove, had to remove about 8 inches to get at plastic connector. Unplug connector, had to use an adapter cable supplied with the PartSelect kit to install new sensor, push cable back into opening, reinstall 2 screws. The oven works fine! Note that due to thermal lag the temperature overshoots to 370 degrees and undershoots to 340 degrees, this appears to be normal oven operation. Putting door back in place was easy.
Turned the breaker off, I removed 2 screws securing the range top to the range, opened the top and secured it in the up position, Removed the 2 screws securing the element ,one at a time I swapped the quick connectors from the old element to the new and repeated the process in reverse. I save over $100.00 in labor, plus most companies get you for a trip charge. It was easy!!


 Diagram and Parts List for Jenn-Air Range")