Models > GU1500XTLT2

GU1500XTLT2 Whirlpool Dishwasher - Overview

Sections of the GU1500XTLT2

[Viewing 12 of 12]

Manuals & Care Guides for GU1500XTLT2

Click to download
Keep searches simple, eg. "belt" or "pump".
Rack Track Stop – Part Number: WP8565925
Rack Track Stop
★★★★★
★★★★★
(56)
PartSelect #: PS11746591
Manufacturer #: WP8565925
The rack track stop on your dishwasher is designed to stop the dish rack at the appropriate place when opening and closing the rack. If your dishwasher is not cleaning your dishes properly, the rack s...
$9.83
  In Stock
Mounting Bracket – Part Number: WP8269145
Mounting Bracket
★★★★★
★★★★★
(27)
PartSelect #: PS11745496
Manufacturer #: WP8269145
Sold individually. This part secures the upper side of the dishwasher to the underside of the counter or cabinet to prevent the dishwasher from moving, shaking, or tilting forward.
$12.81
  In Stock
Chopper Assembly – Part Number: W10083957
Chopper Assembly
★★★★★
★★★★★
(53)
PartSelect #: PS1734917
Manufacturer #: W10083957
This chopper assembly chops up/mince the food particles to prevent from clogging the dishwasher pump.
$44.35
  In Stock
Dishwasher Door Gasket with Strike - Black – Part Number: W10542314
Dishwasher Door Gasket with Strike - Black
★★★★★
★★★★★
(35)
PartSelect #: PS5136129
Manufacturer #: W10542314
$97.47
  In Stock
Friction Sleeve – Part Number: WP8268961
Friction Sleeve
★★★★★
★★★★★
(27)
PartSelect #: PS11745488
Manufacturer #: WP8268961
This part helps to keep your door quiet when it opens and closes.
$9.56
  In Stock
Water Inlet Valve – Part Number: WP8531669
Water Inlet Valve
★★★★★
★★★★★
(40)
PartSelect #: PS11746141
Manufacturer #: WP8531669
This water inlet valve should be located behind the lower kickplate panel in either the right or left corner. The attaching solenoid on the valve will open and close according to the desired amount of water needed.
$87.00
  In Stock
Fuse Kit – Part Number: 8193762
Fuse Kit
★★★★★
★★★★★
(14)
PartSelect #: PS774514
Manufacturer #: 8193762
When replacing these fuses the wire harness must be replaced as well. It is located in the control panel. The harness is included with this part now.
$45.20
  In Stock
3rd Level Wash Spinner Kit – Part Number: 8193768
3rd Level Wash Spinner Kit
★★★★★
★★★★★
(26)
PartSelect #: PS734590
Manufacturer #: 8193768
This part is the top spinner located at the very top of the wash tub. Water passes through all the spinners causing it to dispense all around the tub.
$19.21
  In Stock
Detergent and Rinse Aid Dispenser – Part Number: WP8558129
Detergent and Rinse Aid Dispenser
★★★★★
★★★★★
(20)
PartSelect #: PS11746408
Manufacturer #: WP8558129
This part releases the detergent and rinse aid into the dishwasher.
$114.89
  In Stock
Circulation Pump and Motor – Part Number: WPW10757217
Circulation Pump and Motor
★★★★★
★★★★★
(22)
PartSelect #: PS11757388
Manufacturer #: WPW10757217
The part functions by spinning the impeller of the circulation pump, which is used to move the water through the spray arms during the wash cycle.
$283.79
  In Stock
Touch-Up Paint - White – Part Number: 72017
Touch-Up Paint - White
★★★★★
★★★★★
(16)
PartSelect #: PS385132
Manufacturer #: 72017
This 18 ml bottle of white appliance touch-up paint is used to cover scratches or marks on your appliance. The white touch-up paint can be used on refrigerators, microwaves, ranges, clothes dryers, an...
$10.21
  In Stock
Drain Hose – Part Number: 8269144A
Drain Hose
★★★★★
★★★★★
(13)
PartSelect #: PS2358130
Manufacturer #: 8269144A
This drain hose is 6 and 1/2 feet.
$40.30
  In Stock

Questions And Answers for GU1500XTLT2

Ask our experts a question about this model and we'll get back to you as soon as possible!

1 question answered by our experts.
  • 1
Sort by:
Sorry, we couldn't find any existing answers that matched.Try using some different or simpler keywords, or submit your new question by using the "Ask a Question" button above!
Skip
October 4, 2023
Does this model have a filter and if so how do l get to it? Thank you.
For model number GU1500XTLT2
PartSelect logo
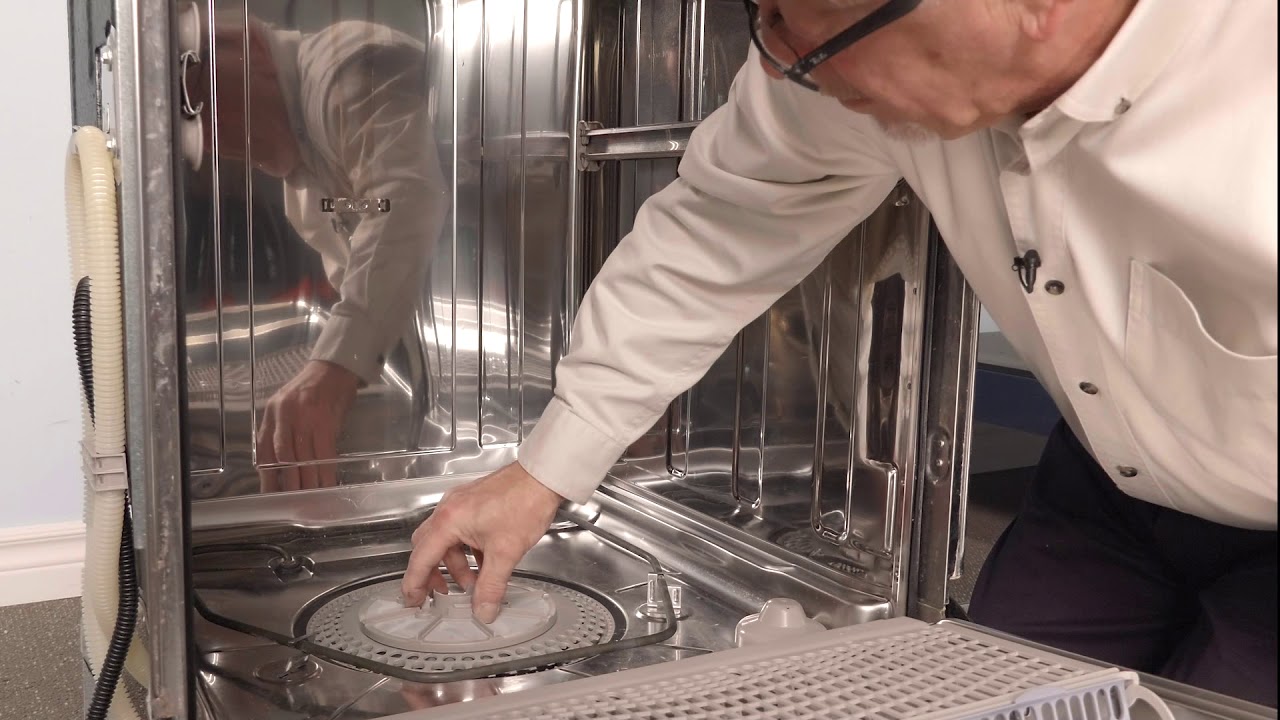
Hello Skip, thank you for getting in touch. According to our research, your model comes with two filters. The filter and accumulator assembly, part number PS897295, and the screen filter, PS392942. The screen filter is located between the motor and the sump assembly. If you remove the motor from the sump, you will access the screen filter. For the filter and accumulator assembly we have attached a relevant video, it may not be of the exact same model, but will help you get to this part. We hope this helps!

1 person found this helpful.

Was this helpful?
Thank you for voting!
Related Parts:
  • 1

Common Symptoms of the GU1500XTLT2

[Viewing 10 of 10]
Leaking
Fixed by
these parts
Fixing Fixing Fixing
Show All
Not cleaning dishes properly
Fixed by
these parts
Fixing Fixing Fixing
Show All
Will Not Start
Fixed by
these parts
Fixing Fixing Fixing
Show All
Noisy
Fixed by
these parts
Fixing Fixing Fixing
Show All
Door latch failure
Fixed by
these parts
Fixing Fixing Fixing
Show All
Not draining
Fixed by
these parts
Fixing Fixing Fixing
Show All
Will not dispense detergent
Fixed by
these parts
Fixing Fixing
Show All
Not drying dishes properly
Fixed by
these parts
Fixing Fixing Fixing
Show All
Will not fill with water
Fixed by
these parts
Fixing Fixing Fixing
Show All
Door won’t close
Fixed by
these parts
Fixing Fixing Fixing
Show All
Keep searches simple. Use keywords, e.g. "leaking", "pump", "broken" or "fit".
Loud grinding noise from water pump
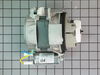
Rather than remove the pump assembly - as an earlier post had done - I pulled the entire dishwasher out and laid it down on the floor. This allowed easy, direct access to the motor (that was the hard, messy part). From this point it was easy. Unplug the wiring, remove the retaining bolt, rotate the motor off the mounting brackets and pull it out. Then put the new one in. That was the easy part (about 15 minutes). The entire job took 2-and-a-half hours, most of which was taken in disconnecting, cleaning up and reconnecting the dishwasher. It's much quieter now.
Parts Used:
Circulation Pump and Motor
  • Steve from Inver Grove Heights, MN
  • Difficulty Level:
    A Bit Difficult
  • Total Repair Time:
    More than 2 hours
  • Tools:
    Nutdriver, Pliers, Screw drivers, Wrench (Adjustable)
219 of 245 people found this instruction helpful.
Was this instruction helpful to you?
Thank you for voting!
dispenser door was not closing
1. Remove torx screws around outer edge of inside of door.
2. Separate outer door panel from inner door panel.
3. Locate dispenser, and remove 6 hex nuts and 2 wires for solenoid.
4. Insert new dispenser and re-insert hex nuts.
5. Reinsert torx screws.
Parts Used:
Detergent and Rinse Aid Dispenser
  • Ed from Fanwood, NJ
  • Difficulty Level:
    Easy
  • Total Repair Time:
    30 - 60 mins
  • Tools:
    Nutdriver
166 of 182 people found this instruction helpful.
Was this instruction helpful to you?
Thank you for voting!
Dishwasher motor - making a very loud grinding noise
I went on the internet and found a pdf file with the Kitchenaid dishwasher repair manual for my model. One of the hardest parts of the job was convincing myself that I could do the job. When you're young, you just go out and buy a new dishwasher and tell yourself, "it's only money, we'll make more." When you're over 50, you tell yourself, "I can fix this. It will mean I get to retire a week sooner if I don't spend another $700 for a new dishwasher."

In hindsight, I could have done this job (replace the motor) in about 30 minutes. 1) Turn off electrical breaker in basement. 2) slide out dishwasher. 3) disconnect water supply. 4) use old towels to soak up any water still in the tub. 5) turn dishwasher on it's side. 6) unhook the wire harness plug from the motor, squeeze with fingers to unhook. 7) unbolt motor, 1 bolt. 8) turn motor counterclockwise, 1/4 turn. 9) pull motor out from sump, requires some force. 10) install new motor, but use some rinse aid to lubricate the rubber seal on it. Instead I did things the hard way and took the whole darn machine apart!!! See my story below.

I was surprised at how simple the design was and how few parts there really were inside the dishwasher. I found the pdf repair manual very useful, and I also found some repair videos on line. One thing they may or may not tell you - clean the parts well and lubricate the gaskets with some 'rinse aid' liquid when you put the machine back together. Also, it might help you to take a few pictures with a digital camera before you take things apart - that might help you remember how things go back together. Take close up pictures and use a treble light to illuminate the area when you're taking a picture.

The new motor was the ticket to fixing the loud noise. I was worried because the part cost $150. Before I ordered a new motor, I hooked up the old motor to electricity on my work bench and was able to recreate the really loud noise - so I was pretty sure that the new motor would eliminate the problem. It was very easy to install the new motor, only one bolt holds it in place. I did need to disassemble several parts to get to it though. Have no fear. One thing I did was mark the electric leads that went to the small pump with red and black sharpie markers so I could easily see which terminals to plug them back onto.

After reassembling the whole dishwasher with a new motor and testing the dishwasher for leaks by pouring a couple pitchers of water into it - I put the beast back under the counter (hooking it back up to the water supply line, the drain pipe to the garbage disposal and finally the electric supply). Then I ran it and water gushed out the bottom.

This whole job should have been easy, but things never go easy for me. Maybe if I would have lubricated the old sump gasket with rinse aid it would have sealed properly when I reinstalled it. Maybe if I would have cleaned the old sump gasket and the bottom of the tub really thoroughly things would have sealed right. But I didn't - so it leaked. I went ahead and bought a new sump gasket ($30 and had a few more days of waiting and self-doubt and having the dishwasher broken down). One the gasket came, I went through the entire uninstall, disassembly, reassembly and reinstall process AGAIN!!! This time with the new clean sump gasket and thoroughly cleaned surfaces. I also lubricated the gasket with rinse aid before installation. NO LEAKS! Job finished. Lessons learned. Doing it the first time was pretty tough though. Good luck! Get a helper for moral support and picture taking!
Parts Used:
Circulation Pump and Motor
  • Michael from St. Louis, MO
  • Difficulty Level:
    A Bit Difficult
  • Total Repair Time:
    More than 2 hours
  • Tools:
    Nutdriver, Pliers, Screw drivers
148 of 152 people found this instruction helpful.
Was this instruction helpful to you?
Thank you for voting!