This an authentic OEM 40-Watt replacement light bulb, used in a number of household appliances. It is specially designed to withstand extreme temperatures, which is why these replacement bulbs are mos...
This control switch controls the stove top 8" surface burner. 8.9- 11.0 amp. This surface burner element switch is for an 8-inch surface burner on an oven, stove, or range. The element switch control...
This 18 ml bottle of white appliance touch-up paint is used to cover scratches or marks on your appliance. The white touch-up paint can be used on refrigerators, microwaves, ranges, clothes dryers, an...
Sold individually. This is a radiant surface element with a limiter, and it works in conjunction with your range. The function of this part is to give heat to the surface directly above it, on cooking area stovetop.
This surface element is for ranges.
The surface element supplies the heat to a cooking area on top of the range.
Unplug the range or shut off the house circuit breaker for the range before insta...
This is a multi-use and multi-appliance screw. It can be used on a microwave, refrigerator, range/oven, air conditioner, dehumidifier, washer, or dryer. The measurements of this screw are 8 x 1/2 inch...
The light socket on your electric range connects the power source to the light bulb. If your oven light is malfunctioning, you may need to replace the light socket. The light socket is located in the ...
Sold Individually. As the broiler drawer slides back and forth, these glides prevent metal-to-metal contact.
$14.15
In Stock
Questions And Answers for GR396LXGB2
Ask our experts a question about this model and we'll get back to you as soon as possible!
2 questions answered by our experts.
< Prev
1
Next >
Sort by:
Search filter:
Clear Filter
Your search term must have 3 or more characters.
Keep searches simple. Use keywords, e.g. "leaking", "pump", "broken" or "fit".
Sorry, we couldn't find any existing answers that matched.Try using some different or simpler keywords, or submit your new question by using the "Ask a Question" button above!
Thomas
February 12, 2020
How do you reinstall the oven door? I’m having a difficult time doing so. Should the door hinges be pulled out and then put in place while holding the door at an angle? If so, the hinges don’t stay pulled out and just snap back into the inside of the door.
For model number GR396LXGB2
Hello and thank you for writing.
For your convenience, we have attached the link to our repair video. We hope this helps. Good luck with your repair.
https://www.youtube.com/watch?v=YKqhX9OhNOg
1 person found this helpful.
Was this helpful?
Thank you for voting!
Gary
February 13, 2020
I have changed a heating element and 2 infinite control switches and still only the two elements on the left side work..the right side no heat on stovetop..thanks
For model number GR396LXGB2
Hi Gary,
Thank you for your question. If you have replaced both elements and the switches on the left hand side of the stovetop are still not working, you will need to check for loose connections and you will also have to check the receptacles that the burners are plugged into to see if they are working correctly. We hope this helps. Thank you and have a great day.
1 person found this helpful.
Was this helpful?
Thank you for voting!
< Prev
1
Next >
✖
Ask a Question
Ask our experts a question on this model and we'll respond as soon as we can.
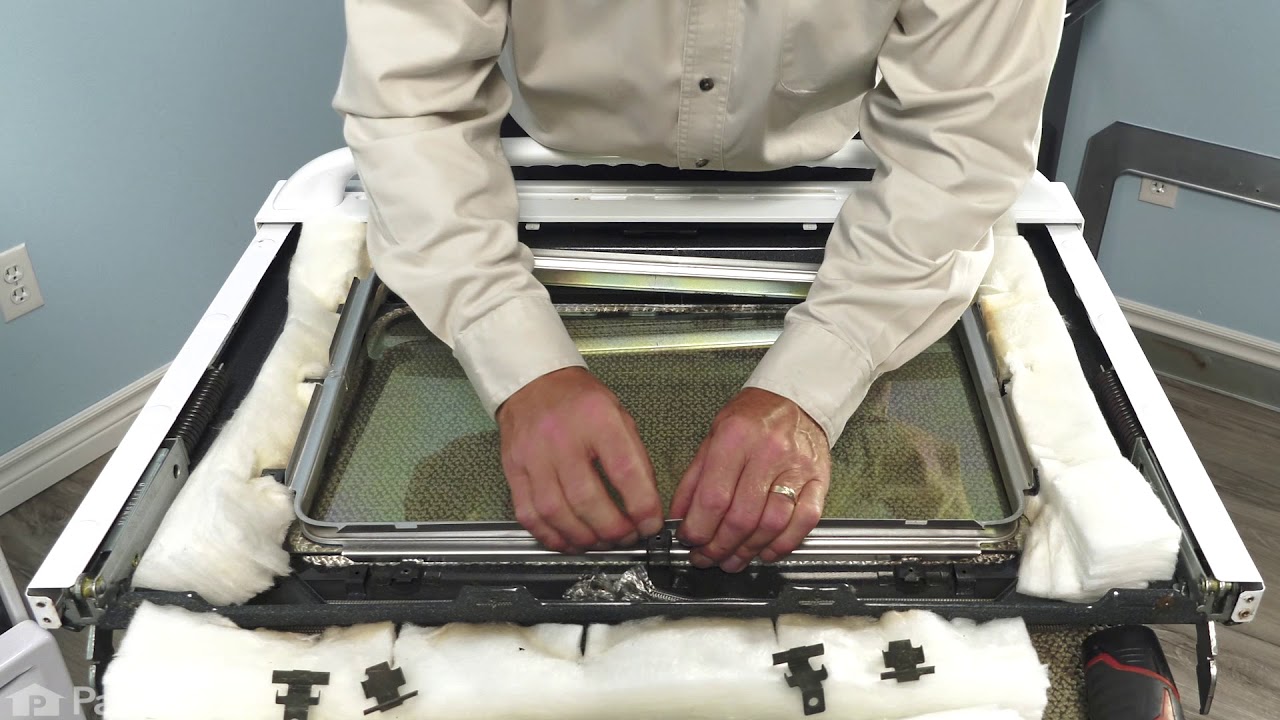
Turned the breaker off, I removed 2 screws securing the range top to the range, opened the top and secured it in the up position, Removed the 2 screws securing the element ,one at a time I swapped the quick connectors from the old element to the new and repeated the process in reverse. I save over $100.00 in labor, plus most companies get you for a trip charge. It was easy!!
first I pulled the stove from the wall. Then unplugged the stove from the wall (electric stove) for safety. then I removed the middle back panel screws(2) and then the panel. I then pulled the wires off the heating element that was bad. I took the screws (2) off the heating element inside the oven. I had to use WD-40 to loosen the screws because with the heat they were really stuck. I removed the heating element and replaced it with the one I got through partselect.com. Put everything back and walla finished. Partselect.com sent me the right part at the right price and fast. No hassles at all.
Thermal switch is integral to element and can not be changed, must replace entire element.
Turn off power. Removed front two screws above oven door jamb and lifted the top. Removed the bracket that holds the element against the glass top and removed the element. Moved brackets from old element to new one, aligning to same numerical position and then moved wiring to new element. Slide new element under bracket and reinstalled single screw. Replaced top and screwed down. Turn on power and test .