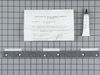
This kit includes one bearing, one ball shaft, one ball bearing, one ball bearing retainer, a small tube of high temperature lubricant, and installation screws.
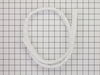
This dryer lint screen is for laundry centers.
Dryer lint screen captures lint and debris from the exhaust air flowing from the dryer.
Follow the instructions in the owner's manual when installing this part.
The pump is what your washer uses to remove the water from the tub. This part is the pump and motor assembly which includes the red flapper to prevent drain back flow.
This start switch is a manufacturer-approved replacement part for your dryer. A faulty start switch means your dryer will not begin its drying cycle. In order to complete this repair, you will need a ...
$87.80
In Stock
Questions And Answers for GLGT1041AS0
Be the first to ask our experts a question about this model!
✖
Ask a Question
Ask our experts a question on this model and we'll respond as soon as we can.
selected correct replacement knob. used small screw driver to remove small black metal sleeve from switch shaft. (had left that in place to be able to turn on dryer with needle nose pliers while waiting on knob). aligned flat of new knob with switch shaft and gently pressed into place.
Googled dryer start knob, Part Select was second site I clicked on, found within 1 min, part was inexpensive, easy to order, arrived quickly and fit perfectly. Excellent online ordering experience.
1. Unplug dryer from outlet 2. Using Lg. flat screwdriver, pry under the front edge of the top and release two spring tabs 3. Lift up top and tilt back out of your way 4. Unscrew two phillips scews on inside of front panel 5. Lift up and out the front panel. Two spring clips at bottom. 6. Rlease tension on drum belt at the motor. Access panel at rear of dryer. 7.Unscrew 3 screws from inside, center rear of drum. 8. Remove drum through the front of the dryer. You may have to spread the sides apart a little bit for it to fit 9. Lift up on the rear drum bearing to remove it from the bearing retainer. ( U shaped plastic socket) 10. unsrew 2 screws and remove the bearing retainer, ground ball. Ball retainer is on outside of dryer. 11. Vacuum everything--duct, blower, lint trap, ect. 12. Intall new bearing retainer and grounding ball, an assistant is helpful at this time, one to hold ball retainer on rear of dryer, one to screw it in from the inside 13. reassemble remainder of parts in reverse order.