


Models
>
GHW9200LW
GHW9200LW Whirlpool Washer - Overview
Models starting with GHW9200LW
Click on the best match to narrow your results.
Keep searches simple, eg. "belt" or "pump".

Door Handle
PartSelect #: PS11744938
Manufacturer #: WP8181846
This handle may appear white, but is light gray in color called Platinum. This door handle for your washer is sold without screws, they can be ordered separately, or you can reuse the existing screws ...
$55.25
In Stock

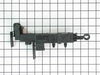
Door Lock Latch
PartSelect #: PS11745016
Manufacturer #: WP8182634
This part is used on front load washers and includes the interlock switch assembly.
$156.97
In Stock

Drain Pump Kit
PartSelect #: PS1485610
Manufacturer #: 280187
This pump helps expel water from the washing machine and is activated after the spin speed is maintained for a specific period of time. This part is used on front load models.
$225.28
In Stock

Water Inlet Valve
PartSelect #: PS11744913
Manufacturer #: WP8181694
Used with some front load washers. The attaching solenoids on the valve open and close according to the desired temperature, or amount of water needed.
$96.35
In Stock

Touch-Up Paint - White
PartSelect #: PS385132
Manufacturer #: 72017
This 18 ml bottle of white appliance touch-up paint is used to cover scratches or marks on your appliance. The white touch-up paint can be used on refrigerators, microwaves, ranges, clothes dryers, an...
$10.20
In Stock

Control Knob
PartSelect #: PS11744940
Manufacturer #: WP8181859
This knob is light gray and is used on platinum-colored models. Sold individually and accepts a D-shaped shaft.
$55.65
In Stock

Shock Absorber
PartSelect #: PS11745030
Manufacturer #: WP8182703
Shock absorbers help keep the washer from vigorous shaking during its cycles. Sold individually.
$65.21
In Stock

Flowmeter
PartSelect #: PS11748313
Manufacturer #: WPW10110225
This part continually measures the amount of water entering the tub. It will make adjustments if too much or too little water is present.
$133.95
In Stock


Bellow
PartSelect #: PS11744939
Manufacturer #: WP8181850
Also known as a door boot seal and is used in front load washers. This part is used to keep the clothes inside the tub during the wash cycle. The folds in the bellow allow the tub to move separately...
$320.26
In Stock

Temperature Sensor
PartSelect #: PS11755214
Manufacturer #: WPW10467289
This part regulates the temperature of the water in the tub. The sensor is located in the heating element.
$47.60
In Stock

Drive Belt
PartSelect #: PS11754067
Manufacturer #: WPW10388414
This drive belt is made to slip on the motor pulley to bring the basket up to the speed required and this makes the belt get wear and tear.
NOTE: Per Manufacture, belt measures 48.22" long uninstall...
$67.39
In Stock
Common Symptoms of models starting with GHW9200LW
[Viewing 14 of 14]Leaking
Fixed by
these parts
these parts


Show All
Will not drain
Fixed by
these parts
these parts


Show All
Lid or door won’t close
Fixed by
these parts
these parts


Show All
Will Not Start
Fixed by
these parts
these parts

Show All
Will not agitate
Fixed by
these parts
these parts


Show All
No hot or cold water
Fixed by
these parts
these parts

Show All
Door latch failure
Fixed by
these parts
these parts
Show All
Marks left on clothes
Fixed by
these parts
these parts
Show All
Burning smell
Fixed by
these parts
these parts
Show All
Spins slowly
Fixed by
these parts
these parts
Show All
Draining Issues
Fixed by
these parts
these parts
Show All
Water Filling Issues
Fixed by
these parts
these parts
Show All
Locking Issues
Fixed by
these parts
these parts
Show All
Touchpad does not respond
Fixed by
these parts
these parts

Show All


Keep searches simple. Use keywords, e.g. "leaking", "pump", "broken" or "fit".
broken plastic washer door handle
Just required removal of two screws, placing the new handle and reinstalling the two screws. Easiest repair I've ever done!
Parts Used:
-
dave from woodway, WA
-
Difficulty Level:Really Easy
-
Total Repair Time:Less than 15 mins
-
Tools:Screw drivers
540 of 549 people
found this instruction helpful.
Was this instruction helpful to you?
Thank you for voting!
Washer would not drain ,F02 and SUD code displaying
(1) First I unpluged the washer then I removed the water from the tube with a water vac.(2) Then I removed the three (3) screws that holds the front panel, using a Torx T-20 socket. ( this is a front load washer ). The panel is below the loading door.
(3) I packed towels under the washer.
(4) I slowly removed the cleanout in the front of the pump, using the water vac to catch the water as it leaked out.
(5) I removed the wiring to the motor.
(6) I removed the screw that holds the pump in place with a Torx T-20 socket.
(7) I pulled the pump forward so the clamps that hold the drain hose and discharge hose could be removed using the hose clamp pliers. ( they come off much easier then they go back on ).
(8) I tested the pump and found it would run but was making a lot of noise and running slow.
(9) To reinstall start with number (7) and work backwards to number (1) skipping (3) and (4).
Don Kramer
Wichita, Kansas
Parts Used:

-
Donald from Wichita, KS
-
Difficulty Level:A Bit Difficult
-
Total Repair Time:1- 2 hours
-
Tools:Pliers, Socket set
231 of 243 people
found this instruction helpful.
Was this instruction helpful to you?
Thank you for voting!
front load washer latch replacement
1. remove the three screws from the top backside of the top panel
2. push the top panel to the rear 1/8 to 1/4 inch
3. lift/rotate top panel from rear to front, set aside.
4. remove the three wire connectors from latch.
5. use #15 Torx to remove the three screws from the latch.
6. remove and replace part using top opening.
7. reverse order to finish.
2. push the top panel to the rear 1/8 to 1/4 inch
3. lift/rotate top panel from rear to front, set aside.
4. remove the three wire connectors from latch.
5. use #15 Torx to remove the three screws from the latch.
6. remove and replace part using top opening.
7. reverse order to finish.
Parts Used:
-
James from Vilonia, AR
-
Difficulty Level:A Bit Difficult
-
Total Repair Time:Less than 15 mins
-
Tools:Nutdriver, Screw drivers
192 of 231 people
found this instruction helpful.
Was this instruction helpful to you?
Thank you for voting!