This part is the replacement drawer slide rail for your refrigerator. The crisper draw will slide in and out along this rail. If the rail is damaged or missing, the crisper will either hang from one s...
This 40-Watt light bulb is sold individually and is a genuine OEM replacement option for your home appliances. It is specially designed to withstand extreme temperatures, so this bulb is compatible wi...
This hinge bushing is a genuine OEM replacement part for your refrigerator. This part works with the door hinge to keep the door in proper alignment with the fridge cabinet. If the hinge bushing is da...
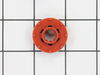
This is a replacement evaporator fan grommet for your refrigerator. The fan grommet absorbs the vibration from the evaporator fan motor for quiet operation while it runs. If your evaporator fan is unu...
This fan motor circulates the air through the refrigerator grille and cools the compressor and condenser coils. It also helps to evaporate extra water in the drain pan.
The lid bumper or evaporator fan motor bumper in your refrigerator prevents the fan motor from scraping against the side bracket. If your refrigerator/freezer is noisy, the bumper could be worn down o...
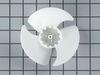
This evaporator fan blade is for your refrigerator, and it circulates air so that the temperature of the fridge is regulated. This model has 3 blades, and is a little more than 4 inches in diameter. I...
No Longer Available
Questions And Answers for GDRC0HBDARWW
Be the first to ask our experts a question about this model!
✖
Ask a Question
Ask our experts a question on this model and we'll respond as soon as we can.
I applied some tips learned by reading other reviews. So before I started I grabbed my trusty vise grip pliers and a small screw driver. I locked onto the switch actuator, the part that the refrigerator door pushes in, with the vise grips and pulled on it just hard enough to get the screw driver inserted in the right side to push in the catch clip so the switch could be pulled out further each time the catch clip was depressed to the next detent. Then I used the screw driver on the left site to encourage the switch past the detents on the left and very quickly the switch was out of the mount. The wires from the refrigerator pulled out with the old switch. I unplugged the old switch from the wires and plugged in the new switch and shoved the new switch back into the mount, wiggled it a couple of times to make sure it was secure and the job was done. Once I applied the vise gripes at first, the whole job took less than a minute.
This story starts with a GE side-by-side refrigerator that has always had wide temperature swings and a temperamental water dispenser. The ice maker was not making ice, and the built in digital thermometer showed it was running warm. I suspected that the heat exchanger was full of dust and so looked there. What I found was that the condenser tank was hot to the touch and the fan wasn’t running. As an experiment, I aimed a fan at the it for a while I saw that the freezer temperature dropped back to normal. .The fan is marked as 11.2 DC so I checked for voltage at the fan and found some. With three wires and no wiring diagram I wasn’t sure this answered all the questions, but hooking the fan to a 12 volt power supply didn’t get it to spin. I priced parts at a couple websites before using partselect.com . They also have a good diagram to look at (Sears diagrams are really poor). I ordered the part with 2-day shipping; it arrived on time, was correct and fixed the problem.
Removed rear and front grills,brushed and vacuumed area- probably caused the fan motor to fail- unplugged fan, removed fan,motor,and shroud in 1 piece, carefully slipped fan off motor shaft, unscrewed shroud and motor. assembled in reverse order. Frige is in tight area, .I'll now roll it out and clean often