This is an end cap for a dishwasher rack. This part is about 2.5 inches long, is black, and is made of plastic. You may need to replaced this part if it is broken, or if your dishwasher rack continuou...
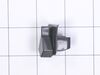
This is replacement door latch for your dishwasher. The door latch is attached to the tub frame, and connects to the door strike to keep your dishwasher door closed during operation. If you have a bro...
This kit includes the lower and middle spray arms. Water is forced through this spray arm by the unit's pump and motor assembly. The force of the water propels the spray arms, spraying water and deter...
This drain pump kit is for dishwashers. The drain pump kit removes the water from the dishwasher tub during the drain phase of the dishwashing cycle. The kit may include multiple parts; refer to your ...
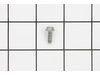
This is a genuine GE dishwasher leveling screw. It operates as a leg on the bottom of your dishwasher, and can be screwed in and out to raise and lower the height of the dishwasher. It is made of meta...
This is a lower rack roller for your dishwasher. It attaches in the lower roller assembly on the bottom of your rack to allow the rack to smoothly slide in and out. This replacement part is 1.5 inches...
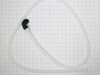
This part is the replacement door hinge cable for your dishwasher. The door hinge cable connects the door spring to the door hinge, and allows the door to drop down slowly when it is opened. If you op...
Ask our experts a question about this model and we'll get back to you as soon as possible!
5 questions answered by our experts.
< Prev
1
Next >
Sort by:
Search filter:
Clear Filter
Your search term must have 3 or more characters.
Keep searches simple. Use keywords, e.g. "leaking", "pump", "broken" or "fit".
Sorry, we couldn't find any existing answers that matched.Try using some different or simpler keywords, or submit your new question by using the "Ask a Question" button above!
Tom
July 1, 2021
No power...no lights
For model number GDF610PMJ6ES
Hello Tom, Thank you for the question. We suggest testing the Control Board Fuse. Once the fuse blows it cuts power tot he board. We hope this helps!
Was this helpful?
Thank you for voting!
Tg
September 27, 2023
Control panel comes on and off, at times tripping the circuit breaker.
For model number GDF610PMJ6ES
Hello Tg, thank you for the question. According to our research, there might be an electricity over load shock that may have affected the circuit breaker. We would recommend you reset the circuit breaker. To reset, switch the circuit breaker on and off two times. If that is not the problem, you may need to change the user interface control board, part number PS16762500, to fix this issue. We hope that helps!
Was this helpful?
Thank you for voting!
Tom
July 29, 2021
Hello, you kindly answered my question about no power-no lights by suggesting looking at the control fuse. I have everything apart now but do not see the fuse? Not in the control box.
tom
For model number GDF610PMJ6ES
Hello Tom, Thank you for the question. The Fuse is located on the Control Board in the Panel. We hope this helps!
Was this helpful?
Thank you for voting!
Udo
February 10, 2023
Not draining
For model number GDF610PMJ6ES
Hello Udo, thank you for the question. We would recommend checking the Drain Hose as it might be clogged, kinked, or placed incorrectly, the part number is PS16618969. If that does not help, we would recommend checking the Drain Pump Kit, part number PS16219695. If you need help placing an order for it, please feel free to give us a call. We look forward to hearing from you!
Was this helpful?
Thank you for voting!
Mike
August 11, 2023
trying to trace power loss how does door cover come off to access control panel?
For model number GDF610PMJ6ES
Hello Mike, thank you for getting in touch. The control board in your model is at the back side and to get access to it, follow the following steps: Take the access panel off by unscrewing the screws out. Grab the access panel and insulation and pull it off and set it aside. Now use the nut driver and take out the screw that holds the junction box cover. You want to lift up and pull the cover off and then you can reach in and unplug the jumper wire. Press on the tab and pull it off and then you can unplug the wiring harness that goes up to the control panel. Reach in and disconnect the wiring harnesses. Once you have mold disconnected, carefully pull the tray out so that you can take the control board out of it and replace it. We hope this information is useful!
Was this helpful?
Thank you for voting!
< Prev
1
Next >
✖
Ask a Question
Ask our experts a question on this model and we'll respond as soon as we can.
Took off the kickplate, diconnected the wires and removed the whole door by lifting straight up, removing spring wires from hinges. Once door is disconnected from the machine, removed one hinge by removing bolt. Slid gasket into place, secured hinge back in place, then reconnected wires at bottom, replaced hinge spring wires and slid door back down onto hinges. Now that we know how to do it, could do it in 15 min to half hour.
Didn't actually do the compete repair but got close. Pulled out dishwasher, disconnected and checked continuity on the existing heating element (about 16 ohms) the new element was also about 16 ohms. This indicates they both were working fine and no need for replacement. Next step would have been to swap the elements would have been simple. Tried to replace main board as well, still not the issue so giving up and replacing the dishwasher. It wasn't the high temp cut off thermostat either incidentally and no error codes in maintenance mode. Check continuity of your existing element before ordering to save aggravation.
Open the washer, remove the bottom dish rack, then twist off the bottom water sprayer. Use a screwdriver to remove the mounting/ stabilizing screws so you can slide out the dishwasher. Close the dishwasher and slide it out. Underneath at the back there are two wires powering the drying element, carefully remove them. Use an adjustable wrench to remove the two plastic mounting nuts for the drying element. Open the washer and remove the old drying element, and insert the new element. Reassemble the dishwasher in the reverse order if disassembly.