The lower door closing cam is used in refrigerator doors, it can be located on the fresh food side or the freezer side. It helps hold the door open. This cam is made out of plastic, so it might crack ...
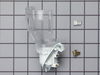
This manufacturer-certified Pan Slide Track allows the drawer to slide in and out. It measures roughly 12 inches in length If this track is damaged or missing, you won't be able to move the drawer pro...
This icemaker can be used with 25-27 cubic feet refrigerators that have a vertical auger dispenser located on the freezer door. Reuse bottom bracket from the original icemaker and attach to the new.
This twenty-five watt microwave light bulb is two and a half inches long. It has a small, screw-in base and it carries 120V. This item sells in a quantity of one, though many microwaves require two.
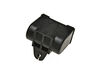
This set of two electronic control boards contains both the emitter and the receiver. These boards tells the icemaker when it's full and that it has to dump the ice, and it also tells the icemaker whe...
Ask our experts a question about this model and we'll get back to you as soon as possible!
1 question answered by our experts.
< Prev
1
Next >
Sort by:
Search filter:
Clear Filter
Your search term must have 3 or more characters.
Keep searches simple. Use keywords, e.g. "leaking", "pump", "broken" or "fit".
Sorry, we couldn't find any existing answers that matched.Try using some different or simpler keywords, or submit your new question by using the "Ask a Question" button above!
Mike
December 30, 2021
Replaced the ice maker. Still no ice. Water not coming to ice maker.
For model number GC3JHAXTS01
Hello Mike, Thank you for the question. We suggest testing the Water inlet Valve. Set your multitester to the R X 1 ohms setting to test for continuity. Place each of the multitester's leads on a terminal. Your multitester should display a reading between 200 and 500 ohms. Closely examine your water inlet valve. The exact ohm resistance rating you should test for may be marked on the valve. We hope this helps!
The old tracks had been falling out consistently, causing the deli tray to fall on top of the food below it (which included the eggs, though none were broken since they were in a hard plastic container).
I had some difficulty getting the new track installed, however. All the parts lined up, but I just couldn't get the tracks to slide into place. After some brute force and about 10 minutes, they were finally installed.
Best thing about it is that it doesn't appear that these tracks are coming out easily! Mission accomplished!
Remove the icemaker service door... gently pry the door pins from the hinge sockets. Remove the 3 screws from the under side of the icemaker with a nut driver (1/4"). Gently remove the icemaker . It's a tight fit between the top of the compartment and the icemaker lower support tray. Next, disconnect the electrical connector at the right side. You're done! Reverse procedure for installing. Good luck. Remember, your working with cold plastic...take your time and don't force too much.


 Diagram and Parts List for Whirlpool Refrigerator")