This 18 ml bottle of white appliance touch-up paint is used to cover scratches or marks on your appliance. The white touch-up paint can be used on refrigerators, microwaves, ranges, clothes dryers, an...
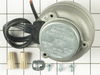
This condenser fan motor operates in a clockwise fashion and carries carries 2W and 115V. It comes with screws, a mounting nut for the blade and a cushion. This part provides forced-air cooling for the condenser coil.
This part is snapped onto the top portion of the evaporator. The thermostat sends temperature information to the processor. The defrost heater must be replaced when replacing the thermostat.
This light switch may also be known as a refrigerator door switch or a light switch kit, and is compatible with your refrigerator. The function of the refrigerator door switch is to turn on the light ...
This evaporator fan motor is located in the back of the freezer, and circulates air over the refrigerator coils. These coils will covert the heat into cool air, which is then circulated.
This part is both the start relay and the overload. The start relay boosts the compressor, and then shuts off as soon as the motor gets up to speed and the overload provides extra protection against ...
If your refrigerator or freezer is too warm, or making noises, you may need to replace the fan blade. The fan blade attaches to the evaporator motor, which is in the freezer section, to help circulate...
Unplug the appliance. Removed the screws holding the back panel. Removed the fan blade. removed 3 screws holding the condenser fan. Remove the 3 metal brackets attached to the fan. (First note which studs the brackets are attached to. Attach the 3 metal brackets to the new fan. (New screws were supplied) Cut and strip the wire about two inches from the fan. Cut and strip the new wire. I cut the new wire in half (about 6 inches.) Connect the two wires, twist and used 2 wire nuts. Tie wrap the wire to the wire harness. Mount the new fan (three screws) Screw the back panel back on. Mount the new
I used a flat-head screwdriver to pop out the old light rocker switch. Then, I unplugged the wires, plugged them into the new light rocker switch, and then popped the new switch into the hole. That's it! Lights began working again.
I could hear a loud hum from the compressor motor cycling on/off every 5-10 seconds. Pulled the capacitor and relay switch from the compressor. Checked compressor terminals with ohmmeter, no shorts to ground so it was ok. A gravely substance rained out of the overload relay switch when I removed it, so I assumed it was bad. Didn't need to check the capacitor as it was only another $20 or so to replace. Also didn't notice any oily residue that would signify a coolant leak, so assumed the system was still pressurized. New relay switch and capacitor plugged right in, no tools needed. Re-secured the assembly with it's original keeper clip wire and I was done. Plugged it in and made sure it was cooling properly before replacing the various back cover panels. Like a new reefer! Couldn't have been easier. Just be careful with the capacitor when you remove it. It could hold a lethal electric charge.