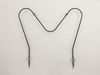
The Oven Bake Element is a black, metal part which supplies heat to the oven. This element is 19-1/2" wide x 18-1/2" long and has 3-1/2" inserts. It is rated as "Easy" to install by users, and attache...
Dual Element with Limiter -9 Inch /6 Inch - 1300W 1200W.
With this element, you can adjust the size of the burner you want to use to match your pots/pans.
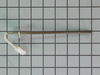
This is a replacement rack for your oven. The oven rack fits into grooves on the side of the oven wall, and acts as a shelf that you can place food items on when you want to cook them in the oven. Thi...
Ask our experts a question about this model and we'll get back to you as soon as possible!
1 question answered by our experts.
< Prev
1
Next >
Sort by:
Search filter:
Clear Filter
Your search term must have 3 or more characters.
Keep searches simple. Use keywords, e.g. "leaking", "pump", "broken" or "fit".
Sorry, we couldn't find any existing answers that matched.Try using some different or simpler keywords, or submit your new question by using the "Ask a Question" button above!
Mike
November 4, 2022
The web site is showing my oven rack as 24" by 16" but the current ones I want to replace are about 17 7/8" long. Should they be only 16 inches long with a 2 inch gap in the back between the rack and the back of the oven.
For model number FFEF3048LSH
Hello Mike, Thank you for your inquiry. As per the parts list we received from the manufacturer, part# PS1765356 is the only listed compatible rack for your model. The manufacturer usually recommends a gap between the oven walls and the racks to allow for the best hot air circulation to bake. We hope this helps and if you need help placing an order for a part, customer service is open 7 days a week. Please feel free to give us a call. We look forward to hearing from you!
1. Removed two screws, pulled out the element, voltage tested the element and determined it was an open circuit (bad element). 2. Ordered the part from partselect.com 3. Disconnected element, connected the new one, and screwed it back in.
Shut off circuit breaker to stove and collected the tool from the basement. Turned on flashlight. Unscrewed the two hex nuts from the old element/back of the oven. Slid the old element prongs out of the back, exposing the connecting wires. Pulled the connecting wires off of the old element, carefully, so that the connections wouldn't come off of the wires. Threw the old element pieces in the garbage. Connected the new element to the connecting wires and re-fastened the hex nuts. My husband had wanted to call the repair man, but it didn't look too difficult, so I decided to try it on my own. Boy was he surprised when I fixed it, and for a fraction of the cost of hiring a repairman! Ladies, we can do this ourselves!!! :) Thank you for being there for us to order our part from, Parts Select, we had our new part in less than 24 hours, so the shipping was blazing fast!!! Keep up the good work!!! :)