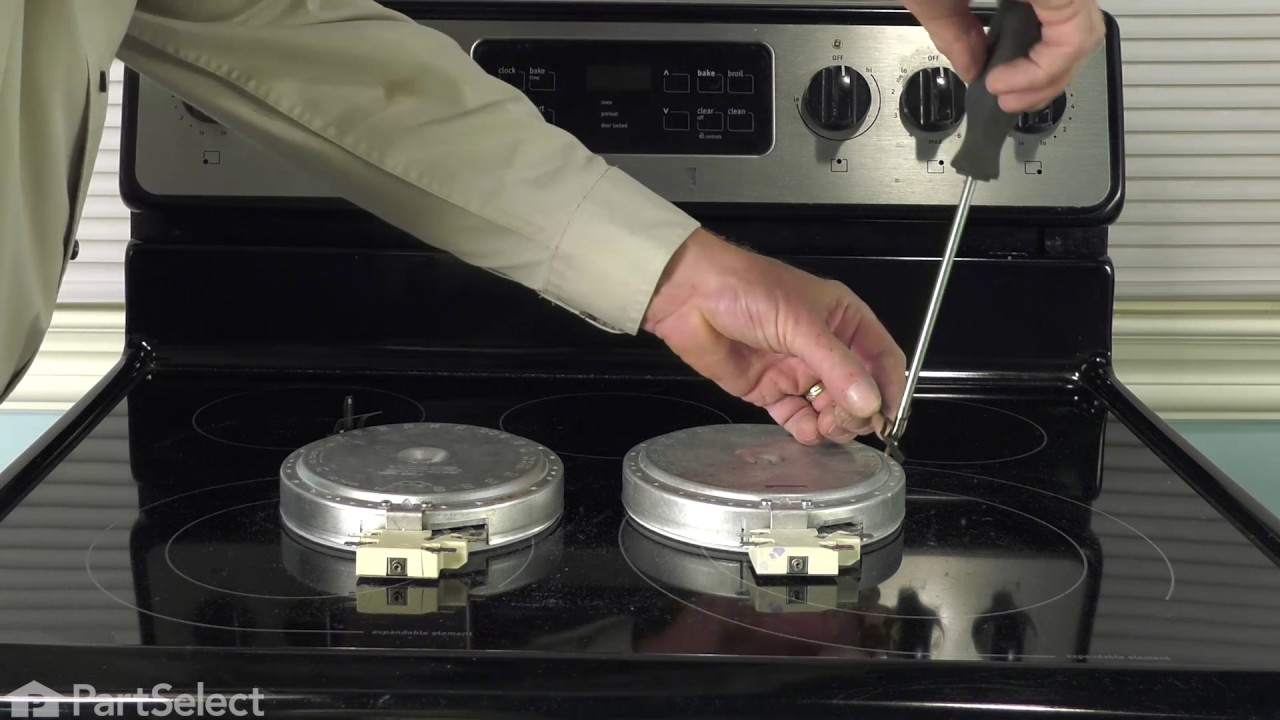
The 6” radiant cooking element with limiter fits under the glass cooktop and supplies heat to the cooking area. If your element is not heating, you can test the element for continuity with a multimeter. If the element doesn’t have continuity you will need to replace the element. If it doesn’t have continuity it is suggested to check the e...Read morelement switch because it could be defective and need to be replaced. This element is 1200 watts and is a genuine OEM part. The manufacturer suggests making sure the cooking element is cooled before starting the repair. Please remember to disconnect the power to the appliance before starting the repair.
If your stove’s large burner isn’t heating properly or won’t adjust, this dual switch could be the fix. It controls the heat for a 9-inch/12-inch element and helps you cook with precision. Easy to install with basic tools—just make sure it fits your model before ordering.
This radiant burner element delivers powerful, even heat for your cooktop, ensuring fast and efficient cooking. Measuring 9 inches and rated at 3200 watts, it is ideal for replacing a worn or malfunctioning element. Installation requires disconnecting power and connecting the new element to the existing wiring and mounting brackets.
This control knob allows smooth, precise adjustment of appliance settings. Its ergonomic design improves comfort and control during use. Replacing a worn or missing knob restores full adjustability and convenience.
This range terminal block kit provides a secure connection point between the household power cord and the appliance’s internal wiring. It helps distribute electrical power safely and reliably to the range’s heating and control components. A damaged or worn terminal block can prevent the oven or burners from operating correctly, cause buzz...Read moreing noises, or lead to power interruptions, and replacing it can help restore proper electrical function and safe operation.
Ask our experts a question about this model and we'll get back to you as soon as possible!
We may have answered a similar question already! Search questions and answers left by others using simple keywords like "fit", "broken", "easy", or "quality" to find questions that match.
Search filter:
Clear Filter
Your search term must have 3 or more characters.
Sort by:
Prev
1
Next
Sorry, we couldn't find any existing answers that matched.Try using some different or simpler keywords, or submit your new question by using the "Ask a Question" button above!
James - For model number FCFE3062ASA
February 2, 2025
Glass front shattered when I opened the oven, I'm trying to find out all the information before I call in on the warranty
Hello James, Thank you for your inquiry. Checking your model, we show the front door glass as part of part# PS16876268. It includes the glass and the outer frame. We hope this helps you.
We broke the glass top on our new range, our model # ends with an H, we need the part # to replace the glass assy.
Thank You
Hello Russell, thank you for contacting us. The glass maintop for your model is part number PS16876138. If you require assistance to place an order, please contact customer service!
See how others fixed this model. Time, tools, difficulty, and steps that lead to victory!View More
Search repair tips from other customers using simple keywords like "replace", "fit", "remove", "inspect". DIY doesn't mean you have to do it alone!
Search filter:
Clear Filter
Your search term must have 3 or more characters.
burned out burner
70 of 99 peoplefound this instruction helpful.
Lori from Winter Haven, FL
Easy
Less than 15 mins
Pliers, Screw drivers
First we removed two screws under the rim of the range top to open the lid. Lifted the lid and removed the screws from the bracket that holds the elements, Be careful with the clips that hold the element in, if you break them or bend them there aren't any more! Also note which holes they were in, they are marked according to the differ
... Read moreent sizes of elements. Disconnected the wires, needed needlenose pliers to grip them...connected new element, popped it back in place, replaced bracket, closed top ...Easy peasy!!!
Read less
Was this helpful?
Thank you for voting!
Center of dual burner was broken
9 of 11 peoplefound this instruction helpful.
German from SELLERSBURG, IN
Easy
1- 2 hours
Screw drivers
Removed screws on the sides and front. Labeled the wire sets connected to the front control panel. Gently lifted up the stove top and flipped it over on to a towel. Removed the piece of metal holding down the burner. Disconnected the cables to the old burner. Repeated steps above in reverse.
Was this helpful?
Thank you for voting!
2 elements stopped working.
9 of 14 peoplefound this instruction helpful.
Ruth from MORGANTOWN, WV
Really Easy
30 - 60 mins
Nutdriver
My husband followed the video instructions and it was easy to fix.



 My Orders