Models > CTE18GRERAD

CTE18GRERAD Hotpoint Refrigerator - Overview

Sections of the CTE18GRERAD

[Viewing 3 of 3]
Keep searches simple, eg. "belt" or "pump".
Light Switch – Part Number: WR23X10725
Light Switch
★★★★★
★★★★★
(7)
PartSelect #: PS8758429
Manufacturer #: WR23X10725
$21.88
  Special Order
Screws - Package of 12 – Part Number: WR1X1763D
Screws - Package of 12
PartSelect #: PS294595
Manufacturer #: WR1X1763D
This is a package of twelve replacement screws. They are designed as replacement screws for refrigerators. Be sure to check that your appliance model is compatible with these screws. The screws are ap...
$14.95
  Special Order
Light Socket – Part Number: WR2X9391
Light Socket
PartSelect #: PS299782
Manufacturer #: WR2X9391
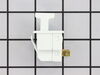
This part is a replacement light socket for your refrigerator. It connects to the power source, and holds the light bulb. If the light in your refrigerator is not working, you could have a faulty sock...
$13.72
  Special Order
Condenser Fan Motor - 115V – Part Number: WR60X187
Condenser Fan Motor - 115V
★★★★★
★★★★★
(1)
PartSelect #: PS304731
Manufacturer #: WR60X187
This part comes with 3 round pin connection terminals. This fan motor circulates the air through the refrigerator grille and cools the compressor and condenser coils. It also helps to evaporate extra...
$95.02
  Special Order
Door Shelf Retainer Bar End Cap - Left or Right Side – Part Number: WR2X7975
Door Shelf Retainer Bar End Cap - Left or Right Side
PartSelect #: PS298758
Manufacturer #: WR2X7975
This end cap can be used for the right or left side of the refrigerator door shelf or the freezer door shelf.
$74.23
  Special Order
Fan Blade with Clamp – Part Number: WR60X123
Fan Blade with Clamp
PartSelect #: PS304693
Manufacturer #: WR60X123
This blade attaches to the evaporator motor.
  No Longer Available
Evaporator Fan Blade Kit – Part Number: WR60X114
Evaporator Fan Blade Kit
PartSelect #: PS304684
Manufacturer #: WR60X114
$32.26
  Special Order
Power Cord – Part Number: WR23X10300
Power Cord
PartSelect #: PS759476
Manufacturer #: WR23X10300
$44.31
  Special Order
Screw – Part Number: WR01X10590
Screw
PartSelect #: PS1020128
Manufacturer #: WR01X10590
Sold Individually.
$10.28
  Special Order
Drawer Slide Rail - Right Side – Part Number: WR72X273
Drawer Slide Rail - Right Side
PartSelect #: PS306977
Manufacturer #: WR72X273
  No Longer Available
Grommet - Black – Part Number: WR2X7391
Grommet - Black
PartSelect #: PS298476
Manufacturer #: WR2X7391
$8.42
  Special Order
Kickplate Grille Clip – Part Number: WR2X7646
Kickplate Grille Clip
PartSelect #: PS298574
Manufacturer #: WR2X7646
Sold Individually.
  No Longer Available

Questions And Answers for CTE18GRERAD

Be the first to ask our experts a question about this model!

Common Symptoms of the CTE18GRERAD

[Viewing 8 of 8]
Light not working
Fixed by
these parts
Fixing Fixing
Show All
Noisy
Fixed by
these parts
Fixing Fixing Fixing
Show All
Fridge too warm
Fixed by
these parts
Fixing Fixing Fixing
Show All
Leaking
Fixed by
these parts
Fixing Fixing
Show All
Door Sweating
Fixed by
these parts
Fixing Fixing
Show All
Freezer section too warm
Fixed by
these parts
Fixing Fixing
Show All
Fridge runs too long
Fixed by
these parts
Fixing
Show All
Will Not Start
Fixed by
these parts
Fixing
Show All
Keep searches simple. Use keywords, e.g. "leaking", "pump", "broken" or "fit".
Sticking Light Switch
I applied some tips learned by reading other reviews. So before I started I grabbed my trusty vise grip pliers and a small screw driver. I locked onto the switch actuator, the part that the refrigerator door pushes in, with the vise grips and pulled on it just hard enough to get the screw driver inserted in the right side to push in the catch clip so the switch could be pulled out further each time the catch clip was depressed to the next detent. Then I used the screw driver on the left site to encourage the switch past the detents on the left and very quickly the switch was out of the mount. The wires from the refrigerator pulled out with the old switch. I unplugged the old switch from the wires and plugged in the new switch and shoved the new switch back into the mount, wiggled it a couple of times to make sure it was secure and the job was done. Once I applied the vise gripes at first, the whole job took less than a minute.
Parts Used:
Light Switch
  • Jonathan from Lilburn, GA
  • Difficulty Level:
    Really Easy
  • Total Repair Time:
    Less than 15 mins
  • Tools:
    Pliers, Screw drivers
116 of 144 people found this instruction helpful.
Was this instruction helpful to you?
Thank you for voting!
bad light socket
unplugged refrigerator. removed light bulb from old socket. unsnapped old light socket and pulled it out just enough to diconnect the electrical plug that plugs into the socket . discarded the old socket and plugged in new socket. snapped in new socket into refrigerator. i watched how to do this simple procedure on you tube and decided to do it myself. easy easy easy
Parts Used:
Light Socket
  • nancy from silsbee, TX
  • Difficulty Level:
    Really Easy
  • Total Repair Time:
    Less than 15 mins
44 of 53 people found this instruction helpful.
Was this instruction helpful to you?
Thank you for voting!
it appears some one damaged the gasket in the front
First, I removed the old gasket by ripping it out of front,

Second, I cleansed the rust (no idea how that get there, maybe it's a cheap fridge)

Third, I took some boiling water from the water boiler and dip the new gasket in it to "smooth" out the gasket and make it more "pliable" (really, it didn't seem like much happened, nonetheless, I did it to make sure I don't have to struggle if it comes to that)

Forth, I slap the new gasket in the top corner (inner edge closes to the fridge) and work across then down. But somehow after everything is accomplished, the gasket at the bottom appears bulged so I re-did it from the bottom up. and double checked on the firmness by checking with a flash light w/ the fridge closed (I made sure I did this near night time lol)

Lastly, I did love to thank PartSelect for shipping it out so quick. I ordered on Sunday, they shipped it on Monday and I received it on Tuesday morning at work. Incredible speedy service that even RadioShack overnight service took 3 "overnights" to recieve.
Parts Used:
Fresh Food Door Gasket
  • Kah Po from San Francisco, CA
  • Difficulty Level:
    Really Easy
  • Total Repair Time:
    15 - 30 mins
36 of 40 people found this instruction helpful.
Was this instruction helpful to you?
Thank you for voting!