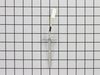
This kit is used to convert your appliance to liquid propane. This liquid petroleum gas conversion kit contains seven orifices, each under an inch long.
$83.58
In Stock
Order within the next 7 hrs and your part ships today!
This part is a replacement electronic clock/timer for your oven. The clock timer will display the time, and can be used to set a timer. If the clock will not start, will not allow you to program the t...
$205.88
In Stock
Order within the next 7 hrs and your part ships today!
Order within the next 7 hrs and your part ships today!
Questions And Answers for CFGF337GSD
Ask our experts a question about this model and we'll get back to you as soon as possible!
1 question answered by our experts.
< Prev
1
Next >
Sort by:
Search filter:
Clear Filter
Your search term must have 3 or more characters.
Keep searches simple. Use keywords, e.g. "leaking", "pump", "broken" or "fit".
Sorry, we couldn't find any existing answers that matched.Try using some different or simpler keywords, or submit your new question by using the "Ask a Question" button above!
Zach
November 20, 2022
The oven stopped working. Theere is a click at the control panel when I set it to broil or bake but no ignition down in the oven. What could it be?
For model number CFGF337GSD
Hello Zach, thank you for contacting us. The issue is most probably related to the oven burner igniter, part number PS12071409, the oven safety valve, part number PS446204, and the control board, part number PS12717913. The safety valve controls gas flow to the bake and broil burners in the oven and the igniter ignites it. While the control board monitors the temperature and controls the oven heat. Please reach out to customer service if you need help placing an order. Glad to be of help!
I am an HVAC tech by trade so it wasn't difficult to diagnose problem with safety valve. The hard part was being without an oven for a week. Repair was simple and effective--oven works good as new. Shut off gas and unplugged oven. Removed floor of oven between broiler and bake section, used wrenches to disconnect gas line from safety valve in back of oven, used philipps head screwdriver to remove burner assembly and gas valve, reversed process to replace. Checked out operation--OK.
I followed the simple instructions that were included in the kit. I started by replacing the 5 orifices on the top burners. The orifices are well labeled with numbers and colors. Next, I tightened the broiler burner orifice and the oven burner orifice with a 1/2 inch wrench. I had to tighten them pretty good to get the flame down where it is supposed to be. Then, I checked for leaks and I was then ready to cook.