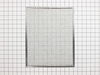
This grease filter is almost fourteen inches long and almost twelve inches wide. This filter is intended for use with some downdraft cooktops and ranges.
$49.53
In Stock
Order within the next 1 hr and 1 mins and your part ships today!
This hinge is located on each side of the oven door. The hinges control the rate that the oven door opens and closes, and allows the door to stay open at an angle. This hinge can be used on either the...
$125.31
In Stock
Order within the next 1 hr and 1 mins and your part ships today!
This is a multi-use and multi-appliance screw. It can be used on a microwave, refrigerator, range/oven, air conditioner, dehumidifier, washer, or dryer. The measurements of this screw are 8 x 1/2 inch...
$26.51
In Stock
Order within the next 1 hr and 1 mins and your part ships today!
This infinite switch knob is an inch and a half in diameter. It is made of plastic and has an orange indicator line as well as orange lettering denoting the 'off' position. There is also white numberi...
$33.55
In Stock
Order within the next 1 hr and 1 mins and your part ships today!
This exhaust vent blower wheel is almost seven inches in diameter, and just under four inches deep. It is made entirely of metal and is used with a range's venting system.
$118.15
In Stock
Order within the next 1 hr and 1 mins and your part ships today!
1. Killed power and removed the regulator's knob, noted the position of the old control. 2. Took off the cover for the center vent and loosened the two screw holding the housing in place--the screws didn't have to come out completely as it is a U-shaped friction hold. 3. Unscrewed the two screws holding the old control switch in place--lifted the housing enough to get at the old switch and carefully pulled it loose--it was a front burner so the control switch was about as far back as it could be but still wasn't that hard to get at. 4. Turned the new switch to orient the wire connectors, then, using a needle-nose pliers, removed each friction connector, one at a time, and fitted them on the new switch (note: one of the wires fitted best if it went under as opposed to around the base of the new switch). 5. Replaced the control back through the housing and screwed it in place, making sure the orientation of the control matched the way it looked originally. 6. Slide the housing back over the two screws and tightened, replace vent. 7. Replaced the knob and turned on the power.
(The above took me about twice as long to write as it did to make the repair and I write professionally but am not a professional electrician.)
Also, I bought a second control switch because, given the age of the unit, I'm sure another one will go. The second one will assure that it won't happen :-).


 Diagram and Parts List for Jenn-Air Cooktop")
 Diagram and Parts List for Jenn-Air Cooktop")
 Diagram and Parts List for Jenn-Air Cooktop")
 Diagram and Parts List for Jenn-Air Cooktop")