The locker, or door latch assembly fits to the inside of the microwave door, and keeps the door closed. If the door on your microwave oven doesn’t appear to close properly, you may have a problem with...
$10.42
In Stock
Order within the next 6 hrs and your part ships today!
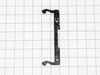
This bracket holds the metal or plastic flapper that closes off the exhaust duct when the fan is not running and opens when the fan turns on. If the exhaust fan on your microwave does not appear to be...
$27.08
In Stock
Order within the next 6 hrs and your part ships today!
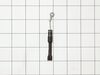
This genuine OEM light socket provides power to the light bulb in your microwave while holding it in place. This light socket is two pronged and the bulb should screw easily into it. If your light bul...
$27.52
In Stock
Order within the next 6 hrs and your part ships today!
Questions And Answers for AMV4204AAB
Be the first to ask our experts a question about this model!
✖
Ask a Question
Ask our experts a question on this model and we'll respond as soon as we can.
I replaced the whole component with all three switches in it even though only one switch was bad . Taking out one switch out of the holder unit would probably have damaged the unit that was holding the switches. Easy install and it works great again .
diagnosed defective 'door-shut switch' in the switch holder assembly. rather than replace switch, replaced entire locker holder assembly which made for a very simple and easy repair...not to mention very inexpensive.
Over the stove microwave installed in top cabinet row. 1. Unplug device. 2. Two people to remove from wall/cabinet (remove two, large, top mounting screws and rotate entire microwave down and off the wall mount). Should be some wood spacers between top of device and bottom of cabinet. 3. Remove screws from sheet metal cover. 4. Remove one screw holding blowers in place and rotate out of the way, in order to gain access to 2 of 5 screws that hold the magnetron in place. 5. Unplug magnetron and remove the 5 screws. 6. Drop in new magnetron and re-assemble microwave in reverse order (steps 5-3). 7. Two people restore micro to wall/cabinet. Replace wood spacers, re-install two, large mounting screws (finger-tight). Test device. Secure the two large screws.


 – Part Number: 6851W1A002E")