Models > AGS745E

AGS745E (P1113901S) Amana Range - Overview

Sections of the AGS745E

[Viewing 8 of 8]
Keep searches simple, eg. "belt" or "pump".
Light Bulb - 40W – Part Number: 8009
Light Bulb - 40W
★★★★★
★★★★★
(27)
PartSelect #: PS884734
Manufacturer #: 8009
This an authentic OEM 40-Watt replacement light bulb, used in a number of household appliances. It is specially designed to withstand extreme temperatures, which is why these replacement bulbs are mos...
$14.96
  In Stock
Flat Style Oven Igniter – Part Number: 786324
Flat Style Oven Igniter
★★★★★
★★★★★
(7)
PartSelect #: PS387058
Manufacturer #: 786324
You must reuse the original bracket. Be very careful to not touch the black element part of this igniter as it is very fragile.
$74.47
  In Stock
2 Piece Broiler Pan – Part Number: 4396923
2 Piece Broiler Pan
★★★★★
★★★★★
(2)
PartSelect #: PS971245
Manufacturer #: 4396923
The top of this part is now black.
$47.83
  In Stock
Wire Oven Rack – Part Number: WP314763J
Wire Oven Rack
PartSelect #: PS11740769
Manufacturer #: WP314763J
This wire oven rack is used on some ovens and ranges. It is twenty-three inches long and it is made of metal.
$52.10
  In Stock
Oven Light – Part Number: WP74011278
Oven Light
★★★★★
★★★★★
(1)
PartSelect #: PS11744440
Manufacturer #: WP74011278
This oven light assembly is a little over four inches long. It is a six hundred an sixty watt light bulb.
$103.77
  In Stock
Screw – Part Number: WPY706189
Screw
PartSelect #: PS11757587
Manufacturer #: WPY706189
$10.25
  In Stock
Hex Nut – Part Number: WP488130
Hex Nut
PartSelect #: PS11742711
Manufacturer #: WP488130
Part may differ in appearance, but functions same as original.
$12.19
  In Stock
Rocker Switch – Part Number: 31986601B
Rocker Switch
PartSelect #: PS2034339
Manufacturer #: 31986601B
This switch is for the oven light and downdraft fan.
  No Longer Available
Hinge Kit - Left Side – Part Number: R0706010
Hinge Kit - Left Side
PartSelect #: PS1729956
Manufacturer #: R0706010
  No Longer Available
Gas Burner Grate – Part Number: WP314647B
Gas Burner Grate
PartSelect #: PS11740765
Manufacturer #: WP314647B
This gas burner grate is used for some gas ranges and cooktops. This is a black burner grate with each side measuring almost eight inches.
$118.82
  Special Order
Hinge Kit - Right Side – Part Number: R0706011
Hinge Kit - Right Side
★★★★★
★★★★★
(1)
PartSelect #: PS2172201
Manufacturer #: R0706011
This hinge is located on the right side of the door.
$56.07
  Special Order
Spark Module – Part Number: Y705823
Spark Module
PartSelect #: PS2201714
Manufacturer #: Y705823
This part sends enough current to the igniter to create a spark to the bottom of the burner cap.
  No Longer Available

Questions And Answers for AGS745E

Be the first to ask our experts a question about this model!

Common Symptoms of the AGS745E

[Viewing 6 of 6]
Gas igniter glows, but will not light
Fixed by
these parts
Fixing Fixing
Show All
Will Not Start
Fixed by
these parts
Fixing
Show All
Little to no heat when baking
Fixed by
these parts
Fixing
Show All
Door won’t close
Fixed by
these parts
Fixing Fixing
Show All
Element will not heat
Fixed by
these parts
Fixing
Show All
Little to no heat when broiling
Fixed by
these parts
Fixing
Show All
Keep searches simple. Use keywords, e.g. "leaking", "pump", "broken" or "fit".
Oven wouldn't heat. Glow ignitor was weak and wouldn't ignite flame.
After shutting off the gas and removing the oven door, which simply slid off of the hinges, I removed the oven plate. The ignitor was attached to the manifold. I removed that and noted the wires were attached back behind a hole in the back of the oven. I thought I would have to access them from the back but when I pulled on them I was able to reach them from the front. I was surprised to find plastic lugs covering the wire ends, rather than ceramic. I attached the new ignitor wires and reused the plastic lugs, as no ceramic ones came with the new ignitor. I carefully slid the new ignitor back into the cage/shield attached to the manifold and replaced the manifold. I then turned the gas back on and tested the ignitor (which worked perfectly) before replacing the oven plate. The repair took less than 30 minutes, but my wife and I thoroughly cleaned the door and interior while we had it apart. The hardest part was getting the door back on the hinges, but this too was accomplished after several attempts. The oven heats up beautifully now.
Parts Used:
Flat Style Oven Igniter
  • John from Niles, MI
  • Difficulty Level:
    Easy
  • Total Repair Time:
    15 - 30 mins
  • Tools:
    Screw drivers
91 of 100 people found this instruction helpful.
Was this instruction helpful to you?
Thank you for voting!
Burners kept clicking after ignited
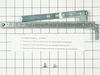
After I bought this part, installed it and the clicking still did not stop I finally found the problem. If your ignitor can still click then it's still good. The problem is the electric connection between the head burners and the base burners (Top Assembly diagram). Put a little weight on the head burner while grabbing it with your hand and grind it into the base burner with a little twisting motion. Repeat for all 4 burners. Presto! (you could be more professional and use steel wool or sandpaper to.)
If you stll want to know how to install this part begin by removing the control panel bracket #24. Then remove the glass top w/seal #9 (after removing the knobs). You may have to tease this out because the rubber seal is sticky. The switch plate #14 comes off after removing 2 obvious screws at each end and 2 not-so-obvious star screws attaching it to the manifold #6. Remove the spark module by removing 2 of the 3 screws and sliding it out of the 3rd screw.
Parts Used:
Spark Module
  • Robert from Ranchos de Taos, NM
  • Difficulty Level:
    Easy
  • Total Repair Time:
    30 - 60 mins
  • Tools:
    Screw drivers
31 of 45 people found this instruction helpful.
Was this instruction helpful to you?
Thank you for voting!
Both fan and light switches were broken.
TURN OFF POWER TO RANGE AT FUSE BOX -- a)Open the oven door, b) Unscrew the left and right silver nuts (not the black screws)that are in the oven under the control panel, c)pull off the four control knobs on the control panel, d) gently tilt out the control panel, e) set the control panel in/on the protruding arms, f) pull off THE connectors at the back of the switches - remember which is top and bottom, g) use a screw drive to break off the plastic pieces that hold the switches in place, h) push out the old switches, i) push/snap in the new switches, j) reconnect wires, replace control panel and screw in the nuts.
Parts Used:
Rocker Switch
  • Peter from Media, PA
  • Difficulty Level:
    Easy
  • Total Repair Time:
    30 - 60 mins
  • Tools:
    Nutdriver, Pliers, Screw drivers
18 of 23 people found this instruction helpful.
Was this instruction helpful to you?
Thank you for voting!