Tools required - #2 Phillips and needle nose pliers. (possibly a new spade connector and stripper/crimper) (possibly a multi-meter)
Shut off the power and slide the range forward about 8-10 inches from the wall. It does not need to be completely in the open and perhaps would not need to be moved at all. Some of the parts may be stuck with accumulation of cooking debris and grease, depending on age. Disassembly will be a bit more difficult than a new range because of this. Clean everything up before reassembly.
Open the oven door. Remove two screws, one on either side, below the control panel. Lift and work the control panel loose. It has two bullet shaped posts that engage slots in the front of the range. These are tight. Be patient and work it by lifting and pulling and wiggling the entire control panel. When loose, it will lay down flat supported by all of the wiring harnesses. In our case it did not stress the wires. If concerned, support it somehow.
There is a galvanized bracket that runs most of the width of the range and retains a rubber gasket on the front edge of the glass. Remove two screws that hold this bracket. The bracket easily comes loose, set it aside.
There is a stainless steel trim piece on each side of the cooktop, running from front to back. Each one is held in place by one screw in the front. Remove the screws and the two trim pieces will slide forward and can be removed. Set them aside.
There is a rubber gasket across the front edge of the glass cook surface. Remove it. The cooktop glass can now be lifted and worked loose from the rear rubber gasket that seals across the back edge. Set the cooking surface aside in a safe place. You now have access to the burner elements.
Using the needle nose pliers, work the spade terminal connectors loose from the burner that is to be replaced. Note their positions. The burner is held in place by two spring clips that attach the burner to a galvanized support bar that runs from front to back of the range. A screwdriver can be used to compress each clip allowing a tab to be lifted out of a slot in the galvanized bar. If needed, you can remove one front screw that holds the bar in place and lift it for better access, but while this is not necessary, it allows for a better view of the retainer clips and the tabs that fit into slots in the support bar. With both clips released, the burner is free to be removed.
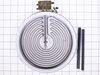
Our burner clearly had a break in the coil, so there was no doubt about the cause of non-functionality.
The spring clips must be removed and transferred to the new burner. With both burners, face down on a bench, remove the screws that retain the clips to the old burner. Make note of the index numbers at the position of the old clips and place them at the same position on the new burner. This positions the burner when it is mounted so that the terminals are properly positioned to allow the wiring harness to be attached as it was.
With the spring clips in place on the new burner, place the burner back in the range and engage the tabs in the slots on the support bar. They will snap back into place. Reconnect the spade connectors. The burner should now be tested before reassembly. (see later)
In our case, when power was reestablished (but burner control in the off position) the Surface Hot light was on art all times, so we knew something was wired wrong, even though it was re-connected exactly as it had previously been. There are slight differences between the new burners and old burners that apparently impact the wiring. There are no markings on either the old burner or new burner to give clues as to how it should be wired. Neither was there any advice in the instruction sheet that came with the new burner. We tested all of the terminals with the power on (burner off) to determine what voltages were where and removed the cover of the small box to which the terminals are attached. This box contains small switches, and we were able to determine the new wiring scheme. By wiring it exactly as it originally was, we had inadvertently put power to the Surface Hot light full time and the same potential to both sides of the coil so it would not heat. With this corrected, it worked fine.
As always, reassembly is just the reveres of the steps taken to disassemble. It is a bit tricky to place the glass back in the rear gasket. Just be careful and work it into place. Also the front control panel can be challenging. Line up the bullets with the slots and work it into place. It will snap into place when it is close with the aid of the heel of your hand.
One other note. One of the four wires in the harness had a smaller female spade connector which had to be cut off and a new one crimped on in order to fit the new burner.
Because of the wiring logic issue that had to be troubleshot, this took about three hours, which included disassembly and reassembly twice (because we reassembled before testing), figurin
Parts Used:


 Diagram and Parts List for P1133384N W Amana Cooktop")