Models > 79090319012

79090319012 Kenmore Range - Overview

Sections of the 79090319012

[Viewing 4 of 4]

Manuals & Care Guides for 79090319012

Click to download
Keep searches simple, eg. "belt" or "pump".
Terminal Block Kit – Part Number: 5303935058
Terminal Block Kit
★★★★★
★★★★★
(34)
PartSelect #: PS470125
Manufacturer #: 5303935058
This surface burner terminal block kit comes with interchangeable mounting brackets, terminal box, ceramic wire nuts, heat shrink protective tubing and wires.
$17.64
  In Stock
Temperature Sensor – Part Number: 316490000
Temperature Sensor
★★★★★
★★★★★
(32)
PartSelect #: PS1528542
Manufacturer #: 316490000
This temperature sensor detects the temperature within the oven cavity.
$65.85
  In Stock
Surface Element - 8 Inch - 2600W – Part Number: 316442301
Surface Element - 8 Inch - 2600W
★★★★★
★★★★★
(18)
PartSelect #: PS2339242
Manufacturer #: 316442301
This coil element has looped terminal ends.
$26.00
  In Stock
Drip Bowl - 8 Inch – Part Number: A316222301
Drip Bowl - 8 Inch
★★★★★
★★★★★
(9)
PartSelect #: PS1537685
Manufacturer #: A316222301
This is an 8-inch drip bowl for your range or cooktop. It is made of porcelain and is black in color. Place the drip pan under your burner to catch food that may drip or spill while you cook. It is 10...
$17.34
  In Stock
Light Bulb – Part Number: 316538904
Light Bulb
★★★★★
★★★★★
(7)
PartSelect #: PS12751166
Manufacturer #: 316538904
Clear, 120 Volt, 40 Watt.
$25.16
  In Stock
Drip Bowl - 6 Inch – Part Number: A316222201
Drip Bowl - 6 Inch
PartSelect #: PS1537684
Manufacturer #: A316222201
This drip bowl is a genuine OEM replacement part for your stovetop. It is black in color, made of porcelain, and six inches in diameter. To replace the drip pan, you simply need to remove the burner e...
$14.97
  In Stock
6-Inch Coil Burner Element – Part Number: 318372211
6-Inch Coil Burner Element
★★★★★
★★★★★
(5)
PartSelect #: PS2368974
Manufacturer #: 318372211
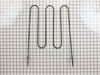
This element has looped terminal ends and comes with a black medallion center. This element is a genuine OEM replacement part, has looped terminal ends, comes with a black medallion center, and fits m...
$50.14
  In Stock
Infinite Burner Switch - Small Element - 240V – Part Number: 316436000
Infinite Burner Switch - Small Element - 240V
★★★★★
★★★★★
(5)
PartSelect #: PS1145039
Manufacturer #: 316436000
This switch controls the stove top surface burner.
$89.32
  In Stock
LENS – Part Number: 5304524341
LENS
★★★★★
★★★★★
(10)
PartSelect #: PS16218465
Manufacturer #: 5304524341
This lens covers the interior oven light bulb.
$15.66
  In Stock
GLASS – Part Number: 5304503232
GLASS
★★★★★
★★★★★
(9)
PartSelect #: PS11728351
Manufacturer #: 5304503232
This is also called the heat barrier glass.
$194.94
  In Stock
DRAWER GLIDE – Part Number: 316407402
DRAWER GLIDE
★★★★★
★★★★★
(5)
PartSelect #: PS12584887
Manufacturer #: 316407402
Sold Individually.
$11.81
  In Stock
Oven Light Socket – Part Number: 316116400
Oven Light Socket
★★★★★
★★★★★
(5)
PartSelect #: PS439060
Manufacturer #: 316116400
$67.38
  In Stock

Questions And Answers for 79090319012

Ask our experts a question about this model and we'll get back to you as soon as possible!

1 question answered by our experts.
  • 1
Sort by:
Sorry, we couldn't find any existing answers that matched.Try using some different or simpler keywords, or submit your new question by using the "Ask a Question" button above!
Bill
November 25, 2022
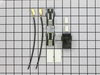
What is the part number for an infinite switch for a large element?
For model number 79090319012
PartSelect logo
Hello Bill, thank you for your question. The part number for the Large 8" Switch is part PS1145040. We hope this information will help you.

Was this helpful?
Thank you for voting!
Related Parts:
  • 1

Common Symptoms of the 79090319012

[Viewing 9 of 9]
Element will not heat
Fixed by
these parts
Fixing Fixing Fixing
Show All
Oven is too hot
Fixed by
these parts
Fixing
Show All
Little to no heat when baking
Fixed by
these parts
Fixing Fixing
Show All
Oven not heating evenly
Fixed by
these parts
Fixing Fixing
Show All
Will Not Start
Fixed by
these parts
Fixing Fixing Fixing
Show All
Door won’t close
Fixed by
these parts
Fixing Fixing
Show All
Little to no heat when broiling
Fixed by
these parts
Fixing
Show All
Door won’t open after self cleaning cycle
Fixed by
these parts
Fixing
Show All
Gas igniter glows, but will not light
Fixed by
these parts
Fixing
Show All
Keep searches simple. Use keywords, e.g. "leaking", "pump", "broken" or "fit".
Cracked oven door inner glass
Repair was quite easy, as long as you have the instructions for removing the door. The screws that hold the bottom of the door to the fixed hinge are placed into the side of the hinge assembly after removal; this holds the door at a 45 degree angle for easy removal. After that, just place the door on a flat surface and dismantle the door from the inside. The inner glass is contained in a metal frame with another piece of glass; this frame comes apart easily using the clips in each side. The door assembles easily after the glass is replaced; just take your time and give yourself enough room to lay out the parts as you go. Good luck!
Parts Used:
GLASS
  • Mitch from Fernandina Beach, FL
  • Difficulty Level:
    Easy
  • Total Repair Time:
    15 - 30 mins
  • Tools:
    Screw drivers
74 of 110 people found this instruction helpful.
Was this instruction helpful to you?
Thank you for voting!
burner shorted out
I followed the directions by clipping wires to old burner socket, splicing the wires to new terminal block, screwing down new "block bracket," and plugging in new burner.
Parts Used:
Terminal Block Kit Surface Element - 8 Inch - 2600W
  • David from Encinitas, CA
  • Difficulty Level:
    Easy
  • Total Repair Time:
    15 - 30 mins
  • Tools:
    Pliers, Screw drivers
61 of 72 people found this instruction helpful.
Was this instruction helpful to you?
Thank you for voting!
Oven wouldn't operated. Error code F9
I called a repair place. They charged $54 to diagnose, (said it needed a new latch motor) then wanted $220 to complete the repair. I checked online prices and did it myself for about 15 minutes work and the latch motor itself ($44?).

Was necessary to uplug the range, pull it away from the wall and remove the back panel sheet metal, then 3 screws that mount the motor. Replace motor, reattach sheet metal. Plug in. Done. Ready to bake cookies.
Parts Used:
MOTOR
  • Richard from Centennial, CO
  • Difficulty Level:
    Really Easy
  • Total Repair Time:
    Less than 15 mins
  • Tools:
    Nutdriver
57 of 67 people found this instruction helpful.
Was this instruction helpful to you?
Thank you for voting!