


Models
>
71602
71602 LG Refrigerator - Overview
Models starting with 71602
Click on the best match to narrow your results.
Keep searches simple, eg. "belt" or "pump".


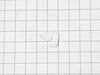
Refrigerator Flipper Assembly
PartSelect #: PS11708993
Manufacturer #: AGU74110902
The main top guide pin guides the main top onto the body of the range and helps hold the top in position.
$137.29
In Stock

Handle Screw
PartSelect #: PS8752913
Manufacturer #: MJB63190001
This handle screw, also known as a mounting bolt, is a mounting screw to help secure the door handle to your refrigerator door. If your handle is loose, you may just need to tighten the screw. If your...
$11.93
In Stock

Deli Drawer
PartSelect #: PS8749643
Manufacturer #: AJP73874601
This deli drawer is for refrigerators.
Deli drawer holds meats, vegetables and snacks in the fresh food compartment of the refrigerator.
Follow the instructions in the owner's manual when installing this part.
$164.49
In Stock

Door Shelf Bin
PartSelect #: PS8748031
Manufacturer #: AAP73871501
Sold individually.
$72.32
In Stock


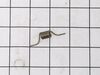
Refrigerator Spring
PartSelect #: PS6012670
Manufacturer #: MHY62044106
This is a replacement door mullion spring for your refrigerator. The door mullion is the flap that allows the doors on your French-door style refrigerator to close. The spring allows the mullion to fi...
$55.89
In Stock


Temperature Sensor
PartSelect #: PS3529340
Manufacturer #: 6615JB2005H
This part monitors the temperature and makes sure the compressor cycles on and off.
$55.18
In Stock

Refrigerator Compressor Overload Protector
PartSelect #: PS3603394
Manufacturer #: 6750CL0001D
The compressor overload protector attaches to the compressor and shuts off the compressor if the compressor motor draws too much current.
$45.74
In Stock


Common Symptoms of models starting with 71602
[Viewing 8 of 8]Door won’t open or close
Fixed by
these parts
these parts

Show All
Light not working
Fixed by
these parts
these parts


Show All
Leaking
Fixed by
these parts
these parts

Show All
Noisy
Fixed by
these parts
these parts


Show All
Ice maker not making ice
Fixed by
these parts
these parts


Show All
Fridge too warm
Fixed by
these parts
these parts
Show All
Frost buildup
Fixed by
these parts
these parts

Show All
Fridge and Freezer are too warm
Fixed by
these parts
these parts

Show All


Keep searches simple. Use keywords, e.g. "leaking", "pump", "broken" or "fit".
Replace Thermistor in back of freezer
Turn off power, remove upper and lower drawers (may need to open upper refrigerator doors to remove large freezer bin,) remove drawer supports (upper and lower), remove rear freezer panel (trick is to loosen 4 screws on fan bumpout to get the panel to come free from the freezer side wall), test thermistor with multimeter (should have continuity or near zero resistance across 2 orange fuse wires) before cutting zip ties, cut zip ties holding Thermistor in place, remove old Thermistor, install new Thermistor, install new zip ties, replace rear freezer panel, install upper and lower drawer supports, install drawers, turn on power, should be fixed if error code doesn't return after 6 hours.
Parts Used:
-
Scott from JUPITER, FL
-
Difficulty Level:Easy
-
Total Repair Time:1- 2 hours
-
Tools:Pliers, Screw drivers
12 of 16 people
found this instruction helpful.
Was this instruction helpful to you?
Thank you for voting!
Spring on door closer broke
Found the broken spring; matched it with parts diagram. Googled for sources via part number. Selected this site because it had best deal - price, availability, shipping. Part arrived as predicted; installed it in 2 minutes. Job done. Door now works.
Parts Used:
-
Charles R from FAIRFAX, VA
-
Difficulty Level:Really Easy
-
Total Repair Time:Less than 15 mins
-
Tools:Pliers
10 of 15 people
found this instruction helpful.
Was this instruction helpful to you?
Thank you for voting!
Icemaker quit releasing ice from tray and water was pouring and freezing in ice storage bin
This couldn't have been easier. Two tiny screws in the front needed unscrewed, and then two plastic clips in the middle just had to be popped lose. Finally, you unplugged the power cord. Then, you just needed to reverse the process by plugging the new ice maker in, popping the clips in place, and screwing the two holes back in and turning the whole thing on. Voila! Perfect ice cubes again. And for only a little over $100.
Parts Used:

-
Amber from PEORIA, IL
-
Difficulty Level:Really Easy
-
Total Repair Time:15 - 30 mins
-
Tools:Screw drivers
8 of 11 people
found this instruction helpful.
Was this instruction helpful to you?
Thank you for voting!