The lower door closing cam is used in refrigerator doors, it can be located on the fresh food side or the freezer side. It helps hold the door open. This cam is made out of plastic, so it might crack ...
This manufacturer-certified Refrigerator Door Shelf Bin, also known as the crisper bin and door shelf bin, is made of clear plastic, and is easy to install. It is used to hold items in the fridge door...
The Door Cam is a black plastic part which helps the door pivot shut while keeping the door and hinge in proper alignment. Lubricating this part upon installation may help it move easier. It attaches...
This 18 ml bottle of white appliance touch-up paint is used to cover scratches or marks on your appliance. The white touch-up paint can be used on refrigerators, microwaves, ranges, clothes dryers, an...
Note: This valve has been updated by the manufacturer and no longer includes the removable pre-filter bracket connector. It must be ordered separately; part number WPW10445062.
This is the icemaker only. You must use the wire harness, cover and bail arm from the original icemaker. This is an icemaker for your refrigerator/freezer. Take note that this part does not include t...
Remove the top hinge cover. Removed the top hinge support. Lifted the door from the bottom support. Old door cams were worn completly flat. Replaced the lower door cam and closing cam use a little vasalene for lubricant on the cam surfaces. Placed the door back on the lower hinge support. Replaced the top hinge support. Door is closing great now. Thanks for the quick part deliver.
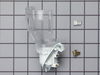
First I unplugged the fridge, then using the socket set I removed the cardboard shield from the lower rear of the refrigerator. I located the leaking water from a cracked solenoid water valve just inside the lower cavity directly behind the water intake line. Removing the valve was a snap - most of the valve plastic compression couplings unscrewed and came off. The metal compression fittings required an adjustable wrench and a pair of pliers to hold the solenoid unit steady. A couple of hex nuts kept the solenoid bolted to the refrigerator frame and came off easily with the socket. Two simple push-on electrical plugs came right off just by pulling on them. The new valve unit wasn't exactly like the original one. It had push-on instead of compression water fittings and the plugs were oriented differently. I recommend studying which water lines entered which port on the valve because I was a little unsure after I took the old one apart (whoops). After figuring out how to put it pack together, the push-on water fittings were even easier, and the unit was scewed back into place on the fridge frame. The electric plugs have different sized contacts so you can't mix them up. I put the cardboard shield back on. Viola!
The process to repair was very simple, I removed the back of the refrigerator to expose the motor area. I then removed three screws that held the condenser motor in place. once it was loose I detactched the electrical harness and removed the old motor. I then placed the new motor in place and secured it with the screws and reattached the new electrical harness that came with the new part. Once completed I reviewed it to make sure I didn't miss anything. I then replaced the cover over the motor area and enjoyed my success in repairing my own appliance with no added cost for labor, which would have been expensive I'm sure. The part purchased came with clear and consice instructions very easy to follow.