


 My Orders


1015 - Overview
Models starting with 1015
Click on the best match to narrow your results.
Enter a part description. DIY Heroes keep it simple, eg. "belt" or "pump".
Search filter:
Clear Filter
Your search term must have 3 or more characters.

$29.65
In Stock
Heat Resistant Adhesive
Part #W10841140
This is a heat-resistant adhesive for your appliance. The heat resistance allows you to stick parts such as grate feet, gaskets, and felt seals in hot areas, such as a cooktop, without compromising the integrity of the adhesive. It is white in color, and the tube is approximately 7.5 inches long.

$16.37
In Stock
Ceramic Fuse - 20 amp
Part #WPM0805101
This ceramic microwave fuse is just over an inch long. It is white in the center, while each end is made of metal. This is a twenty amp fuse.

$10.40
In Stock

No Longer Available
Wall Vent Cap Kit - 5 Inch duct - with Gray Cover
Part #A405
This wall vent cap kit comes with a spring loaded damper. This part can be painted.

$166.48
In Stock
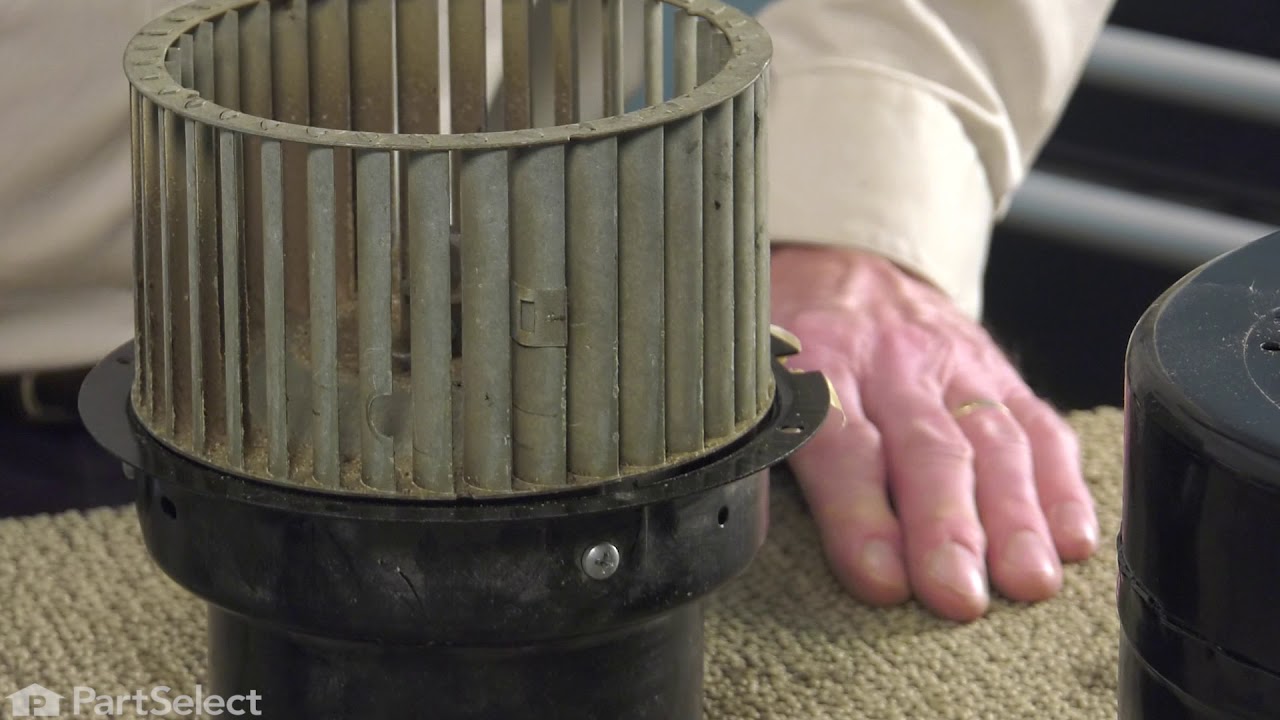
Range Exhaust Vent Blower Wheel
Part #WPY707985
This blower wheel attaches to the ventilation motor to draw in and exhaust smoke, steam, and cooking vapors, helping maintain clean airflow in your kitchen. Built from durable metal for heat resistance and long-lasting performance, it measures approximately 7 inches in diameter and under 4 inches deep for a secure, efficient fit. Designed...Read more to spin smoothly on the motor shaft, replacing a worn or damaged blower wheel can restore proper airflow, reduce noise, and ensure reliable ventilation performance.
Read less

$456.50
On Order
Blower Motor
Part #707704K
This part is used with down-draft models. It helps draw the steam and odors through the vent when the fan switch is activated.

$12.05
Special Order

No Longer Available
Wall Vent Cap Kit - 6 Inch duct
Part #A406
This wall vent cap kit comes with a spring loaded damper and instructions. It is designed for a 6" diameter outside vent.

No Longer Available
Infinite Switch Kit
Part #715230K

No Longer Available
Motor Isolator - Black
Part #Y707395

No Longer Available
Cap, Retainer
Part #20218GS

No Longer Available
Hose Clamp
Part #48031GGS
Exact Part matches for your search term

$36.95
In Stock
Cleaning Brush
This part number matches the current model number 1015
Part #4210463RW
Cleaning brush for coils on refrigerator and freezers, dryer lint filter housings, and more.

No Longer Available
Common Symptoms of models starting with 1015
How this model fails, and the parts that fix it.
Leaking
Fixed by
these parts
these parts

Show All
Won’t turn on
Fixed by
these parts
these parts

Show All
Will Not Start
Fixed by
these parts
these parts

Show All
Watch our pros, then fix it yourself.
See how others fixed this model. Time, tools, difficulty, and steps that lead to victory!
View More