This front load washer cleaner removes odor-causing residue. Use it once a month and it will keep your machine fresh and clean. Package comes with 3 tablets.
Ask our experts a question about this model and we'll get back to you as soon as possible!
3 questions answered by our experts.
< Prev
1
Next >
Sort by:
Search filter:
Clear Filter
Your search term must have 3 or more characters.
Keep searches simple. Use keywords, e.g. "leaking", "pump", "broken" or "fit".
Sorry, we couldn't find any existing answers that matched.Try using some different or simpler keywords, or submit your new question by using the "Ask a Question" button above!
Thaddeus
December 3, 2019
Touch screen display illuminates a vertical line only when powered.Before this, .83 displayed on screen. what do i need to do or parts to fix this problem. what does .83 means?
For model number WTW8500DC4
Hi Thaddeus, thank you for your question. You could try resetting your board by unplugging your appliance for about 10 minutes. If the problem persists then you might need to replace your board. This is the part number: PS12348647. I hope that helps. Good luck with your repair.
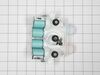
Hello Alejo, thank you for contacting us. According to our research on model number WTW8500DC4, the problem appears to be with the water inlet valve, part number PS12348013. It controls the water flow into the washer. Customer service is always available to help you place an order if you are having trouble doing so. Good luck with your repair.
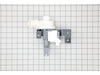
I need the left hinge do I need the entire top load door. The part attached to my lid is broken at the door
For model number WTW8500DC4
Hello Randy, we are glad you asked! You may purchase the individual hinges and hardware. The Left Wire Hinge that is on the lid is part PS11746533 and the Right Wire Hinge on the lid is part PS11746675. The screw for these is PS12741703. There are also the Hinges that screw onto the top of the unit. The Left Hinge is PS11731637 and the Right Hinge is PS11770183. The Screws are PS11740760 and PS11743784. We are pleased to have been able to help.
1.) disconnect power to your washer. Turn off water supply and disconnect from the washer.
open the washer top and remove plastic cap from the wash plate
2.) using 7/16 socket, remove bolt from the wash plate. If you can't remove it with a socket , I recommend using impact wrench.
3.) remove wash plate ( you might need to spray penetrating oil or wd40 inside the bolt hole to loosen it. Check to make sure the wash plate gear grooves are not worn down, if they are, replace it.
4.) using your Maytag specific spaner nut wrench, remove the spaner nut from the shaft of the gear case. This should be right underneath where the wash plate was. If you can't turn it by hand , use a rubber mallet or hammer to encourage it.
5.) some people remove the wash basket at this point. I don't think it is necessary.
6.) close your washing machine. Tape the top closed to keep it from flying open. Tilt your washer back and prop it up where you have access to the underside of the washing machine.
7) remove motor rotor bolt and pull rotor off of the motor.
8.) disconnect the two wire connectors that supply power to motor. using a socket, remove bolts that are keeping motor attached to the gear case.
9.) Now that the gear case is all the is remaining on the underside, you can remove the 4 bolts that are holding the gear case to the washer. Now try to pull gear case out.
10.) if gearcase will not pull out, lower washer back to upright position. Spray penetrating oil or wd40 around the shaft of the gearcase and allow it to sit for 5-10 minutes. Using a hammer, lightly tap on the shaft of the gearcase and it should now fall out. ( you might have to apply penetrating oil again, or apply more force with the hammer.
11.) reinstall motor to new gearcase. Insert new gear case to the washer. Reinstall bolts and reconnect power supply wires.
12. ReInstall spaner nut inside the washer, reinstall wash plate.
As women, myself and my daughter completed this fairly simple repair. The replacement washer plate was top quality and included the washplate replacement screw. Additionally, we purchased a tube of lock tight to further secure bolt placement. The most difficult part of the repair is to disengage old screw and securely replace with new one. Very pleased with fast delivery Excellent customer service and top quality part. Thanks


 Diagram and Parts List for Whirlpool")