The agitator kit is most commonly used if the top part of the agitator is not moving correctly but the bottom is. This kit now includes all pieces shown in photo plus the thrust spacer, inner cap seal...
This 18 ml bottle of white appliance touch-up paint is used to cover scratches or marks on your appliance. The white touch-up paint can be used on refrigerators, microwaves, ranges, clothes dryers, an...
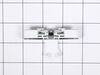
This white thrust spacer is made of plastic and is also commonly referred to as a retainer ring. It is used in the agitator assembly of many direct drive washing machine models. This is the retaining ...
This is a replacement clutch assembly or cam kit for your washer. The clutch assembly is mounted on the drive shaft on the bottom of your washer. You may need to replace the clutch assembly if the spl...
Ask our experts a question about this model and we'll get back to you as soon as possible!
8 questions answered by our experts.
< Prev
1
2
Next >
Sort by:
Search filter:
Clear Filter
Your search term must have 3 or more characters.
Keep searches simple. Use keywords, e.g. "leaking", "pump", "broken" or "fit".
Sorry, we couldn't find any existing answers that matched.Try using some different or simpler keywords, or submit your new question by using the "Ask a Question" button above!
Line
April 1, 2023
Do you have in stock the fabric softner dispenser for this model of Amana? This part was not included in my recent purchase of this washer. Thanks for replying.
For model number NTW4516FW4
Hello Line, thank you for contacting us. The fabric softener dispenser, part number PS1488027, is the part you are looking for. We hope this helps!
When select water temperature on tap,cold or cool it don't flow to much water and stop full it in the light bottoms turns off and being to humming.
But if I select the temperature warm or hot it works.
Wonder if it is the temperature selector or the water pump
For model number NTW4516FW4
Hello Juan, thank you for reaching out. According to our understanding, the issue is most probably with the water inlet valve, part number PS12349269. It controls the water flow into the washer. You may need to replace it to fix the issue. Glad to be of assistance!
Hello Pat, thank you for contacting us. Based on the description that you have provided, we would recommend checking the water inlet valve, part number PS12349269, to solve the problem. It controls the water flow into the washer. We hope this solves your problem!
Hello Harry, thank you for the question. The control panel for your model is part number PS11769218. If you need help placing an order, customer service is open 7 days a week!
Hi, thanks for the help in advance.
So, this washer will start filling up with water. The only problem is that it doesn't fill up all the way with water, and starts washing the clothes. I have a feeling it is to do with the a sensor. (This happens on any setting by the way. I have to fill it with water from my sink.)
Machine Settings;
Deep Water Wash
Tap Cold
Regular.
For model number NTW4516FW4
Hi Bryan, thank you for getting in touch. Yes, the issue is with the pressure sensor. You will need to replace the control board, part number PS16744839, to fix the issue. Because the water level (pressure switch) sensor is built into the control board. Good luck with the repair!
The instructions came with the repair kit, it was fairly simple and straight foward.
One bolt held the entire agitator unit in the washer, as well as held the upper and lower halves together. Once that nut was removed the two halves seperated and the plastic clutch pieces could easily be replaced wtih the new onces in the repair kit.
Very easy do-it-yourself repair! Took about 20 minutes because I was being cautious. Next time I could do it in 5 minutes.
I first pulled the softener dispenser cap off, then re-moved the inner cap/seal by twisting and pulling (it was a little stubborn, but alternating my grip from side to side while pulling was helpful). Using a 7/16" socket with an extension to reach down inside the mover, I then loosened the agitator mounting bolt. Note the amount of torque needed to "break " the bolt from the threads holding it as you don't want to overtighten it when you replace it. It doesn't require much effort to tighten it., depend-ing on the size of your wrench. I then lifted the agitator up and off its shaft by slipping my fingers under it on opposite sides of its base. Then, I lifted the mover or auger off the agitator and removed the thrust washer, cam and cam dogs. Don't worry; the illustrated instructions which are included with the new parts are quite clear and understandable. Then, I placed the new thrust washer and cam and dogs (a separate instruction sheet shows you how to assemble the cam, dogs and bearing; not difficult). Here's the only complaint I have about all this: the instructions advise you to apply agitator grease to the top surface of the thrust washer, but the grease isn't included in the kit. I used standard plumber's silicone grease which I had on hand. Hopefully, that won't be a problem. There's a part # for the grease shown on the illustration (#350849). It would be helpful if this information were given when ordering these replacement parts. You then put the auger and cam on the agitator and place the assembly back on the shaft in the wash tub and replace the mounting bolt and tighten it. Remember to not overtighten it. Then you place the inner cap/seal back inside the mover after lubricating the seal with plumber's grease or liquid soap and replace the dispenser cap. The instructions remind you that the mover is to turn only clockwise and, if that's what you have, you are finished. As a precaution, I checked the "play" (and there is some in it) in the mover/auger after assembly then checked it again after the first couple of loads we washed. It seems to be fine. Please don't let the length of this story alarm or discourage you. I'm trying to include everything which might be helpful to anyone who wants to do this. It really isn't difficult. Incidentally, it probably wasn't necessary to replace the mover/auger in my machine as it looked to be in very good condition, but I thought it wise (at another's suggestion) to replace it in case it might wear the other parts prematurely. I hope this helps somebody out there and that I didn't forget anything. Again, the parts come with very good instructions. Just don't forget the grease!
wife complained about washing machine making bad noise and she said it was not spinning. So being the good husband that I am, after she yelled at me 8-10 times I stopped what I was doing and sure enough she was right , the washing machine wasn't working correctly. Started testing the agitator by spinning it back and forth. it would only catch on the dogs every once in a while. the washer is only 3 years old, thought maybe one of the kids toys or lint was interferring with the dogs, pulled this dispenser off the top and then another plastic cap with a black o-ring off and found the agitator and dogs gears worn down and chipped. think it was a 3/8" socket I used, but you need a long extension to get to it. Part was labelled well and it was very easy to order. problem I had was when the new parts came in I had ordered the agitator repair kit ($16) and the thrust spacer ($5). Well it's not that $5 is alot of money but the spacer I had was worn and I was in there anyway so why not. The agitator repair kit comes with a thrust spacer but it was not shown on the otherwise very detailed pictures. So it would cost more for me to pay the shipping to return the unused part than not. the agitator repair kit description reads "This nine piece agitator repair kit comes with a two and a half inch cam, a thrust spacer, and four dogs (agitator dogs) but the thrust spacer is not shown. You could say I was 30% more into parts cost and make it sound worse. Had I been an actual repair man instead of a home do it yourself kind of person, probably would have known to call and speak with a rep vice going at it online solo. anyway, 5 minutes and the washer was back up, wife was happy, and I was able to continue with what i was originally doing.