This 18 ml bottle of white appliance touch-up paint is used to cover scratches or marks on your appliance. The white touch-up paint can be used on refrigerators, microwaves, ranges, clothes dryers, an...
This is a replacement lid hinge for your washer. It is approximately 2.5 inches in length and 1.5 inches in width. The lid hinge is what the lid for your washer pivots on. If the lid hinge is damaged,...
This front load washer cleaner removes odor-causing residue. Use it once a month and it will keep your machine fresh and clean. Package comes with 3 tablets.
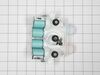
This gray and white washer lid bumper contains a rubber bottom and is sold individually.
$10.14
In Stock
Questions And Answers for MVWB755DW0
Ask our experts a question about this model and we'll get back to you as soon as possible!
2 questions answered by our experts.
< Prev
1
Next >
Sort by:
Search filter:
Clear Filter
Your search term must have 3 or more characters.
Keep searches simple. Use keywords, e.g. "leaking", "pump", "broken" or "fit".
Sorry, we couldn't find any existing answers that matched.Try using some different or simpler keywords, or submit your new question by using the "Ask a Question" button above!
Gladys
November 8, 2022
The washing machine stops working and it shows an error code of E2F6
For model number MVWB755DW0
Hi Gladys,
Thank you for your question. The F6 E2 error code indicates a connection issue between the control unit and the user interface or the wiring between them. Usually this issue can be resolved by unplugging the washer for 5 minutes. If the code returns, you will need check these parts to see which one is causing the issue. If you have any questions, please let us know. We are open 7 days a week. We look forward to hearing from you!
1 person found this helpful.
Was this helpful?
Thank you for voting!
Andy
December 16, 2022
The plastic piece of the lid lock broke and before when it broke I placed the plastic piece back in the little hole and try to bypass it by telling the unit the lid is closed to continue washing my loads. Now, it’ll sense for a few seconds then water would run and then just completely just down. What is my problem.
For model number MVWB755DW0
Hello Andy, thank you for reaching out. Our research shows that the issue could be caused by the lid lock assembly, part number PS11722981. Please reach out to customer service if you need help placing an order, anyone will be happy to assist you. We hope that helps.
This product comes in a bottle with a brush like Liquid Paper. It goes on incredibly easy. A second coat might be needed. I wanted to prevent rust from setting in so I covered the scratches and dings. The paint is a little brighter since my washer is 10 years old but it still looks great.
1.) disconnect power to your washer. Turn off water supply and disconnect from the washer.
open the washer top and remove plastic cap from the wash plate
2.) using 7/16 socket, remove bolt from the wash plate. If you can't remove it with a socket , I recommend using impact wrench.
3.) remove wash plate ( you might need to spray penetrating oil or wd40 inside the bolt hole to loosen it. Check to make sure the wash plate gear grooves are not worn down, if they are, replace it.
4.) using your Maytag specific spaner nut wrench, remove the spaner nut from the shaft of the gear case. This should be right underneath where the wash plate was. If you can't turn it by hand , use a rubber mallet or hammer to encourage it.
5.) some people remove the wash basket at this point. I don't think it is necessary.
6.) close your washing machine. Tape the top closed to keep it from flying open. Tilt your washer back and prop it up where you have access to the underside of the washing machine.
7) remove motor rotor bolt and pull rotor off of the motor.
8.) disconnect the two wire connectors that supply power to motor. using a socket, remove bolts that are keeping motor attached to the gear case.
9.) Now that the gear case is all the is remaining on the underside, you can remove the 4 bolts that are holding the gear case to the washer. Now try to pull gear case out.
10.) if gearcase will not pull out, lower washer back to upright position. Spray penetrating oil or wd40 around the shaft of the gearcase and allow it to sit for 5-10 minutes. Using a hammer, lightly tap on the shaft of the gearcase and it should now fall out. ( you might have to apply penetrating oil again, or apply more force with the hammer.
11.) reinstall motor to new gearcase. Insert new gear case to the washer. Reinstall bolts and reconnect power supply wires.
12. ReInstall spaner nut inside the washer, reinstall wash plate.


 Diagram and Parts List for Maytag Washer")