This part is a replacement halogen lamp for your oven. The bulb is 25 watts and 120 volts. If your light bulb is burned out, this is the part that replaces it. Be sure to turn off power to your range ...
This is a multi-use and multi-appliance screw. It can be used on a microwave, refrigerator, range/oven, air conditioner, dehumidifier, washer, or dryer. The measurements of this screw are 8 x 1/2 inch...
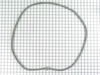
This is a replacement screw and washer for your oven/range. It is a Phillips-head screw approximately half an inch long, and the washer is approximately 1 inch in diameter. The screw attaches the oven...
$10.14
In Stock
Questions And Answers for JDR8895ACW
Be the first to ask our experts a question about this model!
✖
Ask a Question
Ask our experts a question on this model and we'll respond as soon as we can.
Removed the oven door by opening slightly, then pic door up to remove. Remove 2 screws holding oven sensor in place, gently pull on sensor to remove, had to remove about 8 inches to get at plastic connector. Unplug connector, had to use an adapter cable supplied with the PartSelect kit to install new sensor, push cable back into opening, reinstall 2 screws. The oven works fine! Note that due to thermal lag the temperature overshoots to 370 degrees and undershoots to 340 degrees, this appears to be normal oven operation. Putting door back in place was easy.
This particular model has a bracket that holds the element close to the oven ceiling, so I had to unscrew that as well as the element mounting screws on the back oven wall. The hardest part (not that hard) was the connectors were really tightly clamped to the element terminal. I had to use pliers to help wiggle them off the tips. Recommend doing this very gently yet firmly - I was worried about ruining the connectors or the wires to the oven. The element was deader than dead and actually fell apart in three places once it was detached. The new replacement element arrived a couple days later. Putting it in was a breeze, although the oven is quite dark and I needed Mrs. Handyman to hold a flashlight so I could get the screws in. Oven works fine now.
First I removed the two screws that hold the element in place. I then pulled the sensor out about 3 inches and disconnected the two wires. Next, I connected new sensor and screwed the new sensor back in place. One area for caution. Make sure that the electrical connection is pushed in past the insulation on the back side of the oven. Failure to do so will cause the plastic plug connector to melt from oven heat.


 Diagram and Parts List for Jenn-Air Range")
 Diagram and Parts List for Jenn-Air Range")


.gif "SUPPLEMENTAL INFORMATION Diagram and Parts List for Jenn-Air Range")

 Diagram and Parts List for Jenn-Air Range")