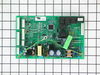
This board controls the operation of the unit.
Note: This part has been updated by the manufacturer. It may differ in appearance but will function the same as the original.
This evaporator fan motor grommet, or condenser fan grommet is built for refrigerators. It provides a cushion between the fan motor and the motor mounting bracket. It is made or round, black plastic a...
This 40-Watt light bulb is sold individually and is a genuine OEM replacement option for your home appliances. It is specially designed to withstand extreme temperatures, so this bulb is compatible wi...
This door recess spring or dispenser lever spring in your refrigerator is used to return the ice door to the closed position or the dispenser lever to the home position once released. You will find th...
Replacement icemaker kit - electronic. This kit includes a 4 pin round plug-in connector, 6 post plug-in connector, tube and fill cup.
$275.78
Special Order
Questions And Answers for GSS20GEWJBB
Ask our experts a question about this model and we'll get back to you as soon as possible!
1 question answered by our experts.
< Prev
1
Next >
Sort by:
Search filter:
Clear Filter
Your search term must have 3 or more characters.
Keep searches simple. Use keywords, e.g. "leaking", "pump", "broken" or "fit".
Sorry, we couldn't find any existing answers that matched.Try using some different or simpler keywords, or submit your new question by using the "Ask a Question" button above!
Robert
June 6, 2023
Freeez not working
For model number GSS20GEWJBB
Hi Robert, thank you for reaching out. Based on the description that you have provided, we would recommend checking the temperature sensor, part number PS304103, to fix this issue. We hope this solves your problem!
I used a digital camera and photographed the assembled unit and the metal blades before I started the repair. Then, I removed the top screw on the clear shield. Flip over ice tray and removed two Phillips screws on bottom. Exterior plastic white cover comes off next. The cover sides have hard push-in white plastic tabs. Push them in; pry up top cover with small flathead screwdriver. Slide white top cover up and you will now see the metal blades and assembly. Auger is held in place with a metal c-clip and washer on the end. Use flat head screwdriver to pry off c-clip. Then you will see a nylon round slotted nut. The threads are reverse, use pliers and loosen nut. It is not that tight but pliers are needed. Then it all is loose and ready for removal. I slid all the blades off at one time and kept them stacked together. Slide out auger and clear flat shield cover. Install new auger, clear shield, and metal blade stack. When you put it all back together take a look at the long metal J-hook on the bottom make sure it is in the slot before you make everything tight. Failing to do this will prevent cubed ice from dispensing. It is not that hard to do the repair it just takes some patience and paying attention to details.
1. I had to defrost the ice off of the back wall of the freezer with a blowdryer. 2. Removed the four 1/4'' screws and removed the back panel. 3. Defrosted all of the ice off the coils and heater. 4. I replaced the defrost thermostat and heater by following the directions that came with them. The directions are very clear and easy to follow. I had a single element heater, and the replacement was a double element, the directions even explained how to rearrange the wires to make it work. The whole job only really consisted of cutting two wires that are color coded on the thermostat and resplicing the new ones in. I used scotch locks and electrical tape for the splices. The element had connectors on it so I just removed two screws, unplugged two wires and plugged them on the new one. The greatest thing about this repair was that I troubleshot the problem using the PartSelect website, ordered the parts and they arrived at my house in less than 24 hours. Thank You.
After replacing the defrost heater, main board and thermistor I still had the same problem. Called a repair guy and he (with the help of GE on the phone) diagnosed that the temperature sensor was bad. So I ordered from partselect and installed it and it fixed the problem. Been good for a couple months (knocking on wood). To install I had to cut the 2 wires to the old sensor, crimp the 2 new wires on and snap the new sensor to the clip on the evaporator. Very easy. Make sure you seal the ends of the wire crimps so moisture doesn't get in and corrode the connection.