This 18 ml bottle of white appliance touch-up paint is used to cover scratches or marks on your appliance. The white touch-up paint can be used on refrigerators, microwaves, ranges, clothes dryers, an...
Glass ONLY. This inner door glass is a heat resistant part that fits into a stove, oven, wall oven, cooktop, or range as the inner glass panel of the appliance door.
This oven rack is chrome in color and is approximately 24.76 inches wide by 15.78 inches deep. If your old oven rack is damaged, you should consider replacing it. Many of our customers have determined...
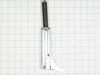
This is a multi-use and multi-appliance screw. It can be used on a microwave, refrigerator, range/oven, air conditioner, dehumidifier, washer, or dryer. The measurements of this screw are 8 x 1/2 inch...
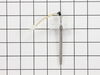
This is a replacement light bulb to illuminate the inside of your oven. It is 25 watts and 120 volts. Please wear gloves during replacement if your existing bulb is shattered. Consider ordering a spar...
This part is the replacement door gasket for your oven. It is made of gray rubber and is sold individually. The door gasket runs along the circumference of the oven door and creates a seal that insula...
$40.94
In Stock
Questions And Answers for GSC309PVS02
Ask our experts a question about this model and we'll get back to you as soon as possible!
3 questions answered by our experts.
< Prev
1
Next >
Sort by:
Search filter:
Clear Filter
Your search term must have 3 or more characters.
Keep searches simple. Use keywords, e.g. "leaking", "pump", "broken" or "fit".
Sorry, we couldn't find any existing answers that matched.Try using some different or simpler keywords, or submit your new question by using the "Ask a Question" button above!
Jim
April 12, 2023
How do you change light bulb?
For model number GSC309PVS02
Hello Jim, thank you for your inquiry. To replace the light bulb in the oven, follow the following steps:
1. Disconnect the power.
2. Remove the glass light cover by grasping the front edge and pulling it away from the oven.
3. Remove the bulb from the socket.
4. Replace the bulb, using tissue or cotton gloves to handle the bulb. Do not touch the bulb with your bare fingers.
5. Replace the bulb cover by snapping it back into the wall.
6. Reconnect power.
We hope this helps, good luck with this repair!
Was this helpful?
Thank you for voting!
Jim
April 13, 2023
I was asking about changing bulb in microwave not oven! This is the number on oven , can’t find number on microwave.
For model number GSC309PVS02
Hello Jim, thank you for contacting us again. To remove the light bulb from the microwave, use the following instructions:
1. Remove the screws on the side of the control panel.
2. Remove the upper and lower vent grills.
3. Remove the screws from the bottom of the microwave and pull the microwave out.
4. Remove the insulation plate on top of the microwave.
5. Reach the light socket and squeeze the retainer spring to release.
6. Replace the light bulb from the socket.
We hope this solves your problem!
How do I take the front glass off to clean it? Thank you!
For model number GSC309PVS02
Hello Selena, thank you for reaching out. We have found some relevant instructions for you to take the front glass off. They may not be of the exact same model, but they will help you with the process. You may follow the following steps: use a small flat-head screwdriver to help lift up the hinge locks, then remove the door from the frame and set it on a sturdy surface. Use a Phillips head screwdriver to unthread the screws securing the inner door panel to the outer panel. Carefully lift off the inner panel. Remove the handle support. The door glass is secured with two-sided tape so use a putty knife to break the seal to remove the old glass. We hope this information helps!
Was this helpful?
Thank you for voting!
< Prev
1
Next >
✖
Ask a Question
Ask our experts a question on this model and we'll respond as soon as we can.
Easily removed the door from the oven by releasing clips attached to the door hinge -- very nicely engineered. Removed about 6 philips head screws to allow the door assembly to be taken apart for access to the glass. Lifted out the broken glass, cleaned the inside of the door, installed the new glass, reassembled the door (a two minute project), and reattached the door to the oven. Cleaning the inside of the door took longer than the actual repair!
This built-in oven was slid out of it's space and set on a box. I removed the back cover with nut driver and located the safety overload device. removed nuts and used pliers to remove wires and replace them. The power must be off to do this repair.Replaced the cover and slid back into place. This could be a lot more difficult if your power cord or gas line is not long enough to make it out of your wall space. Or of your oven is attached well to the frame.
The glass broke after I took the oven door off to tighten the handle which had become lose.....There are 4 screws and one of th 4 had come out , hence the lose handle....So I tightened the 4 screws which were in a metal bracket only to find out under all the foil wrap was glass, and by tightning the screws they fractured the glass into a million little shards of glass...who knew the glass was the full size of the door, and who knew the metal bracket was over top of the glass... too much presurre and the glass explodes. So what should have been an easy re-tighten job cost me alot of time and money.rather than tighten the 4 screws down too hard and break the glass agin, I gentley tightened and used lock tight glue so the screws would not come out again.....Hope that saves someone the problems i had to go through.


 Diagram and Parts List for Whirlpool Microwave Oven Combo")