This handle may appear white, but is light gray in color called Platinum. This door handle for your washer is sold without screws, they can be ordered separately, or you can reuse the existing screws ...
This pump helps expel water from the washing machine and is activated after the spin speed is maintained for a specific period of time. This part is used on front load models.
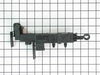
Used with some front load washers. The attaching solenoids on the valve open and close according to the desired temperature, or amount of water needed.
This 18 ml bottle of white appliance touch-up paint is used to cover scratches or marks on your appliance. The white touch-up paint can be used on refrigerators, microwaves, ranges, clothes dryers, an...
Also known as a door boot seal and is used in front load washers. This part is used to keep the clothes inside the tub during the wash cycle. The folds in the bellow allow the tub to move separately...
This drive belt is made to slip on the motor pulley to bring the basket up to the speed required and this makes the belt get wear and tear.
NOTE: Per Manufacture, belt measures 48.22" long uninstall...
$67.39
In Stock
Questions And Answers for GHW9200LW0
Be the first to ask our experts a question about this model!
✖
Ask a Question
Ask our experts a question on this model and we'll respond as soon as we can.
(1) First I unpluged the washer then I removed the water from the tube with a water vac.(2) Then I removed the three (3) screws that holds the front panel, using a Torx T-20 socket. ( this is a front load washer ). The panel is below the loading door. (3) I packed towels under the washer. (4) I slowly removed the cleanout in the front of the pump, using the water vac to catch the water as it leaked out. (5) I removed the wiring to the motor. (6) I removed the screw that holds the pump in place with a Torx T-20 socket. (7) I pulled the pump forward so the clamps that hold the drain hose and discharge hose could be removed using the hose clamp pliers. ( they come off much easier then they go back on ). (8) I tested the pump and found it would run but was making a lot of noise and running slow. (9) To reinstall start with number (7) and work backwards to number (1) skipping (3) and (4). Don Kramer Wichita, Kansas
1. remove the three screws from the top backside of the top panel 2. push the top panel to the rear 1/8 to 1/4 inch 3. lift/rotate top panel from rear to front, set aside. 4. remove the three wire connectors from latch. 5. use #15 Torx to remove the three screws from the latch. 6. remove and replace part using top opening. 7. reverse order to finish.