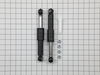
This kit is used for front load washers and includes 2 dual-stage shock absorbers, 1 spare shock mounting pin and 4 locking nuts. These shock absorbers keep the washer from vigorous shaking during it's cycles.
This is a drive belt for your washing machine. This part spins the basket in your appliance by connecting the drive motor to the drive system. You will need to replace the drive belt if your pumps are...
Also known as the door boot seal. This part is used to keep the clothes inside the tub during the wash cycle. The folds in the bellow allow the tub to move separately from the door during the spin cycle.
This is a replacement screw for your washer or dryer. The screw is approximately half an inch in length and is a Phillips-head screw. It screws in from the outside of the drum, into the vane/baffle. T...
removed 2 screws and removed top access cover. removed 2 screws and removed front access cover. removed 4 retaining pins (one with nammer and punch because it was stuck) connected lower ends of new shocks with plastic pins, extended each shock to slip fit and connected upper ends to wash tub mounts. Reinstalled panels. I wish I could say that it all went well from there but......when the shocks broke, apparently the hit the motor took was enough to cause an electronic failure of the speed cycle control chip. Now Im waiting for that part.
Turned out drum brackets were corroded, so drum and shell-rear/brg and gasket needed replacing
1. Disconnect power and water lines 2. Remove rear and top panels 3. Remove control knobs, Assembly, soap dispenser, and Assembly cons frame/trim 4. Remove all screws from control panel mounting bracket (panel-cont mtg wing bend), disconnect easy wires to get to so you can flip it on it's edge when the time comes - no need to remove completely 5. Disconnect hoses running to shell-rear/brg 6. Remove the motor (motor-Sole) and belt 7. Place foam pad and/or jack with pad on it underneath shell (it's gonna be very heavy when you remove it - two men or a jack required) 8. Lift and remove the two spring/sleeves that support the shell. 9. Remove two level-shocks below shell or at a minimum remove one of the pins on each 10. Remove Spring boot from bellow 11. Lower and remove entire shell 12. Remove the weight, upper back from the rear shell and the counterweights from the front shell (can leave front weights if you want to, but probably easier to work with without them on. Note: be careful, these all crack/chip very easily) 13. Remove the screws that hold the rear shell to the front shell 14. Remove the pulley screw and pulley (may take a little wiggling or tapping with rubber mallet to loosen) 15. Separate the rear shell from front shell. 16. Remove the drum from the rear shell (may also require some wiggkling/tapping with rubber mallet)
Note: I did this from memory, so probably missed some steps - just use your parts manual to ensure you know what you're looking at and it will help you through the process.
Good luck. I figure I saved about $700 to $1200 since the estimated repair costs were so high, I would have simply had to buy a new washer.
After turning off water, disconnecting power, and sucking water out of the tub and drain hose with a shop vac, I removed the front kick panel (took out two sheet metal screws). Then I removed two mounting screws from the pump assembly, and disconnected two hose clamps (inlet and outlet hoses) with a pair of pliers. Very simple, very easy. The pain in the fanny came when I tried to reattach the hoses. The hose clamps apparently require either a special tool or a technique I'm not familiar with. I finally tossed them and purchased two standard screw and band hose clamps which made the final connections a breeze. The surprise came when I found that the motor had seized because of a pair of tweezers that had somehow worked into the motor impeller. Free of tweezers and coins, the new motor works great! To quote another one of your contributors: wife happy!