Models > FDU-248-2D

FDU-248-2D (FDU-248-2 D) Amana Range - Overview

Sections of the FDU-248-2D

[Viewing 5 of 5]
Keep searches simple, eg. "belt" or "pump".
Light Bulb - 40W – Part Number: 8009
Light Bulb - 40W
★★★★★
★★★★★
(28)
PartSelect #: PS884734
Manufacturer #: 8009
This an authentic OEM 40-Watt replacement light bulb, used in a number of household appliances. It is specially designed to withstand extreme temperatures, which is why these replacement bulbs are mos...
$14.96
  In Stock
Order within the next 10 hrs and your part ships today!
Drip Bowl - 6 Inch – Part Number: WPW10196406
Drip Bowl - 6 Inch
★★★★★
★★★★★
(30)
PartSelect #: PS11750108
Manufacturer #: WPW10196406
This drip bowl is used for electric cooktops and ranges, it is designed to sit under a 6-inch surface burner. It catches the drips and spills coming from the cookware on the surface burner. This drip ...
$8.87
  In Stock
Order within the next 10 hrs and your part ships today!
Surface Burner Plug-In Block Kit – Part Number: 330031
Surface Burner Plug-In Block Kit
★★★★★
★★★★★
(4)
PartSelect #: PS340571
Manufacturer #: 330031
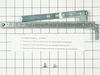
This newer-style terminal block kit includes two metal brackets, two pre-crimped wires with terminals, two ceramic wire nuts, a heat shrinking tube, and a mounting screw.
$17.11
  In Stock
Order within the next 10 hrs and your part ships today!
2 Piece Broiler Pan – Part Number: 4396923
2 Piece Broiler Pan
★★★★★
★★★★★
(2)
PartSelect #: PS971245
Manufacturer #: 4396923
The top of this part is now black.
$47.83
  In Stock
Order within the next 10 hrs and your part ships today!
Wire Oven Rack – Part Number: WP314763J
Wire Oven Rack
PartSelect #: PS11740769
Manufacturer #: WP314763J
This wire oven rack is used on some ovens and ranges. It is twenty-three inches long and it is made of metal.
$52.10
  In Stock
Order within the next 10 hrs and your part ships today!
Oven Light – Part Number: WP74011278
Oven Light
★★★★★
★★★★★
(1)
PartSelect #: PS11744440
Manufacturer #: WP74011278
This oven light assembly is a little over four inches long. It is a six hundred an sixty watt light bulb.
$103.77
  In Stock
Order within the next 10 hrs and your part ships today!
Surface Burner Element - 8 Inch – Part Number: WP3191454
Surface Burner Element - 8 Inch
★★★★★
★★★★★
(2)
PartSelect #: PS11740903
Manufacturer #: WP3191454
This large surface burner is 2100W.
$141.35
  In Stock
Order within the next 10 hrs and your part ships today!
Screw – Part Number: WPY706189
Screw
PartSelect #: PS11757587
Manufacturer #: WPY706189
$10.25
  In Stock
Order within the next 10 hrs and your part ships today!
Installation Screw – Part Number: WP3400882
Installation Screw
PartSelect #: PS11741612
Manufacturer #: WP3400882
This screw is sold individually.
$10.25
  In Stock
Order within the next 10 hrs and your part ships today!
Hex Nut – Part Number: WP488130
Hex Nut
PartSelect #: PS11742711
Manufacturer #: WP488130
Part may differ in appearance, but functions same as original.
$12.19
  In Stock
Order within the next 10 hrs and your part ships today!
Outer Bake Element - 2800W – Part Number: WP77001096
Outer Bake Element - 2800W
PartSelect #: PS11744641
Manufacturer #: WP77001096
This bake element is found on the bottom of the oven.
$62.33
  In Stock
Order within the next 10 hrs and your part ships today!
Hinge Kit - Left Side – Part Number: R0706010
Hinge Kit - Left Side
PartSelect #: PS1729956
Manufacturer #: R0706010
  No Longer Available

Questions And Answers for FDU-248-2D

Be the first to ask our experts a question about this model!

Common Symptoms of the FDU-248-2D

[Viewing 4 of 4]
Element will not heat
Fixed by
these parts
Fixing Fixing Fixing
Show All
Little to no heat when baking
Fixed by
these parts
Fixing
Show All
Door won’t close
Fixed by
these parts
Fixing Fixing
Show All
Little to no heat when broiling
Fixed by
these parts
Fixing
Show All
Keep searches simple. Use keywords, e.g. "leaking", "pump", "broken" or "fit".
Modern Maid Oven, Bake element barely warming
1. Locate range breaker and switch off.
2. Verify range has no power by switching fan or light on.
3. Have someone shine flashlight beam on inside back of oven.
4. Use screwdriver to remove two screws holding outer element to back of oven wall.
5. Carefully pull element out until wires attached to ends of element can be seen.
6. Pull connectors off ends of element, don't let them pull back into the insulation material.
7. Connect new element to wires.
8. Push element back into position and re-attach the screws.
9. Make sure that the element is resting nicely on the floor of the oven.
10. Reset the range breaker and test the oven.
Parts Used:
Outer Bake Element - 2800W
  • Philip from Severna Park, MD
  • Difficulty Level:
    Really Easy
  • Total Repair Time:
    Less than 15 mins
  • Tools:
    Screw drivers
15 of 18 people found this instruction helpful.
Was this instruction helpful to you?
Thank you for voting!
One burner didn't work all the time the other would go red hot
I unplugged the stove from the outlet, then removed the two burners I was going to be working on and the drip pans. Then I raised the top part of the stove and removed the screws holding the plug-in blocks to the stove. Then I cut the two wires going to the old plug-in block and stripped the wires back to match the new wire parts. Then I placed the sleeves over the new wires, then I placed the new wire beside the wire I stripped on the stove and screw on the wire cap making sure it was tight. I repeated this three more times, once I had all four wires connected I then placed the sleeves over the connections and heated them up until they were formed around the connection. Once I had all the connections done I placed one wire at a time into the plug-in block until it locked into place ( I looked at my old plug-in blocks first to make sure I placed the new wires in the correct way ).I then used the metal mounting bracket that matched my old ones and snapped the correct one onto each plug-in block. Before mounting them onto the stove I compared them to my old ones to make sure they were correct. Then I used the new screws to mount them to the stove. I took a second look at everything I had done before closing the top cover of my stove. After lowering the cover back into place I put both the drip covers in place and then installed the burners.I then plugged the stove back into the outlet and tried the burners. This was very simple and the video on the web site shows this very well which made my job very simple.
Parts Used:
Surface Burner Plug-In Block Kit
  • Phillip from Pekin, IL
  • Difficulty Level:
    Really Easy
  • Total Repair Time:
    15 - 30 mins
  • Tools:
    Screw drivers
14 of 15 people found this instruction helpful.
Was this instruction helpful to you?
Thank you for voting!
hard to get old one out
easy to put in
Parts Used:
Oven Light
  • robert from chatham, VA
  • Difficulty Level:
    Really Easy
  • Total Repair Time:
    15 - 30 mins
  • Tools:
    Nutdriver, Pliers, Screw drivers
31 of 70 people found this instruction helpful.
Was this instruction helpful to you?
Thank you for voting!