This an authentic OEM 40-Watt replacement light bulb, used in a number of household appliances. It is specially designed to withstand extreme temperatures, which is why these replacement bulbs are mos...
This is a multi-use and multi-appliance screw. It can be used on a microwave, refrigerator, range/oven, air conditioner, dehumidifier, washer, or dryer. The measurements of this screw are 8 x 1/2 inch...
This electric oven bake element with female spade connections is 16 inches long and 19 inches wide. It has a terminal depth of three inches, making a total element length of nineteen inches.
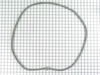
This hinge is located on each side of the oven door.
No Longer Available
Questions And Answers for 9875VVV
Ask our experts a question about this model and we'll get back to you as soon as possible!
1 question answered by our experts.
< Prev
1
Next >
Sort by:
Search filter:
Clear Filter
Your search term must have 3 or more characters.
Keep searches simple. Use keywords, e.g. "leaking", "pump", "broken" or "fit".
Sorry, we couldn't find any existing answers that matched.Try using some different or simpler keywords, or submit your new question by using the "Ask a Question" button above!
Lucille
October 26, 2023
Do they sell this model oven? My oven will only heat up to about 130 degrees.
For model number 9875VVV
Hello Lucille, thank you for getting in touch. We would recommend checking the temperature sensor, part number PS1570174, to fix your issue. This wall oven is not available to buy anymore. Good luck with your repair!
Removed the oven door by opening slightly, then pic door up to remove. Remove 2 screws holding oven sensor in place, gently pull on sensor to remove, had to remove about 8 inches to get at plastic connector. Unplug connector, had to use an adapter cable supplied with the PartSelect kit to install new sensor, push cable back into opening, reinstall 2 screws. The oven works fine! Note that due to thermal lag the temperature overshoots to 370 degrees and undershoots to 340 degrees, this appears to be normal oven operation. Putting door back in place was easy.
First I removed the two screws that hold the element in place. I then pulled the sensor out about 3 inches and disconnected the two wires. Next, I connected new sensor and screwed the new sensor back in place. One area for caution. Make sure that the electrical connection is pushed in past the insulation on the back side of the oven. Failure to do so will cause the plastic plug connector to melt from oven heat.
Inside the oven, I removed one Phillips screw on each side where the element mounts to the back oven wall. Then disconnected the wire on each side using pliers. Unscrewed glass lens, unscrewed light bulb. Replaced all pieces in reverse order. Took less than 10 minutes.


 Diagram and Parts List for Magic Chef Wall Oven")


 – Part Number: WP74003020")


 – Part Number: WP74003020")