These agitator directional cogs are commonly referred to as dog ears. They come four to a package and are usually used with direct drive washing machines.
$5.60
In Stock
Order within the next 9 hrs and your part ships today!
This 18 ml bottle of white appliance touch-up paint is used to cover scratches or marks on your appliance. The white touch-up paint can be used on refrigerators, microwaves, ranges, clothes dryers, an...
$10.21
In Stock
Order within the next 9 hrs and your part ships today!
The point of the lid switch is for the tub to stop spinning when the washer lid is opened. It is a safety precaution just in case someone decides to stick their hand inside the washer while the tub is spinning.
$72.93
In Stock
Order within the next 9 hrs and your part ships today!
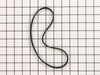
This is a replacement clutch assembly or cam kit for your washer. The clutch assembly is mounted on the drive shaft on the bottom of your washer. You may need to replace the clutch assembly if the spl...
$69.35
In Stock
Order within the next 9 hrs and your part ships today!
This part is the replacement lid latch or latch assembly for your top-load washer. The lid latch holds your washer door closed, and allows the washer to run its cycle. If the lid latch is damaged, you...
$56.62
In Stock
Order within the next 9 hrs and your part ships today!
Order within the next 9 hrs and your part ships today!
Questions And Answers for 7MWTW1904DM1
Ask our experts a question about this model and we'll get back to you as soon as possible!
3 questions answered by our experts.
< Prev
1
Next >
Sort by:
Search filter:
Clear Filter
Your search term must have 3 or more characters.
Keep searches simple. Use keywords, e.g. "leaking", "pump", "broken" or "fit".
Sorry, we couldn't find any existing answers that matched.Try using some different or simpler keywords, or submit your new question by using the "Ask a Question" button above!
Dave
May 2, 2023
Looking for a Suspension rod kit.
For model number 7MWTW1904DM1
Hi Dave, thank you for reaching out. The suspension rod kit, part number PS11703288, is compatible with your model. We hope this is what you were looking for!
WE have this Whirlpool washer in costa rica. The technician said the mother board needs to be replaced - sometimes doesnt do final spin, sometimes fills for rinse and stops with the tank full of water, or doesnt complete a full cycle. The tech said the mother board isnt receiving the signal coming from the sensor at least most of the time. The part is W10723770/AP6026096. Can you help?
For model number 7MWTW1904DM1
Hi Daleen, thank you for the question. Yes, the issue you are facing can be because of a faulty control board, part number PS11730061. But before replacing it, we recommend checking the lid latch assembly, part number PS3497627. We hope this sorts out your problem!
First pry off the cap of the agitator. Then using a socket remove the bolt that holds the plastic cup in place. Remove this cup by prying it loose from the two tabs that hold it in place. Once this cup is removed you can get to the broken cogs. Slip the new cogs into the underside of the cup, and slide the cup back down in the agitator housing using the slots on the side for a guide. (You may want to remove the entire agitator and assemble everything upside down, then flip it all back over to mount, so the cogs don't fall out). Tighten the bolt, snap the cap back in place on top of the agitator and your'e done. Easy repair.
pull off softner dispenser, pop off agitator cap by inserting straight screw driver into small slot, remove bolt inside agitator with socket wrench and long extension, pull agitator straight up off shaft, place agitator on floor, with feet holding bottom half pull top half apart from bottom half by pulling straight up, note direction of old cogs remove and replace with new, reassemble
The instructions that came with the part were worthless. Essentially, unplug, put in new part, plug it back in. I spent a considerable amount of time on the internet and finally found a video showing how to open the top. Unlike other models, it is held down by clamps in the back rather than clips in the front. Once finding this information the installation was simple. Remove the clamps and the back of the console, slide the top forward and lift, remove and replace the lock and reassemble. You don't even have to remove the hoses.


 Diagram and Parts List for Whirlpool Washer")