This 18 ml bottle of white appliance touch-up paint is used to cover scratches or marks on your appliance. The white touch-up paint can be used on refrigerators, microwaves, ranges, clothes dryers, an...
The point of the lid switch is for the tub to stop spinning when the washer lid is opened. It is a safety precaution just in case someone decides to stick their hand inside the washer while the tub is spinning.
This is a replacement clutch assembly or cam kit for your washer. The clutch assembly is mounted on the drive shaft on the bottom of your washer. You may need to replace the clutch assembly if the spl...
This part is the replacement lid latch or latch assembly for your top-load washer. The lid latch holds your washer door closed, and allows the washer to run its cycle. If the lid latch is damaged, you...
The instructions that came with the part were worthless. Essentially, unplug, put in new part, plug it back in. I spent a considerable amount of time on the internet and finally found a video showing how to open the top. Unlike other models, it is held down by clamps in the back rather than clips in the front. Once finding this information the installation was simple. Remove the clamps and the back of the console, slide the top forward and lift, remove and replace the lock and reassemble. You don't even have to remove the hoses.
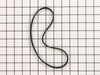
Well, first investigated and found loose nut on drive clutch. First take off the two screws with nut drive then cover off using a screwdriver blade to snap off the cover. Then socket ratchet to take off the nut on drive clutch. take off belt by slowly rotating the drive gear. two screws that hold the electronics to the upper drive clutch and put aside, so you can snap off the cover for drive clutch on upper part with screwdriver and off the parts come and install whole unit back as took it apart. Line up the new upper clutch so that is position as was before. (Using parts diagram helps a lot as www. partsselect.com has for you or Maytag.com.) Then put the electronic part board back on and the gear and nut. Make sure it is tight by several attempts to make sure it's snugged up good and then slowly roll belt back on the pulley and motor drive. Put your cover guard back on with two screws and done.


 Diagram and Parts List for Maytag Washer")