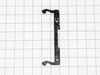
The locker, or door latch assembly fits to the inside of the microwave door, and keeps the door closed. If the door on your microwave oven doesn’t appear to close properly, you may have a problem with...
The turntable motor coupler connects the turntable motor to the tray. If the turntable on your microwave will not rotate, you may have a faulty motor coupler. The coupler commonly has a D shaped openi...
After watching a few youtube videos, I used a phillips SD to take controll pannel off to access the switches that sense when microwave door is closed. Swapped out all 3 switched and mocrowave works like new. $20 fix (shipping included)
I replaced the whole component with all three switches in it even though only one switch was bad . Taking out one switch out of the holder unit would probably have damaged the unit that was holding the switches. Easy install and it works great again .
The countdown timer was working but no "cooking" happening. Did not hear the familiar sound of the heating part working.
Determined it might be some simple switches for under $15 dollars. Bought one of each. They allow the microwave to turn on/activate by signaling that the door is properly latched. My wife noticed that it was failing and then failed over the course of about a day. Several times where it worked, then did not work. The timer was counting down one time and then when she opened the door the microwave heating component turned on. Guess it had activated the switch as she was opening the door.
Procedure to repair - Unplug - Remove two screws on front top - allows you to remove the vent. Realized there was a charcoal filter there that I had never replaced so ordered that after the fix. - Remove two screws to pull off the front right panel (area where your microwave buttons are) One at the top under the before mentioned vent and one under the microwave on the far right corner. - Have someone hold the panel because wiring is to short to place it on a ledge while connected or take a picture and remove connections. I simply held it while my daughter undid the micro switches. - Carefully remove micro switches. There were two "orange" button ones so I chose the top one to replace along with the green button one that I had ordered, so I simply pulled an orange from the bottom and a green from the top latch area. You may have remove the part that holds the switches since it was a little tough with the wires in the way and not knowing how the switches stay put. - plug in new switches and place in the brackets that hold them in place - reverse everything you did. Viola - a working microwave vs purchasing a brand new for several hundred dollars or having to call in a technician.I love that my young kids did this project with me and we actually got it running. Don't like to have to throw away more items at the landfill.


 LG Wall Oven")
 LG Wall Oven")
 LG Wall Oven")
 LG Wall Oven")
 LG Wall Oven")
 LG Wall Oven")
 LG Wall Oven")
 LG Wall Oven")


 – Part Number: 6851W1A002E")