


Appliance Parts
Shop With Confidence


REPAIR > WATER HEATER > CHANGING BETWEEN HOT AND COLD
How to Fix a Water Heater That's Not Heating Properly
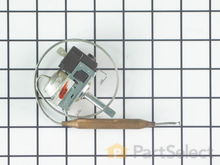
Control Thermostat
If your hot water heater temperature switches between hot and cold, there may be a problem with the control thermostat. Your water heater has two thermostats, an upper and lower. Fluctuations between hot and cold temperatures indicate that only the upper water heater circuit is working. This thermostat supplies power to the upper heating element, and diverts power to the lower element once the ideal temperature is reached in the water at the top of the tank. If the upper thermostat fails to send power to the lower one, it will not heat the water toward the bottom of the tank. To repair your hot water heater, you must find out which thermostat is causing this problem. Turn off power to the water heater, open a hot water faucet and wait for the temperature to drop to a safe level. Remove the lower access cover from the side of the tank, push aside the insulation cover and remove the wires that are attached to the lower thermostat. Use a multi-meter to test the continuity of the thermostat. Set the meter to R 1 ohms, and measure the terminals of the thermostat. No continuity means the thermostat is not working and should be replaced. To replace it, lift the spring mounting bracket off and secure the new one in place, making sure it is firmly placed against the side of the tank. If the thermostat appears to be in order, check the lower element for continuity using your multi-meter. If it is also functioning, you will need to test the upper thermostat. To do this test, the water must be hot enough for the upper thermostat to direct power to the lower one, meaning your water heater must have power for long enough to heat the water. Once this has happened, turn it back off, and remove the upper access cover to access the thermostat the same way you did with the lower one. Remove the wires from terminals L1 and T4. Check for continuity between these two terminals (as long as the water has reached the ideal temperature). If there is no continuity, it means the upper thermostat needs to be replaced. For gas water heaters, the gas valve controls the temperature. The valve assembly features a dial which you can use to adjust the temperature. If the water temperature fluctuates but the pilot light is on, the gas valve assembly is probably at fault. This repair will need to be done by a qualified technician.


More About This Repair
- Customers rate this repair as Easy
- Takes 30 - 60 mins
We have 9 installation instructions
We have 0 step-by-step videos
Lower Heater Element
If your hot water temperature changes between hot and cold unpredictably, you may need to test the lower hot water heater element. On home water heaters, there is an upper and lower thermostat, and the upper one diverts power to the lower one when the water at the top of the tank reaches the correct temperature. If the lower element isn’t working, the water temperature will fluctuate. To test the element, turn off power to the heater and remove the lower access cover. Push aside the insulation and disconnect the wires from the heating element. Use a multi-meter, set to R 1, to test for continuity. It should have continuity between 10 to 20 ohms between the two terminals. If the heating element has continuity, check the thermostat for continuity. If it has none, the thermostat will need to be replaced. In order to replace the element, you will need to drain the tank. To drain the tank, shut off the inlet water valve, attach a hose to the drain valve, open the drain valve and hot water faucet and wait until the water is lower than the heater element. Remove the element with a socket or element wrench, and ensure that the new gasket is secure in place as you tighten the new element. Connect the wires to the element terminals and shut the drain valve before refilling the tank. Keep an eye out for leaks before turning the power back on.


More About This Repair
- Customers rate this repair as Easy
- Takes 30 - 60 mins
We have 0 installation instructions
We have 0 step-by-step videos