This tank stores water until the water actuator is activated and water is requested.
How Buying OEM Parts Can Save You Time and Money
Part Videos
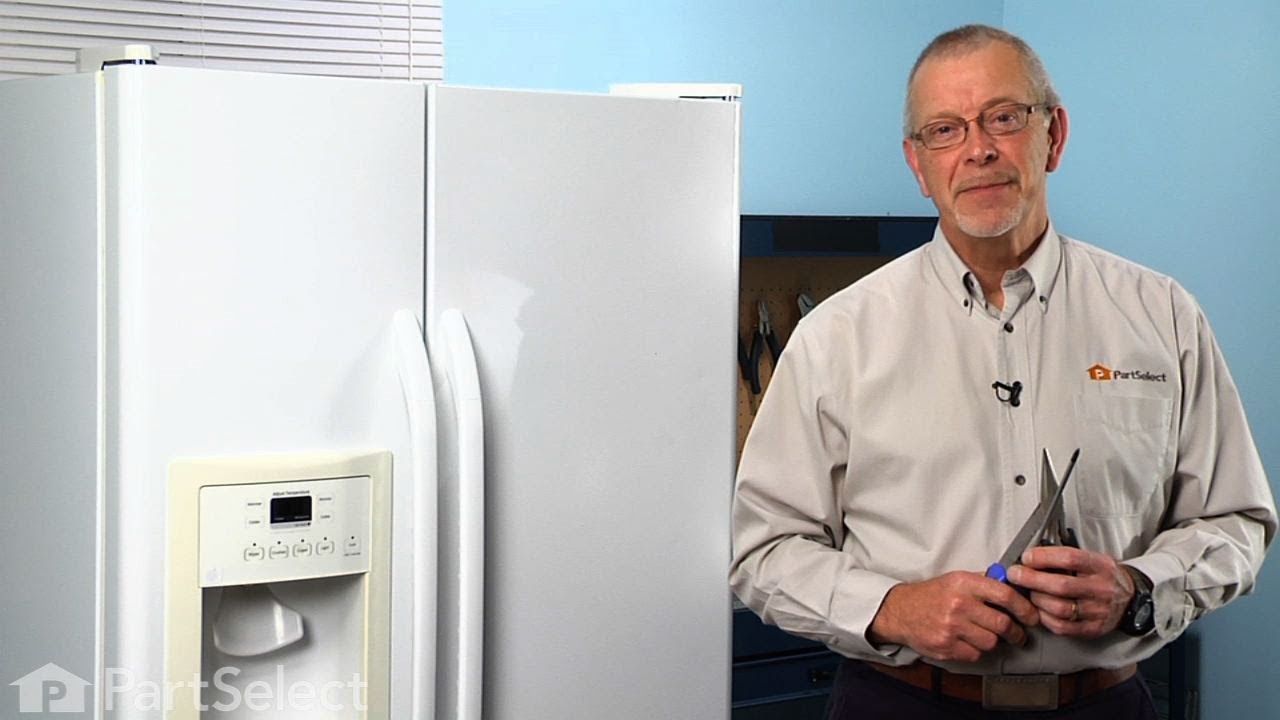
Replacing your General Electric Refrigerator Water Tank Assembly
Troubleshooting
This part fixes the following symptoms:
Leaking | Not dispensing water | Leaks water
This part works with the following products:
Refrigerator.
This part works with the following products:
General Electric, Hotpoint.
Part# WR17X11440 replaces these:
AP3205548, 1091942
Customer Reviews
Average Rating:
★★★★★
★★★★★
25 Reviews
4.8
Filter By Rating:
5 Stars
21
4 Stars
3
3 Stars
1
2 Stars
0
1 Star
0
< Prev
1
2
3
Next >
Sort by:
Search filter:
Clear Filter
Your search term must have 3 or more characters.
Keep searches simple. Use keywords, e.g. "leaking", "pump", "broken" or "fit".
Sorry, we couldn't find any existing reviews that matched. Try using some different or simpler keywords.
★★★★★
★★★★★
David L - January 18, 2024
Verified Purchase
Fast reliable service, easy repair, great part!
Couldn’t believe how easy it was to find the right part to order. The tracking system allowed me to see when the part would arrive. It was delivered faster than expected. When it arrived it had a link to an installation video that made the job simple. Couldn’t be more satisfied!
★★★★★
★★★★★
Rodger W - November 3, 2022
Verified Purchase
Easy repair
Was exactly what I needed!
★★★★★
★★★★★
Mark A - June 8, 2022
Verified Purchase
Water Tank replacement
My water tank in my refrigerator started to leak and I was concerned about where I'd find a replacement. I simply Googled the model number and Part Selects web site was at the top of the address list. They provided a full parts list including an explosion drawing so it was very easy to identify the part I needed. A simple click of the part and it was in my cart. I checked out, and the part arrived 3 days later. 110% satisfied!!
★★★★★
★★★★★
Tracey C - May 8, 2022
Verified Purchase
Awaiting installation of part
It looks like the right part. Part not installed yet. Household passing covid back and forth. Had to cancel the installer twice. I sure hope it works after the long wait for installation. We are still sick today. May 8 th. Hope if part is not right that it could be returned.
★★★★★
★★★★★
Mark G - April 5, 2022
Verified Purchase
Water Tank Assembly -- worked as expected
The part arrived much sooner than expected and it was easy to install.
★★★★★
★★★★★
Kerri B - March 19, 2022
Verified Purchase
Easy repair, great part
The part works fine .issue is now fixed
★★★★★
★★★★★
Heather W - October 28, 2021
Verified Purchase
Exactly what I needed
The part came quickly and the installation video was helpful. It worked great and definitely saved me a service call. Partselect.ca is a great choice for the “Do it yourselfer! “
★★★★★
★★★★★
Adam G - September 7, 2021
Verified Purchase
Good quality, and did the job.
Quick to install and worked better than I had hoped. Water tastes better and I'm glad it's filling glasses instead of creating pools under the fridge.
★★★★★
★★★★★
Douraid Y - January 19, 2021
Verified Purchase
Easy repair
The video was very helpful to replace the part
★★★★★
★★★★★
Pierre L - January 15, 2021
Verified Purchase
Bonne pièce
Exactement la pièce que j'avais besoin. Livraison rapide. Vidéo explicatif pour l'installation bien fait. Cinq étoiles.
< Prev
1
2
3
Next >
Customer Repair Stories
Average Repair Rating: 3.5 / 5.0, 21 reviews.
What's this?
< Prev
1
2
3
Next >
Sort by:
Search filter:
Clear Filter
Your search term must have 3 or more characters.
Keep searches simple. Use keywords, e.g. "leaking", "pump", "broken" or "fit".
Sorry, we couldn't find any existing installation instruction that matched.
Water tank cracked
So there's a plastic water tank in our fridge, its purpose is to chill water so it's nice and cold when you dispense it from the freezer door tap. Long story short, during out kitchen remodel I stored the fridge in our unheated Wisconsin garage. The leftover water in the tank froze, expanded and ruptured it. Got the replacement, super easy to fix. The tubing connections are shark bite, just press them together and they're water tight. Pretty simple plug and play operation but you do have to pull the fridge all the way from the wall and shut off the water supply. I replaced the filter too, just incase the freezing water messed with it in some undetectable way.
1. Turn-off water 2. Removed drawers and bottom three shelfs 3. Remove screw inside refrige that is holding the water tank in place 4. Remove bottom front grate on fridge (2 screws) and disconnect water line from quick disconnect (residual water will run out of line) 5. Remove bottom cover on back of fridge 6. Disconnect water line from quick disconnect on bottom left side when looking from the back of the fridge (residual water will run out of line) 7. Remove water tank from inside of fridge 8. Install new water tank - install screw that hold water tank in position 9. Route lines through hole and to the two locations you removed the old ones 10. Install both lines by pushing them all the way in the quick disconnects. Pull on them to make sure they are secure. 11. Turn on water and look for leaks 12. Reinstall bottom front grate (2 screws) 13. Reinstall back cover (5 or 6 screws) 14. Install shelfs and drawers inside fridge
Other Parts Used:
Matt from RPV, CA
Difficulty Level:
Easy
Total Repair Time:
30 - 60 mins
Tools:
Screw drivers
115 of 130 peoplefound this instruction helpful.
Was this instruction helpful to you?
Thank you for voting!
Cold water reservoir tank was cracked and spraying the interior of the fridge
Symptom was water running out of bottom of fridge. Found water pooled up under bottom drawer. Removed (3) drawers and found water was "spraying" from the reservoir tank at back of fridge. Unboxed the new "tank" and confirmed it was the right one by holding it up to the one still in the fridge. Pulled fridge from the wall; removed the rear bottom cover panel on the back using the nutdriver. Removed the solenoid assy by taking that single hex screw out. Push down on the blue circular flange where tube supply enters solenoid, and release the tubing from the solenoid. Remove front bottom cover with phillips screwdriver. Located 2nd tubing connector below freezer (under the unit) and used the same procedure to release that tube from the coupling. Removed screws from tank on inside of fridge, after removing several shelves that were in front of it. Pulled the tubing from the old unit up and out. Discard. Got new unit and fed tubes through the hole the others came out of (back right corner of fridge) MAKE SURE THE NEW TUBES HAVE THEIR "stoppers" IN PLACE. You don't want to contaminate the new tubes with insulation or other debris. Make sure the "o" ring that seals the tubes on the inside of the fridge (supplied with new unit)and the styrofoam insulation stays in place to keep air from leaking through the holes the tubes go through. Installation of the (2) tubes is simple, simply push them into the connector on the solenoid, and the coupler under the freezer. You'll need to feed the longer tube from the back to the front left corner where this coupler is. After making the connection, I bolted the solenoid unit back to the fridge (only 1 screw) and then tested the unit to see there were no leaks before I buttoned everything up. NO LEAKS!! Put the front bottom grill back on with the (2) phillips screws, and the back bottom cover back on with the hex screws removed near the beginning. Probably took longer to write this than it did to make the repair.
Other Parts Used:
Thomas from Waynesboro, VA
Difficulty Level:
Easy
Total Repair Time:
15 - 30 mins
Tools:
Nutdriver, Screw drivers
41 of 49 peoplefound this instruction helpful.
Was this instruction helpful to you?
Thank you for voting!
Cracked water tank from freezing
Followed your instructions and you made it simple.Thanks a million.
Other Parts Used:
Steve from Easton, MO
Difficulty Level:
Easy
Total Repair Time:
15 - 30 mins
Tools:
Nutdriver, Screw drivers
14 of 19 peoplefound this instruction helpful.
Was this instruction helpful to you?
Thank you for voting!
Water Leak in vegetable Drawers
shut off water supply to unit, pull the unit out,unplug, unscrew lower back cover, locate valve relay unit (bottom left, black and clear hose coming out of it) undo the quick connect for the clear water hose on the right (black one is for ice).
front of the unit, bottom left, locate the other hose (longer one) running to the freezer door from under the unit, undo quick connect.
Inside unit, remove middle drawers, careful with the glass panels as these just lay on top and are not fixed.
undo the 3 screws for the old tank, pull it out, snake the hoses thru the grommet on the bottom, reverse process...all set!
Other Parts Used:
John from Miami, FL
Difficulty Level:
Easy
Total Repair Time:
15 - 30 mins
Tools:
Nutdriver, Screw drivers
13 of 17 peoplefound this instruction helpful.
Was this instruction helpful to you?
Thank you for voting!
Water collecting under vegetable tray
Very easy to install. Simply follow the hoses to the end. One ends under the freezer door in front. The other requires you to take the back panel off the fridge - then its right there. There is a blue valve where it connects. Pull back on the white ring at the top of the blue valve and the old tube will release. Then you can just pull the old water tank out and thread the new tubes through. Connect the same way and you disconnected.
Other Parts Used:
Kimberly from Suwanee, GA
Difficulty Level:
Really Easy
Total Repair Time:
30 - 60 mins
Tools:
Nutdriver, Screw drivers
13 of 14 peoplefound this instruction helpful.
Was this instruction helpful to you?
Thank you for voting!
water was squirting out a crack in water tank assembly.
This was a great opportunity to clean the bottom 3 shelves. I unplugged the frig.,disconnected both water lines, unscrewed water tank, pulled water lines out, put new tank in and pushed new water lines in and connected them, and plugged frig. back in. I grabbed my glass to get a drink and feeling proud but no water. I thought about this for a while and came to the conclusion that the freezer was set to 9 and the water had frozen in the value in the door. I dropped the temp. in the freezer from 9 to 3 and after about 2 days the water worked just fine. I emptied the ice because it was clumped into one big piece. I heard the ice maker going to town all day long. I called for ice later and the motor that dispenses the ice was humming and no ice was dropping. I thought about it and could not come up with the answer so I called tech. at GE and he was no help. So I solved one problem and now I have another that I don't have an answer to. My last attempt is to remove the motor housing to see if gears are jammed or something else.
Other Parts Used:
Fillmore from Asheville, NC
Difficulty Level:
Really Easy
Total Repair Time:
15 - 30 mins
6 of 11 peoplefound this instruction helpful.
Was this instruction helpful to you?
Thank you for voting!
The water dispenser was not working, then the tank was leaking
The water dispenser was not working, but when I pressed the lever I could hear it attempt to disperse water. But when looking inside I could see that when I pressed the lever it was spewing water from the tank. I was not certain why it was not dispersing water, but I knew I had to replace the leaking tank. I found several YouTube videos that described in detail how to replace the tank (and I highly recommend doing that). The removal and replacement was very straight-forward and that part took only about 30 minutes. But the time-consuming part was cleaning behind the refrigerator and cleaning the inside as well (since I already had most of the shelves out). Then once I got it all back together I tested the water dispenser and still nothing. So I disconnected the line coming out of the tank going up into the door and then tried again. This time water was coming out of the line. So at that point I was fairly confident that the problem was a frozen line somewhere in the door. After leaving it unplugged for a while and also heating the door with a hair dryer, I connected the line again and got water dispensed.
Other Parts Used:
Steve from AUBURN, IL
Difficulty Level:
Really Easy
Total Repair Time:
30 - 60 mins
Tools:
Nutdriver, Pliers, Screw drivers
4 of 4 peoplefound this instruction helpful.
Was this instruction helpful to you?
Thank you for voting!
Busted water tank
Removed the lower 2 drawers, lower front grill, rear lower compressor cover. Removed the 2 water lines from the quick connects and screws from the water tank. Pulled lines through the hole in the right rear of the refrigerator and removed tank. Then reversed steps to install new tank. The upper plastic tank cover has 2 buttons on top that are really screws with a plastic cap, these are easily removed with pliers.
Other Parts Used:
Larry from Shepherdsville, KY
Difficulty Level:
Really Easy
Total Repair Time:
15 - 30 mins
Tools:
Nutdriver, Pliers, Screw drivers
4 of 6 peoplefound this instruction helpful.
Was this instruction helpful to you?
Thank you for voting!
drinking water cooler leaked at the seam.
ordered replacement part with the understanding that tubing to the water valve could be easily removed. The tubes were carefully removed with some difficulty, and when the new tubes were inserted one leaked. The tube seat was not snug. Therefore a new water valve was purchased. The installation was successful within about 20 minutes. If I were to do the job again, both the water resevoir and valve would be ordered together.
Other Parts Used:
Alric H from Waynesville, NC
Difficulty Level:
A Bit Difficult
Total Repair Time:
15 - 30 mins
Tools:
Nutdriver, Pliers, Screw drivers
4 of 6 peoplefound this instruction helpful.
Was this instruction helpful to you?
Thank you for voting!
< Prev
1
2
3
Next >
Questions and Answers
Ask our experts a question about this part and we'll get back to you as soon as possible!
19 questions answered by our experts.
< Prev
1
2
Next >
Sort by:
Search filter:
Clear Filter
Your search term must have 3 or more characters.
Keep searches simple. Use keywords, e.g. "leaking", "pump", "broken" or "fit".
Sorry, we couldn't find any existing answers that matched.Try using some different or simpler keywords, or submit your new question by using the "Ask a Question" button above!
Vernon
August 11, 2017
Water tank keeps freezing. Prevention???????
For model number PSC23MGMAWW
Hi Vernon,
Thank you for your inquiry. For certain refrigerators, the drawers inside refrigerator have their own temperature settings. Food inside the refrigerator will absorb the cold air. If the bins are set to the highest cold setting and they have no food or very little food inside them then the water tank will freeze. You should only use the highest cold setting if the bins are full. In general as well, if there is very little food in the refrigerator cold air will sink and stay at the bottom of the refrigerator and this will cause the water tank to freeze. I hope this helps. Thank you and have a great day!
16 people found this helpful.
Was this helpful?
Thank you for voting!
Joe
December 10, 2018
I installed the water tank assembly, would never have tried without the video, great job. How long does it take for the frig to distribute water after installing? Also i have a slight drip from the control unit in the back where to water lines connect. I don’t see this part, can you provide replacement? Thanks again, videos are just great!!
For model number GE ZFSB23DNDSS
Hello Joe, thank you for your question, and feedback about completing the tank repair! The water should be distributed within a few minutes. Allow for a bit of time for the water to get back through the system. The part the water lines connect to at the back of the fridge is called the water valve. If there is a little water leaking from there it should be replaced. That part number is PartSelect Number: PS304374 and we have an installation video on that part as well! Good luck!
7 people found this helpful.
Was this helpful?
Thank you for voting!
Mike
October 30, 2017
Hi! I have an odd problem. I can't get water out of the dispenser in the door but the ice maker makes ice. I disconnected the tubing from the water solenoid and water flows fine through the solenoid. As far as I can tell, the tank and tubing are the only things between the solenoid and the water dispenser.Is it possible that they are blocked?If so, should I just replace the whole tank assembly? Thanks
For model number GSS25WGTACC
Hi Mike, Thank you for the question. In most cases if the dispenser is not dispensing it is the Micro Switch. The switch can be tested for continuity with a Multi Meter. It is also good to have the filter replaced ever 6 months. Only way to know if the water tubes are blocked is to remove them and run water through them. Hope this helps!
6 people found this helpful.
Was this helpful?
Thank you for voting!
Bill
May 3, 2019
The water dispenser tank on my GE refrigerator (model tfx20jrbbwh) has a crack and is leaking. The water dispenser tank for this model (part # wr17x3105) is apparently not available. Can i just eliminate the tank by running tubing from the inlet water valve to the water dispenser supply line or use a coupler to connect the in to out tubing to bypass the tank? If this would work, what size and kind of tubing do i need? Thanks for your help.
For model number GE TFX20JRBBWH
Hello Bill, thank you for your question. Yes, you can eliminate that tank by adding tubing and couplers. the water tubing connected to the water tank WR17X3105 is a 5/16" waterline. I hope this helps!
5 people found this helpful.
Was this helpful?
Thank you for voting!
Connie
October 23, 2019
Longer hose from tank is leaking. Depending on where its leaking can it be bypassed w/blue connector? So I'd be cutting out cracked piece and putting ends in connector. Do you have part number for blue connector? Also do you charge for shipping?
For model number PSS26MGPACC
Hello Connie, Thank you for the question. Very sorry but I am not showing a Blue Connector but, If the line is cut straight, you should be able to use a Union, PartSelect Number PS758446. Hope this helps!
My fridge is 10 years old,and stop getting water and ice, any idea what it might be.
For model number GSHL5KGXCCLS
Hello Rene, Thank you for the question. This sounds like an issue with the Dual Inlet Water Valve, PartSelect Number PS304374. if the ice maker and dispenser are not getting water, the valve may be defective. Thank you for your inquiry, good luck with this repair!
3 people found this helpful.
Was this helpful?
Thank you for voting!
Charles Mcneely
August 15, 2017
What is the part number and can you sell me theplastic cover and foam that covers the water tank?
For model number gshl5kgxbcls
Hi Charles,
Thank you for your inquiry. We do provide the insulation tank foam. The part number for it is PS964273. If you have any questions, please do not hesitate to ask. Thank you and have a great day!
The water has a plastic smell and taste. Refrigerator is 15 years old and the water just now taste awful. The ice is just fine. Any ideas what might be wrong. I don’t use a filter since the water is filtered thru a reverse osmosis unit. Filters in the reverse osmosis unit have been checked and verified in good working order.
For model number Pss26mgpabb
Hi Glen, Thank you for the question. I suggest checking and flushing the waterlines. They can have a build up over time and if they have never been replaced or flushed in 15 years this maybe the issue. Hope this helps!
2 people found this helpful.
Was this helpful?
Thank you for voting!
Chuck
February 25, 2022
I am getting dripping water on the floor when we switch from cubes to water. there normally is a "click" sound when the change from ice to water is complete. If the "click" occurs within a couple seconds I have no leak. If the "click" is not heard, or occurs many seconds later, I still get water but then there is water dripping on the floor. Usually changing back to ice stops the dripping. I removed the kick-plate and can see water coming down the 1/4" water line and dripping onto the floor.
For model number GSS25GSHPCSS
Hello Chuck, thank you for writing. The Water tank Assembly part PS783769 is the first recommendation. Secondly, it could be a faulty Micro Switch PS8259956. We have a video for you to access. We hope to hear from you soon.
After installing water tank assembly, the tank only fills halfway because the pressure keeps building up.Kept priming it no avail.
it doesn't make no sense?
Hello Yana, thank you for contacting us, In order for us to locate the correct parts and repair information we will require the model number of the unit. Once you have located the model number please feel free to resubmit the question and we will be happy to help you. Look forward to hearing from you!
1 person found this helpful.
Was this helpful?
Thank you for voting!
< Prev
1
2
Next >
✖
Ask a Question
Ask our experts a question on this part and we'll respond as soon as we can.