Ask our experts a question about this part and we'll get back to you as soon as possible!
10 questions answered by our experts.
< Prev
1
Next >
Sort by:
Search filter:
Clear Filter
Your search term must have 3 or more characters.
Keep searches simple. Use keywords, e.g. "leaking", "pump", "broken" or "fit".
Sorry, we couldn't find any existing answers that matched.Try using some different or simpler keywords, or submit your new question by using the "Ask a Question" button above!
Jerry Ryner
December 20, 2017
My microwave currently vents inside. I’d like to change it to vent outside to reduce moisture put in the house when cooking. Is this the part i need to adapt this. I know i still will need vent. Are there instructions that come with part
For model number JVM1430BD002
Hi Jerry,
Thank you for your questions. Yes, this the part you would need so the microwave will vent outside. Before you begin any repair please unplug the appliance from the electrical outlet. To install the hood damper assembly, you will need to uninstall the appliance. First, you will need to remove the screws on the bottom of the microwave to release the panel. Next, remove the wire connectors from the light sockets. Then remove the wires from the retainers and then remove the bottom panel completely from the microwave. Have someone hold the microwave from the bottom while you unscrew the mounting screws from the top of the microwave. Carefully tilt the microwave down and remove the power cord from the cabinet. After you have completed this, remove the microwave from the mounting bracket and set it on a sturdy surface with a towel or blanket placed underneath it. Now remove the screws securing the old vent damper and carefully slide the damper up to remove. If the damper is on top of the oven, slide it to the left after the screws have been removed. Install the new vent damper by sliding it into position and if applicable secure it with the screws. Remove the tape to release the vent flap. Once this is done carefully place the microwave back on mounting bracket. Insert the power cord through the hole in the upper cabinet and then lift the microwave up so you can secure it with the mounting screws. Reattach the bottom panel and reconnect the wires to the light sockets. Secure the wires as required. Lift the panel up and secure it with the screws. You can now plug the appliance back in and it should now work for you. I hope this helps. Thank you and have a great day!
4 people found this helpful.
Was this helpful?
Thank you for voting!
Ron
April 15, 2018
I need to replace the vent cover above the microwave door. The plastic parts that the little screws goes thru are broken and the cover keeps falling off
For model number jvm1740dm1bb
Hi Ron,
Thank you for your question. The part number listed under your model number for the vent grille is PS1480886. I hope this helps. Thank you and have a great day!
1 person found this helpful.
Was this helpful?
Thank you for voting!
Jeff
March 22, 2019
My son remodeled his kitchen, he gave me the microwave. I want to direct vent out the back,is this the part i need?
For model number Jvm1650wh01
Hello Jeff, thank you for your question. Yes, this the part you would need so the microwave will vent outside. Before you begin any repair please unplug the appliance from the electrical outlet. To install the hood damper assembly, you will need to uninstall the appliance. First, you will need to remove the screws on the bottom of the microwave to release the panel. Next, remove the wire connectors from the light sockets. Then remove the wires from the retainers and then remove the bottom panel completely from the microwave. Have someone hold the microwave from the bottom while you unscrew the mounting screws from the top of the microwave. Carefully tilt the microwave down and remove the power cord from the cabinet. After you have completed this, remove the microwave from the mounting bracket and set it on a sturdy surface with a towel or blanket placed underneath it. Now remove the screws securing the old vent damper and carefully slide the damper up to remove. If the damper is on top of the oven, slide it to the left after the screws have been removed. Install the new vent damper by sliding it into position and if applicable secure it with the screws. Remove the tape to release the vent flap. Once this is done carefully place the microwave back on mounting bracket. Insert the power cord through the hole in the upper cabinet and then lift the microwave up so you can secure it with the mounting screws. Reattach the bottom panel and reconnect the wires to the light sockets. Secure the wires as required. Lift the panel up and secure it with the screws. You can now plug the appliance back in and it should now work for you. I hope this helps. Thank you and have a great day!
1 person found this helpful.
Was this helpful?
Thank you for voting!
Sherry
February 26, 2019
My microwave is giving me the following message "shortened steam sensor.....service may be needed". what part do i need to correct this matter? the only way i can use the microwave, is to unplug and when i need it reset the clock and then reheat what ever i'm reheating.
For model number JVM1540DP1WW
Hi Sherry,
Thank you for your question. The shortened steam sensor message you are seeing on your microwave is caused when you open the door too early when you are using the sensor cooking function. To resolve this, check to see if the door is open of if the "Start/Pause" button was pressed before any steam appeared during the cooking cycle. Close the door if it is open and/or press the "Start" Button immediately. I hope this helps. Thank you and have a great day!
Was this helpful?
Thank you for voting!
GARY
August 30, 2019
Can you tell me what the dimensions of the GE wb06x10436 hood damper assembly are. Thank you.
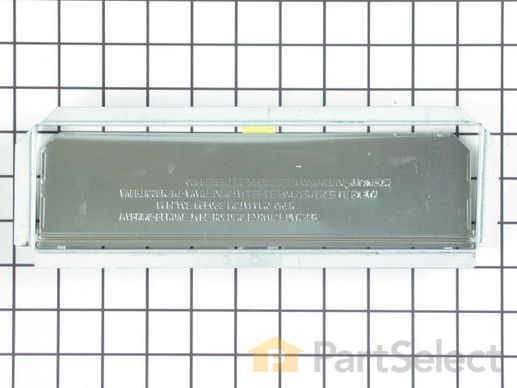
Hello Gary, thank you for your question. This Hood Damper Assembly is approximately 11" x 3.5". Good luck with your repair!
Was this helpful?
Thank you for voting!
Gregg
November 11, 2019
Exhaust cover does not open, fan blows fine, what is needed for exhaust cover to open
For model number JVM1860WF001
Hi Gregg, hard to say it could very well be the damper assembly PS651224 it could also need replacement grease filter PS227998 and charcoal filter PS224009. Thank you for your question and good luck with your repair!
I turn on vent but fan won't start,then about 15 minutes later it comes on for about 3 to 5 minutes and shuts off agin
For model number RVM1325WW 004
Hello John, Thank you for your inquiry. I would check the fan motor assembly with a multimeter to see if it has continuity. Hope this helps!
Was this helpful?
Thank you for voting!
Norma
January 13, 2018
I need to replace the 3 right bottom buttons that control the vent, boost and light of the microwave counter top all 3 buttons are pushed in. What is the part that i need to get this replaced? Thank you for your help.
For model number JVM2070SH001
Hi Norma,
Thank you for your question. You would need your entire control panel assembly to replace those buttons. I hope that helps. Good luck with your repair.
I need to replace the vent cover piece that goes along the top of the microwave. The plastic clips used to attach it broke. Which part is that??
For model number Jvm1540sn1ss
Hi Cheryl,
Thank you for your question. The part number for the vent grille is PS2353406. I hope this helps. Thank you and have a great day!
Was this helpful?
Thank you for voting!
Mike
October 20, 2017
Exhaust fan motor runs, but the fan blade does not move/blow air. The upper vent panel opens during opperation as it should. Also, regardless of speed chosen on panel, runs at same speed (high). Fan working is priority vs, speed. Is getting the fan to move an easy fix? Thanks! - mike
For model number PVM1870SM1SS
Hi Mike,
Thank you for your inquiry. Based on the information you provided you will need to replace the motor. I hope this helps. Thank you and have a great day!
Was this helpful?
Thank you for voting!
< Prev
1
Next >
✖
Ask a Question
Ask our experts a question on this part and we'll respond as soon as we can.
Something went wrong. Please try again later.
Your Question Has Been Submitted!
Our experts will send you an email as soon as your question has been answered.
Customer Reviews
Average Rating:
★★★★★
★★★★★
1 Review
5.0
Filter By Rating:
5 Stars
1
4 Stars
0
3 Stars
0
2 Stars
0
1 Star
0
< Prev
1
Next >
Sort by:
Search filter:
Clear Filter
Your search term must have 3 or more characters.
Keep searches simple. Use keywords, e.g. "leaking", "pump", "broken" or "fit".
Sorry, we couldn't find any existing reviews that matched. Try using some different or simpler keywords.
★★★★★
★★★★★
Wanda L - September 10, 2019
Verified Purchase
easy repair
the part was perfect fit, fast, will order parts from you again thanks
< Prev
1
Next >
Model Cross Reference
This part works with the following models:
PartSelect Number: PS651224
Manufacturer Part Number: WB06X10436