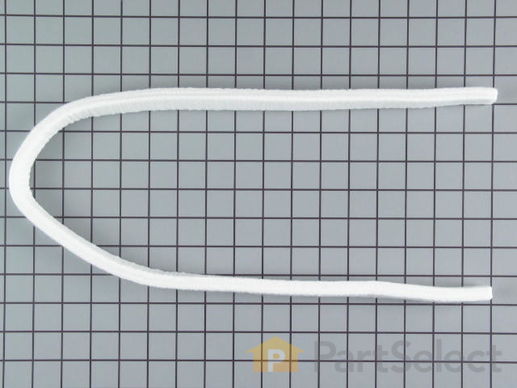
Part Location Diagram of 5303281049 Frigidaire Front Drum Seal
See part 9 in the diagram
( Grid squares measure 1x1 inch )
Customer Service Representative

Get in touch, we're here to help!

Daily 8am - 9pm EST

customerservice@partselect.ca

Front Drum Seal

$41.58
  On Order
PartSelect Number PS459776
Manufacturer Part Number 5303281049
Manufactured by Frigidaire
Product Description

Front Drum Seal Specifications

Used with dryers with a 27-inch drum.
How Buying OEM Parts Can Save You Time and Money

How Buying OEM Parts Can Save You Time and Money

Troubleshooting
This part fixes the following symptoms:
Noisy | Marks left on clothes
This part works with the following products:
Dryer.
This part works with the following products:
Frigidaire, Kelvinator, Gibson, Tappan.
Part# 5303281049 replaces these:
AP2142612, 3576, 08015429, 3281049, 5303281049, 8015429, Q000616042, WQ616042
Back to Top
Customer Repair Stories
 Average Repair Rating: 3.2 / 5.0, 14 reviews. What's this?
  • 1
  • 2
Sort by:
Sorry, we couldn't find any existing installation instruction that matched.
Clothes getting scorch marks, drum noise
First and foremost, I read the repair reviews here at parts source and found that a) Other people had the same symptoms, b)following their repair tips made it super easy.
What I would add to previous reviews is to pull the front off or the little acces grill in back and check to see what kind of belt you have. According to the model #, It showed the wide flat belt when in fact I had the smaller ribbed belt. Glad I checked before ordering.
A few things that will make your life easier is once you have the old upper guide/seal removed, put down the glue then use several med sized plastic spring clamps to hold the seal in place while the glue sets up, (@ 20-30 min). Their cheap and you should have some around anyway. When replacing the seals I would go ahead and replace the belt too. It's cheap and if your machine is 5+ yrs old probably is worn. Total cost of repair was about $60 (inc shipping). Took about 1 hr 20 min total time. Most of that time was scrapping the old seal material/ glue off the dryer front. Actual disassembly and repair maybe 1/2 hour. Other little tip is the clips for the lid of dryer is to use a flat screwdriver and gently push straight in until it's compressed enough to release the lid, it will pop up when pushed in far enough. That one took me a while to figure out.
Thanks to Part Select for such a helpful site. My dryer is like new again.
Other Parts Used:
Upper Drum Glide Multi Rib Belt
  • Matthew from Portland, OR
  • Difficulty Level:
    Really Easy
  • Total Repair Time:
    1- 2 hours
  • Tools:
    Pliers, Screw drivers
561 of 570 people found this instruction helpful.
Was this instruction helpful to you?
Thank you for voting!
Burn/rust marks on clothes
Like many others, i was suffering the problem of rust marks on clothes, which ruins them for good.

We have a Frigidaire Gallery dryer, gas, front loading stacked in top of the washer, which is about 7 or 8 years old.

Turns out the top felt seal was worn out, allowing clothes to get stuck between the drum and the door where they would get the rust colored stain. I think this is fairly common. It also "ate" zippers and buttons.

To open the dryer up, you first want to remove 2 screws at the bottom of the front panel, they are covered by little plastic plugs that pop out. Then, go in through the top- you have to pop the lid up from the front, and it swings up like a car hood. from the top, you have to reach in and undo a screw on each side that holds the front panel to the body of the dryer. it's a little tricky.

After those four screws are removed, the front panel is held on by pressure clips, which you can reach from the top and squeeze so they 'let go'. As those release, the front panel will fall outward with the bottom still attached- there are two small pieces of metal at the bottom that the panel sits in. So you lift the panel straight up to get them off those two guides/hooks, and it's clear.

Next you'll want to shop vac the heck out the whole dryer interior. Mine was caked with dust and lint.

Step two is felt replacement. you have to use some muscle to tear the felt off the top of the door opening, which will leave a bunch of ripped felt stuck to the high temp glue. That's where the wire brush and the Goof Off come in. That stuff worked like a charm to remove every last bit of felt and glue.

Once clean and dry, apply the glue that came with the felt guide, set the felt in place (with those plastic pieces facing up), and hold in place for a while. I used plastic clamps to hold the felt in place for about 30 minutes while the glue set.

For good measure, i also replaced the dryer belt and the plastic ball joint that the drum sits in, but i don't think that was necessary. The belt may be a good idea, and to do that you remove the belt by popping it off the little plastic wheel under the drum first, then it'll be loose and you can remove the belt and put a new one on. (This is also a little tricky, take it one step at a time.)

Then put it back together in reverse order and you'll be done with those rust marks.

(Mine is working great)
Other Parts Used:
Rotary Knob Drum Support Bearing Multi Rib Belt
  • Randy from Anchorage, AK
  • Difficulty Level:
    Easy
  • Total Repair Time:
    1- 2 hours
  • Tools:
    Pliers, Screw drivers, Socket set
42 of 47 people found this instruction helpful.
Was this instruction helpful to you?
Thank you for voting!
Dryer Squeaked
UNPLUGGED DRYER.
1. I used a putty knife to pop the clips in the front. This allows the top to open like a car hood.

2. There are two screws one on each side holding the front to the body. Then there are clips which can just be pulled.

3. There are some electrical connections. I made a diagram and disconnected them.

4. The front slides up off two tabs at the bottom.

5. Peel and scrape off old felt. install new felt using high temp glue and clamps. The top one the plastic guides go to the top.

6. The belt has a tensioner on the bottom right and comes off easily.

7. There are three screws in the middle of the back of the drum. They were very tight and require a good phillips head screw driver.

8. Drum lifts out the front.

9. Unscrew the ball bearing assembly from the back, put the high temp lubricant on the ball.

10. Re-assemble in opposite steps.

Plug in and test.
Other Parts Used:
Rear Drum Bearing Kit
  • Edward from Carmel, NY
  • Difficulty Level:
    Easy
  • Total Repair Time:
    30 - 60 mins
  • Tools:
    Screw drivers
12 of 13 people found this instruction helpful.
Was this instruction helpful to you?
Thank you for voting!
My dryer squeaked - the squeak from hell
We had to take off the front door - rather simple. The belt was OK. It simply fit over the drum then was tightened up. The seal supplied didn't want to stick to the door. Thinking it was the wrong one - we went shopping. Come to find out it was the correct seal but the glide has been changed since the inception of my dryer. We had to poke holes in the seal to get the nibs on the glide to fit in the seal. Then it wouldn't stick to the dryer door, so we had to sand the outer door and we put some rtv on it and tied a belt around it to hold it. After drying for a couple of hours, we re-assembled the dryer only to have it overheat and burn up. New dryer $389. sad but true.
Other Parts Used:
Drum Glide - White Multi Rib Belt
  • Barbara from Rohnert Park, CA
  • Difficulty Level:
    A Bit Difficult
  • Total Repair Time:
    More than 2 hours
  • Tools:
    Nutdriver, Screw drivers, Wrench (Adjustable)
6 of 9 people found this instruction helpful.
Was this instruction helpful to you?
Thank you for voting!
Rust Stains on clothes in dryer
1. Slid putty knife under each side of front of dryer to release lid.
2. Removed 2 screws from front of drum to release door assembly.
3. Removed wires from door switch.
3. Cleaned lint out of inside of dryer.
4. Removed old felt seals, upper & lower.
5. Removed old glue with goof off type remover.
6. Glued new seals on & held then in place with clothes pins. (there was enough glue in the tube that came with the upper glide for both seals)
7. Put dryer back together.
**Ensure you verify the correct felt seal pieces with the model number of your dryer, usually on inside of door.
Other Parts Used:
Upper Drum Glide
  • Ryan from Jeffersonville, IN
  • Difficulty Level:
    Easy
  • Total Repair Time:
    15 - 30 mins
  • Tools:
    Screw drivers
4 of 5 people found this instruction helpful.
Was this instruction helpful to you?
Thank you for voting!
Small burn marks on light clothing
First I unpluged the machine, then opened the top with a flat head screw driver. Then I removed the two screws inside, unpluged the door sensor. (makes it stop when opened) Removed old gasket, cleaned with emery cloth, cleaned the residue and applied the glue provided. Waited about 1 min. and applied the new gasket leaving about 1/8'' of it hanging over the door facing the drum.
Other Parts Used:
  • Gordon from Canton, PA
  • Difficulty Level:
    Really Easy
  • Total Repair Time:
    30 - 60 mins
  • Tools:
    Screw drivers
3 of 3 people found this instruction helpful.
Was this instruction helpful to you?
Thank you for voting!
Clothes where getting brown stripmarks on the fabric.
After removing the front door of the unit I removed the Drum seal felt and upper felt part. Then I cleaned the metal ring with acetone to remove dirt. We you install the new parts the glue sent with the Drum Glide is enough for the task with a little left over. Now its working great.
Thanks for good part Jeff
Other Parts Used:
Upper Drum Glide
  • Jeff from Reidsville, NC
  • Difficulty Level:
    Easy
  • Total Repair Time:
    1- 2 hours
  • Tools:
    Pliers, Screw drivers
2 of 2 people found this instruction helpful.
Was this instruction helpful to you?
Thank you for voting!
The old drum seal top had torn off.
Opened the drayer top and then removed the front panel.
Removed the bottom seal from the acr as it was warn.
Carefully scarped off the remaining bits of felt from the arc.
Applied the supplied adhesive to the top half of the cleaned arc.
Placed the seal and held in place with small spring clamps.
Let it dry for an hour, then I repeated the process with the bottom seal.
I let it dry over night, overkill probably but I wanted it to stay.
Replaced the front with new seal and closed up the top.
It has been working well since. Thanks for stocking parts that help out homeowner's on tight budgets.
Other Parts Used:
  • jeffrey from round lake heights, IL
  • Difficulty Level:
    Easy
  • Total Repair Time:
    1- 2 hours
  • Tools:
    Screw drivers
2 of 2 people found this instruction helpful.
Was this instruction helpful to you?
Thank you for voting!
Burn marks on clothes
Opened the top of the dryer (no tools needed).
used socket set and removed the two screws (one on each side). unpluged wires from front panel, labled each (good practice).
Pulled open the front panel.
cleaned old felt off all around the front panel. Wiped down everything. while I had it opened, I vaccumed out the dryer underneath.
used glue provided in felt kit and glued new felt where old was.
let dry, put front panel back on ensuring that the felt was between drum and front panel.
put screws back in front panel. closed top.
Let me say that this is the third time I've done this to this dryer as it is about 18 years old.
Until the heating coils go out, this is the cheapest fix there is. :-)
Other Parts Used:
Upper Drum Glide
  • Carlis from Lexa, AR
  • Difficulty Level:
    Really Easy
  • Total Repair Time:
    30 - 60 mins
  • Tools:
    Nutdriver
1 person found this instruction helpful.
Was this instruction helpful to you?
Thank you for voting!
Dryer Belt Broke & Would Not Spin
First I pulled up on top panel. Next I removed the two screws holding on the front panel on. Next I pulled forward and front panel pulls out. I cleaned the old upper & lower drum glide & drum seal using a razor blade. I used the high temp glue that came with the top glide. I glued them both on & let sit for about half hour. While the glued dried I installed new belt & belt idler pulley. I re-assembled the front panel while lining up the drum. Re-installed the 2 screws. Snapped the top panel back in place. Plugged it back in & turned it on. Awesome noise was gone & working great.
Other Parts Used:
Upper Drum Glide
  • ROBERT from LAKE ELSINORE, CA
  • Difficulty Level:
    Easy
  • Total Repair Time:
    30 - 60 mins
  • Tools:
    Screw drivers, Socket set
1 of 2 people found this instruction helpful.
Was this instruction helpful to you?
Thank you for voting!
  • 1
  • 2
Questions and Answers

Be the first to ask our experts a question about this part!

Related Parts
Model Cross Reference
This part works with the following models:
PartSelect Number: PS459776
Manufacturer Part Number: 5303281049
Brand
Model Number
Description
Kenmore
41788980100
Dryer - Kenmore Dryer Model 417.88980100 (41788980100, 417 88980100) Parts
Kenmore
41788988100
Dryer
Kenmore
41788988800
Dryer
Kenmore
41788989100
Dryer
Kenmore
41788989800
Dryer
Kenmore
41798988100
Dryer
Kenmore
41798988110
Dryer
Kenmore
41798988120
Dryer
Kenmore
41798988130
Dryer
Kenmore
41798988150
Dryer
Kenmore
41798988800
Dryer
Kenmore
41798988810
Dryer
Kenmore
41798988820
Dryer
Kenmore
41798988830
Dryer
Kenmore
41798988850
Dryer
Kenmore
41798989100
Dryer
Kenmore
41798989110
Dryer
Kenmore
41798989120
Dryer
Kenmore
41798989130
Dryer
Kenmore
41798989140
Dryer
Kenmore
41798989150
Dryer
Kenmore
41798989800
Dryer
Kenmore
41798989810
Dryer
Kenmore
41798989820
Dryer
Kenmore
41798989830
Dryer
Kenmore
41798989840
Dryer
Kenmore
41798989850
Dryer
Tappan
47-2151-00-01
Dryer - Residential, 27", Electrical
Tappan
47-2151-00-02
Dryer - Residential, 27", Electrical
Tappan
47-2151-23-01
Dryer - Residential, 27", Electrical
Customer Service Representative

Get in touch, we're here to help!

Daily 8am - 9pm EST

Contact Customer Service