This dishwasher drain and wash impeller kit comes with both the drain and wash impeller, gaskets, chopper and installation screw. This part helps stop your dishwasher from leaking and helps with the proper draining of the dishwasher.
How Buying OEM Parts Can Save You Time and Money
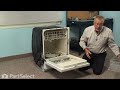
Part Videos
Replacing your Kenmore Dishwasher Drain and Wash Impeller Kit
Troubleshooting
This part fixes the following symptoms:
Not draining | Not cleaning dishes properly | Noisy | Leaking
Keep searches simple. Use keywords, e.g. "leaking", "pump", "broken" or "fit".
Sorry, we couldn't find any existing reviews that matched. Try using some different or simpler keywords.
★★★★★
★★★★★
Dale S - November 2, 2023
Verified Purchase
Worked great
Parts recieved fast and as described. Price needs to be looked at
★★★★★
★★★★★
Terry T - November 1, 2023
Verified Purchase
Great product!
Received the parts in great time and they worked perfectly! I would buy again from this seller!
★★★★★
★★★★★
William M - September 20, 2022
Verified Purchase
Quick repair made easy with video link provided.
Pleased with the fast delivery, and follow up. The email with link to a how to video made the repair easy for a do it yourselves.
★★★★★
★★★★★
Randy S - November 13, 2021
Verified Purchase
Pretty simple repair and everything is working great again
The correct parts came in perfect shape and just as ordered.
★★★★★
★★★★★
Lewis M - September 17, 2020
Verified Purchase
Easy repair
Look at your drain check valve first!! turns out mine was blocked, and just needed to clean it out. For the price though still nice to have new parts on the drain impeller. Very easy to replace
★★★★★
★★★★★
Tony D - June 6, 2020
Verified Purchase
Just what was needed.
The parts I ordered where exactly what was needed to do the job. Thanks to the quality products and fast delivery time , I made my repair’s and every thing is back to working order.......??
★★★★★
★★★★★
Craig T - May 20, 2020
Verified Purchase
Impeller kit
The web-site was easy to use and the probable causes were very helpful. Once the issue was identified the video's were great. The parts came within 3 days and were exactly as ordered. My dishwasher is up and running again.
★★★★★
★★★★★
Shirley A - March 7, 2019
Verified Purchase
Easy repair
The part was just as illustrated and installed easily. Dishwasher is back working!! Thanks for the quick service. The teaching video on how to install it, was invaluable.
★★★★★
★★★★★
Martin G - October 21, 2018
Verified Purchase
Great parts, easy repair
The parts were in great condition, and our Dishwasher is working great again.
★★★★★
★★★★★
Alyson G - September 12, 2018
Verified Purchase
Fabulous set of key parts
I thought I only needed the impeller itself, but this kit was perfect as it came with replacements for some key parts like the chipper blade, spring and lots of rubber gaskets. We are on an island and my son and I took on the daunting task of repairing a 20 year old dishwasher that stopped draining. The installation video was superb and we must have watched it 5 times for a flawless and easy installation. Turns out the drain hose was clogged due to the chopper blade not doing it’s work (or the broken glass and junk we found deep inside). The part arrived in less than 48 hours to a tiny town way up North and we had clean dishes again! Customer service on the phone is also amazing as they are so patient.
< Prev
1
2
Next >
Customer Repair Stories
Average Repair Rating: 2.8 / 5.0, 23 reviews.
What's this?
< Prev
1
2
3
Next >
Sort by:
Search filter:
Clear Filter
Your search term must have 3 or more characters.
Keep searches simple. Use keywords, e.g. "leaking", "pump", "broken" or "fit".
Sorry, we couldn't find any existing installation instruction that matched.
leaking from tub above motor
Disconnect unit and remove from under counter. remove lower spray arm, tip over dishwasher on it's back, diconnect wires from motor , unscrew drain fitting rotate motor mounts to and lift pump and motor assembly up and out from inside the dishwasher. thoughly clean all parts during pump disassembly( under running water and a toothbrush works well) . Looking at a parts diagram,and using your memory from disassembly replace the new seals and put it all back together, with patience you can do anything and use common sense.
Nutdriver, Pliers, Screw drivers, Socket set, Wrench (Adjustable), Wrench set
175 of 241 peoplefound this instruction helpful.
Was this instruction helpful to you?
Thank you for voting!
Dishwasher wouln't drain
Follow diagram that comes with the repair kit
Other Parts Used:
Shannon from Cocoa, FL
Difficulty Level:
Easy
Total Repair Time:
15 - 30 mins
Tools:
Nutdriver
73 of 109 peoplefound this instruction helpful.
Was this instruction helpful to you?
Thank you for voting!
Grinding Noise
Grinding Noise when running. I was not sure of problem and thought that a new Dishwasher may be needed if motor was the problem. After taking the bottom rack and spray arms out I came across my first problem. I believe it was the impeller design that has a 1in hex nut with a bolt in middle that needed to be removed. I needed a 90 degree 1in wrench to hold impleller while I removed Bolt. Luckly I have a friend that is a mechinist who made me a wrench. After that the grinding cause was discovered - Broken glass that grinded the cermic shaft that is over motor shaft. I did not small drops of water under motor during grinding due to damaged cermic shaft. $24 and 2 days later my dishwasher is as good as new. Sugguest you sell a 1in 90 degree hard plastic wrench for holding impeller which bolt is removed. Thanks PS. - Best part of your site is Parts detail which was very helpful for me to understand assembly.
Other Parts Used:
Gary from Dousman, WI
Difficulty Level:
A Bit Difficult
Total Repair Time:
30 - 60 mins
Tools:
Socket set, Wrench (Adjustable), Wrench set
69 of 75 peoplefound this instruction helpful.
Was this instruction helpful to you?
Thank you for voting!
dishwasher not draining and overflowed
Well, after I got the the dishwasher apart I realized the problem was not the wash impeller kit, it was the pump/ motor asembly. we deicided to replace the machine. the hardest part was holding the impeller from turning while removing the screw. there is a hex on top of the impeller you must hold in place but, if the machine is old, the hex is brittle,It will break as mine did. you will need to disconnect and take the washer from under the cabinet, and wedge a piece of wood into the motor to hold it. Then loosen the screw and inspect the components. 10 years old, it was more cost effective to replace the dishwasher. i emailed for a request authorization to return. partselect responded promptly with the autorization i needed to return the part. The service was good, and I would use partselect again.
Other Parts Used:
christopher from Spring, TX
Difficulty Level:
A Bit Difficult
Total Repair Time:
1- 2 hours
Tools:
Nutdriver, Pliers, Screw drivers, Socket set, Wrench (Adjustable), Wrench set
35 of 40 peoplefound this instruction helpful.
Was this instruction helpful to you?
Thank you for voting!
Kenmore UltraWash Dishwasher leaking
My wife noted wood floor bucking up around dishwasher - pulled dishwasher out from counter, tipped it on it's side, looked underneath, & noted slight corrosion on top of motor -
Took motor/pump assembly completely off of dishwasher (comes out from the bottom) by flipping four little plastic cams on motor to the side & then took pump apart (starting at top & working down) till I got to the impeller/motor shaft seal.
Found plastic impeller worn through into two pieces & little spring thingy under the grinder-upper thingy broken.
Ordered Drain & Wash Impeller kit - got it a few days later - installed (new motor shaft seal didn't seem to be quite the same as far as fit, so I didn't use it - just used the impeller & new spring thingy)
Put it all back together & runs fine - no more leaks - (now just have to figure out what to do about warped wood flooring - oh well, it's old & is probably time for whole new kitchen floor anyway)
Note: This particular Kenmore model made by Whirlpool - takes Whirlpool parts.
Note 2: Needed only screwdrivers to do this whole thing - would have been a really quick/easy repair if I had known what the problem was & how it all comes apart. took a little time to figure it out. (I am a rank amateur at dishwasher repair)
Other Parts Used:
Andrew from Texarkana, TX
Difficulty Level:
Easy
Total Repair Time:
30 - 60 mins
Tools:
Screw drivers
25 of 33 peoplefound this instruction helpful.
Was this instruction helpful to you?
Thank you for voting!
broken wash impeller unit
I removed the rubber boot on the top of the water dispersal unit ( stainless steel wand ) by turning it counterclockwise and the wand came off with ease. I then removed the top unit under it by removing the 8 torx screws and removed it. Under the unit is a cover with 1 torx screw to be removed and removed the cover to access the unit. I was unable to loosen the 1/4" nut on the shaft as it was very tight so I had to remove the unit and lock the motor armature with a piece of wood and removed the bolt. Using the kit I purchased I installed the new parts as required and it works as good as new.
The whole problem started with the upper vent on the door being plugged up with a whole bunch of labels that had been washed off of a bunch of tin cans that were washed prior to recycling them. Te high water float was also gummed up for the same reason and overflowed on the floor, I pulled it up and out and cleaned it up also, it works as good as new.
Other Parts Used:
James from Kronnenwetter, WI
Difficulty Level:
A Bit Difficult
Total Repair Time:
30 - 60 mins
Tools:
Screw drivers, Socket set
22 of 24 peoplefound this instruction helpful.
Was this instruction helpful to you?
Thank you for voting!
Dishwasher wouldn't clean - arms not spraying
Water was not being sprayed thru the arms. I opened the dishwasher, removed/unscrewed the spray arms and wash impeller (black plastic wheel that directs the water) and then noticed that the part below the wash impeller had broken into pieces. There was only a metal ring and it was supposed to have a spring attached to it. I replaced the ring/spring below the wash impeller using the part from the Drain and Wash impeller kit. The dishwasher works great now.
It was my first mechanical fix. Use the web to diagnose, find the specs of the appliance and use common sense and you can do it yourself too.
By the way, the parts from this site arrived the next day.
Other Parts Used:
Aivars from Round Lake Beach, IL
Difficulty Level:
Easy
Total Repair Time:
30 - 60 mins
Tools:
Screw drivers, Socket set
17 of 20 peoplefound this instruction helpful.
Was this instruction helpful to you?
Thank you for voting!
Dishwasher Rehab
After hearing ominous grinding sounds and water leaking around the gasket, it was about time to rehab the dishwasher. This is usually the point where I say "t'hell with it, buy a new one". I am glad I didn't. The Kit to rehab the impeller and such had EVERYTHING I needed. Right parts, right price. Removed the upper arm assembly, T15 screwdriver, the screen strainer, the impeller, T25 screwdriver, the food grinding spring and impeller (the grinding noise, spring was sprung), and finally the post and impeller thingie (had to break it off, very brittle). The pieces went back on a lot more smoothly than it took to get them off! Use your digital camera! I took pictures of every stage of the parts removal and what I removed. I got confused with some little balls that were inside and the pictures told me exactly where they went. Door gasket? I should have replaced it YEARS ago, so easy and cheap with PartSelect parts.
1. Hose drain: I could not use the new hose drain I bought because the female end to be hooked up to the dishwasher is not bendable enough without breaking the hard plastic casing. You can bend the corrugated hose only so much. I considered adjusting the orientation of male end to accomodate the female end. It was too risky for me. In the end, I abandoned all options and resort to salvaging my old hose by patching the nail-size hole with a combination of caulk, teflon tape and electrical tape. It's holding up for a week now. 2. Impeller: Another leak was under the motor shaft. Days of investigation lead me to believe that I need a new impeller because mine was broken into pieces. Searching for a new impeller was not easy. The part number does not help. I just stumbled upon it by chance after browsing through forums after forums.
Anyway, replacing everything that comes with the impeller kit makes the matter worse. It leaks even more!
Seeing me wasting 5 days already on the dead horse, my wife grows impatient and threaten to buy a new machine or call a pro. This would either hurt my pocket or my ego.
She was out that evening so I sneaked in trying to give it what's left of me. Taking the machine apart and going through every part, I narrow down to motor shaft seal. I compare the new one with my old one and notice that the new one is like 1/8in higher. Compress each by my thumb, I feel that I could not press the new one down as much as I can with the old one.
So i removed the new one and put my old motor shaft seal back. The rest is history.
My mother-in-law was so proud of me. My wife was apparently not. She sounded like "yah right, 6 days on that dead horse...".
Other than saving several hundreds buck, I just taught my self another lesson: Don't quit. Try harder and happy ending would come. For me, it did.
Removed dishwasher, take to garage, removed lower rack to gain access to top of motor unit. Used star socket wrench to remove upper screws holding top of unit in. Disconnect wires, drain tube and counter weight. pulled motor unit out from inside dishwasher and placed on bench. Proceeded to disassemble motor. Some things were obvious, others not so. replaced old worn out parts with new, used a little lube (Vaseline) in places to assist in getting seals back in place. Instructions were of little help need to pay close attention when tearing unit apart. Reassembled with new seals, installed motor and re-installed dishwasher...NO LEAKS!! Wife and I happy.
Ask our experts a question about this part and we'll get back to you as soon as possible!
20 questions answered by our experts.
< Prev
1
2
Next >
Sort by:
Search filter:
Clear Filter
Your search term must have 3 or more characters.
Keep searches simple. Use keywords, e.g. "leaking", "pump", "broken" or "fit".
Sorry, we couldn't find any existing answers that matched.Try using some different or simpler keywords, or submit your new question by using the "Ask a Question" button above!
Marilyn
October 27, 2017
The black rubber gasket? On the washer arm assembly is breaking down and leaving black on the dishes. Is it possible to get just that part?
For model number DU8500XX3
Hi Marilyn,
Thank you for your inquiry. The gasket is only sold in this kit and is not sold separately. I hope this helps. Thank you and have a great day!
7 people found this helpful.
Was this helpful?
Thank you for voting!
Joe
February 20, 2018
Hi my dishwasher is having a issue with draining, found water in tub and hit cancel / drain button 4 times to get it completely empty. ( very low flow out drain hose ). What part would I need .
For model number GU980SCGB2
Hi Joe, Thank you for the question. I suggest testing the board and motor. You will need to access the control board while the unit running and check to see if there is intermittent power going to the wash motor. The pins for the wash motor on the control board would be P3 for the main winding, P5 for the drain winding and P4 for the wash winding of the motor. If you check from the wash winding to the P7 neutral, there should be a constant 120 vac while in the wash mode. Hope this helps!
4 people found this helpful.
Was this helpful?
Thank you for voting!
Sid
March 5, 2018
I put in a new drain kit but the dishwasher still doesn't drain. Any suggestions?
For model number kudg25shwh1
Hi Sid, Thank you for the question. If the Drain and Wash Impeller Kit did not fix the issue, you may have an issue with the Pump and Motor Assembly, PartSelect Number PS3500990. Hope this helps!
3 people found this helpful.
Was this helpful?
Thank you for voting!
Alan
March 28, 2018
I replaced the drain and impeller kit parts but the lower sprayer arm is very wobbly after reassembly. The plastic part with sort of a rubber donuts is screwed down onto the filter housing tightly but the sprayer arm is loose and wobbly. Is it supposed to wobble loose like that or am I missing another gasket to tighten it up better?
For model number DU920PFGB0
Hi Alan, Thank you for the question. There are two parts above the lower sprayarm. The Part Number: PS11741251, Cap and Connector Assembly and the Part Number: PS11743936, Lower Wash Arm Bearing and the Part Number: PS11741334 Lower Sprayarm Seal that woudl help hold the sprayarm securely. Hope this helps!
2 people found this helpful.
Was this helpful?
Thank you for voting!
Greg
February 9, 2018
Trying to troubleshoot. My dishwasher won't drain. Motor runs as normal but the water shoots back up through the lower washer arms. Will this kit fix that? It's seems like it by watching the video. I don't want to replace the motor. It's an old enough unit to justify replacing unless a smaller fix
For model number Gu980scgq3
Hello Greg, thank you for your question. The drain and wash impeller kit could be the issue. The other possibility is the motor and pump kit. Good luck with your repair!
2 people found this helpful.
Was this helpful?
Thank you for voting!
Sean
August 22, 2019
My dishwasher does not always drain and also says that the child lock is on when it is not. Will this fix that?
For model number KUDS25SHBL1
Hi Sean,
Thank you for your question. If the dishwasher is not draining, the drain and wash impeller kit usually fixes the issue the majority of the time. There are some other parts that you will need to check to see which one is causing the issue. Here is a link from our website that you may reference on what parts to check, https://www.partselect.com/AdvancedModelSymptoms.aspx?ModelNum=KUDS25SHBL1&mfgModelNum=&fkMfgID=3&ModelMasterID=53358&PID=23. I hope this helps. Thank you and have a great day!
2 people found this helpful.
Was this helpful?
Thank you for voting!
Bernard
April 15, 2019
Can I clean the drain under the impeller?
For model number 66515721691
Hello Bernard, Thank you for the question. Once the Impeller is removed you should have access to clean the drain under it. Hope this helps!
2 people found this helpful.
Was this helpful?
Thank you for voting!
Stan
April 5, 2023
I installed a new impeller kit and the dishwasher works like new but now leaks out the bottom. I’ve taken it apart and checked everything but it still leaks. Could the shaft seal be wrong or defective
For model number Kitchen aid superba KUDS24SEWH5
Hello Stan, thank you for contacting us. We recommend you check your tub gasket, part number PS384950, as it is responsible to prevents leaks between the circulation pump and the tub. We hope this information helps.
I imagine i need a new impeller kit, but not sure. When i push the cancel/drain button, the water sitting in the tub cycles through the spray arms instead of draining. Is this impeller related?
For model number GU980SCGQ2
Hello JR, Thank you for your inquiry. It can be, the other part to check is the motor and pump. You can test the parts with a multimeter. If you are unfamiliar with how a multimeter functions, there are YouTube videos available to assist you. Hope this helps!
1 person found this helpful.
Was this helpful?
Thank you for voting!
Don
December 8, 2017
My dishwasher doesn't have any balls. (check balls) just assemble without any?
For model number DU900PCDQ6
Hi Don,
Thank you for your question. Actually your appliance does have a check ball. I have listed that part in a link down below for you. Good luck with your repair.