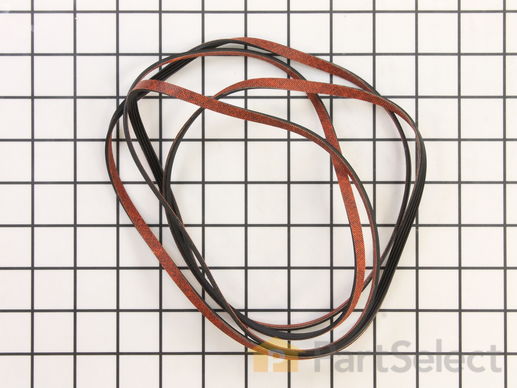
Part Location Diagram of 3394652 Whirlpool Multi Rib Belt
See part 15 in the diagram
( Grid squares measure 1x1 inch )
Customer Service Representative

Get in touch, we're here to help!

Daily 8am - 9pm EST

customerservice@partselect.ca

Multi Rib Belt

★★★★★
★★★★★
1 Review
$62.30
  In Stock

Get this part fast! Average delivery time for in-stock parts via standard shipping: 1.8 days.

PartSelect Number PS345337
Manufacturer Part Number 3394652
Manufactured by Whirlpool
Product Description

Multi Rib Belt Specifications

Specifications: Length 79-1/8 inch, width 1/4 inch, 4 ribs, Flat.
How Buying OEM Parts Can Save You Time and Money

How Buying OEM Parts Can Save You Time and Money

Troubleshooting
This part fixes the following symptoms:
Noisy
This part works with the following products:
Dryer, Washer Dryer Combo.
This part works with the following products:
Kenmore, Whirlpool, KitchenAid, Roper.
Part# 3394652 replaces these:
AP2946614, 2823, 26000345675, 3394652, 345675, 4319392, 8066064, P46-153
Back to Top
Customer Reviews
Average Rating:
★★★★★
★★★★★
1 Review
5.0
Filter By Rating:
  • 5 Stars
    1
  • 4 Stars
    0
  • 3 Stars
    0
  • 2 Stars
    0
  • 1 Star
    0
  • 1
Sort by:
Sorry, we couldn't find any existing reviews that matched. Try using some different or simpler keywords.
  • 1
Customer Repair Stories
 Average Repair Rating: 2.4 / 5.0, 4 reviews. What's this?
  • 1
Sort by:
Sorry, we couldn't find any existing installation instruction that matched.
In the middle of changing loads there was snapping and sound and drum stopped turning.
I was hopeful it was the belt. But, I had no idea how to get to it. I used the model no. and looked on line for pats and schematics. That gave me a sense of what to do. I started at the rear and removed the back panel. It was like peeling an onion because then, I wasn't sure what to remove next. So I just kept removing nut head screws until eventually I had loosened the sides, removed the top and discovered the front lifted up and off (no screwed attachment.) There's grounding wire that must be detached. Don't forget to re-attach. Without proper grounding you could be electocuted! I was careful to remember how it was attached. To get to the pulley, which is on the front, I had to remove the drum. I found the snapped belt. The pulley is held in place by tension from the belt so, once the belt goes the pulley detaches. I tried to find the belt locally the following week but was unsuccessful. I found the part on-line and had it in four days. It was tricky getting the belt and pulley in place. I persevered.
The parts ( I replaced the fliter that needed replacement for years too) came with installation instructions. Its possible I did not have to disassemble as much as I did. Oh well! Although I'm fairly mechanical, I'm still pretty proud to have been able to do it and save the cost of a repairman.
Other Parts Used:
Dryer Lint Filter and Cover
  • William from Glen Burnie, MD
  • Difficulty Level:
    A Bit Difficult
  • Total Repair Time:
    1- 2 hours
  • Tools:
    Socket set
23 of 31 people found this instruction helpful.
Was this instruction helpful to you?
Thank you for voting!
drum stopped turning
First unplug dryer, then remove 4 screws along the back of the top and remove top and set aside. Next pull outward on the front until the front clears the drum and lift off the front and set to the side, careful not to stretch the wires to the door switch. Remove old belt and slip belt around the drum and line up with marks from old belt. Reach in under the drum under the motor and lift up the tensioner. Insert belt through tensioner and slip over the front of the shaft on the motor and release the tensioner. The belt should now be tight. Reinstall the front and top, plug in and test.
Other Parts Used:
  • Kenneth from Gerber, CA
  • Difficulty Level:
    Really Easy
  • Total Repair Time:
    Less than 15 mins
  • Tools:
    Nutdriver, Screw drivers
14 of 16 people found this instruction helpful.
Was this instruction helpful to you?
Thank you for voting!
Dryer was rumbling and clanking
My dryer started making a loud rumbling and clanking sound and I didn't know what was wrong.

First I pulled it away from the wall and disconnected the power cord. I loosened the four nut/screws across the top of the rear of the dryer with my adjustable wrench then removed them with the flathead screwdriver. Then from the front of the machine, pulled the top of the dryer towards me, freeing the top and removed it. I could see one belt towards the front of the machine that appeared to be intact. I plugged the dryer back in and ran it... It spun but continued to clank and rumble. I noticed a "groove" near the rear of the drum and didn't see a belt there so I assumed that I needed the rear belt and ordered a replacement. I WAS WRONG. It turned out that there is actually only ONE BELT on this machine, that in fact I needed replacement DRUM WHEELS.

Next, I unplugged the power cord again and then I removed all twenty some-odd screws from the rear of the machine... which was POINTLESS as it only gave me access to the heating element, so I replaced this and all the screws.

I then removed the inside top nut/screw from the front panel on both the right and left inner lip. The panel then lifted up and off of the machine...only connected at this point to the rest of the dryer by the wires.

I made a schematic of the wires and which color was connected where, and then only removed those that were necessary to detatch the front panel completely from the dryer (so I could easily replace them properly later).

I noticed at this point that the belt was still functioning (although was cracked and needed replacing soon anyways)...but that the bottom drum wheel had worn itself down on the inside (where it rests on the axle)...the rubber around the outside was still good... but the whole wheel needed replacing. The side drum wheel (same part number as bottom) appeared to be fine.

I ordered replacement DRUM WHEELS (they sell them in packages of two only).

When the wheels arrived, I got down on my hands and knees and noticed how the belt was connected to the drive spindle of the motor... by a spring levered plastic wheel... very simple. Push the spring lever towards the drive spindle of the motor...loosening the belt. Then removed the belt from the motor, relaxing the spring and the belt came off, hanging only around the drum of the dryer.

Without tension on the spring levered plastic wheel, it came off of the bottom of the dryer completely. (If your belt has broken, you most likely will find this sitting on the bottom of your dryer...I will tell you how to attach it later on in this story.).

I carefully pulled the sides of the dryer case apart and slid one side of the drum forward out of the case...then slowly slid the other side of the drum out of the case...gently lifting up and out...completely removing the drum from the machine....setting it aside.

The dryer (inside the case) was FILTHY. I got out the handheld vacuum and cleaned it all out (finding a religous medallion, an earring, and over $2.00 in change). I vacuumed the inner bottom, sides, motor, and took advantage of vacuuming the inside of the lint collector as well... cleaning it up nicely.

The bottom drum wheel was attached by a triangular plastic clip (on both sides of the wheel)...I removed the plastic clip carefully by gently prying it off with the flat edged screwdriver... being careful not to break it. There was a LOT of hair wrapped around the axle near the triangular clip and used the pliers to pull the hair off...then removed the bad wheel..then the plastic clip behind where the wheel was sitting...and the hair there as well. I cleaned off the axle thoroughly, then did the same with the other drum wheel (even though it looked fine, I replaced them both.).

I set the old side wheel aside with the old (still useable) triangular plastic clips. In the future if one of the wheels goes bad... I'll have a replacement that will get me by.

Then I slid one of the NEW triangular p
Other Parts Used:
  • William from Burlington, WA
  • Difficulty Level:
    A Bit Difficult
  • Total Repair Time:
    More than 2 hours
  • Tools:
    Pliers, Screw drivers, Wrench (Adjustable)
9 of 11 people found this instruction helpful.
Was this instruction helpful to you?
Thank you for voting!
a broken belt
my hany man did it....
Other Parts Used:
  • Dorise from Donalsonville, GA
  • Difficulty Level:
    A Bit Difficult
  • Total Repair Time:
    More than 2 hours
  • Tools:
    Nutdriver, Pliers, Socket set, Wrench (Adjustable)
6 of 12 people found this instruction helpful.
Was this instruction helpful to you?
Thank you for voting!
  • 1
Questions and Answers

Be the first to ask our experts a question about this part!

Related Parts
Model Cross Reference
This part works with the following models:
PartSelect Number: PS345337
Manufacturer Part Number: 3394652
Brand
Model Number
Description
Kenmore
10688419100
Dryer
Kenmore
10688419300
Dryer
Kenmore
110088732791
Washer Dryer Combo
Kenmore
1101820296
Washer Dryer Combo - LAUNDRY CENTER
Kenmore
1101820299
Washer Dryer Combo - WASHER DRYER LAUNDRY SYSTEM
Kenmore
1107208300
Dryer
Kenmore
1107208301
Dryer
Kenmore
1107208350
Dryer
Kenmore
1107218370
Dryer
Kenmore
11078410100
Dryer
Kenmore
11078410110
Dryer
Kenmore
11078410200
Dryer
Kenmore
11078410210
Dryer
Kenmore
11078410400
Dryer
Kenmore
11078410410
Dryer
Kenmore
11078410600
Dryer
Kenmore
11078410610
Dryer
Kenmore
11078411100
Dryer
Kenmore
11078411110
Dryer
Kenmore
11078411200
Dryer
Kenmore
11078411210
Dryer
Kenmore
11078411400
Dryer
Kenmore
11078411410
Dryer
Kenmore
11078411600
Dryer
Kenmore
11078411610
Dryer
Kenmore
11078412100
Dryer
Kenmore
11078412200
Dryer
Kenmore
11078412400
Dryer
Kenmore
11078412600
Dryer
Kenmore
11078413100
Dryer
Customer Service Representative

Get in touch, we're here to help!

Daily 8am - 9pm EST

Contact Customer Service