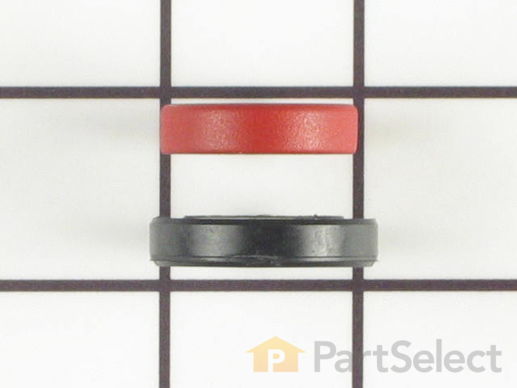
Oil Seal Kit for Gearcase Input Shaft
$66.37
In Stock
Get this part fast! Average delivery time for in-stock parts via standard shipping: 1.8 days.
PartSelect Number
PS334494
Manufacturer Part Number
285352
Manufactured by
Whirlpool
Product Description
Oil Seal Kit for Gearcase Input Shaft Specifications
This two piece oil seal kit comes in two pieces and is used for the gearcase input shaft of your washer.
How Buying OEM Parts Can Save You Time and Money
Troubleshooting
This part fixes the following symptoms:
Leaking
This part works with the following products:
Washer, Washer Dryer Combo.
This part works with the following products:
Whirlpool, Kenmore, KitchenAid, Roper.
Part# 285352 replaces these:
AP3043580, 470681, 285352, 286106, 286108, 63387, W10111745
Customer Repair Stories
Average Repair Rating: 2.8 / 5.0, 2 reviews.
What's this?
- < Prev
- 1
- Next >
Sort by:
Search filter:
Clear Filter
Your search term must have 3 or more characters.
Keep searches simple. Use keywords, e.g. "leaking", "pump", "broken" or "fit".
Sorry, we couldn't find any existing installation instruction that matched.
Gearcase oil leak
To replace gearcase seals, first disconnect the power cord. Turn off water supply and remove water inlet hoses at washer (safety first). You may want to have a bucket available to catch water that will drain out of the hot/cold and drain hoses. Next, remove top agitator cap, seal and (7/16”) bolt (see diagrams on PartSelect). This will allow the top agitator and cogs to be removed. Grab the bottom agitator and rock it back and forth until it can be removed.
Suggestion: now is a good time to remove and clean the old soap and junk from drain holes in the top agitator and any junk that may be under the lower agitator.
Lay the washer on its right side. You will now have access to the motor, pump, hoses clutch and gearcase. Place a couple of 2X4X(5?) blocks under the tub to support it. Remove the electrical connector from the motor (this is clipped into place) and the two wires that go to the capacitor on the motor.(TIP: don’t put your finger across these terminals, SHOCK HAZARD) Remove the hose clamps and hoses, the two screws (5/16”) on each strap that holds the motor in place, you may have to use a screw driver to pop the straps off the motor. Remove the motor and pump by pushing the tub to the left and move the motor and pump to the right to clear the coupling. If you have not replaced the drive coupling, now would be a good time to order and replace. With the motor out of the way, remove the three (½”) bolts holding the gearcase to the chassis and pull to remove gearcase and shaft. If you are only replacing the drive shaft seal, you do not need to open the gearcase case. Stand the gearcase so the input shaft is facing up, or what fluid is left in the gearcase will come out. One question I see a lot is how do you remove the seal. One, buy a real expensive tool that you will only use once, or take a screwdriver with about a ¼” blade, stick it between the shaft and the seal, gently leverage the seal out while going around the shaft. After the seal is removed, oil can be added thru the seal hole. Understand that different oils are designed for different applications. That said, I used 90 weight gear oil from the local auto parts store, you can add it thru the seal hole. To install the seal, lightly tape it into the seal cavity, then use a socket that is close to the diameter of the seal and gently drive it in.
If you have to replace the top case seal, it will require you to take the gearcase apart. The advantage of this is, if you have an older washer, you can clean out the contaminated oil and sludge and check for wear on the parts, and replace as needed from PartSelect. Here’s a suggestion: if you have a digital camera, take pictures, this will really help when you put things back together.
Now look at the diagram that is provide by PartSelect, remove the clutch, remove the bolts on the top cover, try to keep it level or you may have a mess on your hands. Lift the cover up over the shaft. I found the top case seal very stubborn to remove. Using a small screwdriver, get between the case and the seal and gently pry it out. Replace the seal, again, by using a socket and gently taping into place. There is also a seal at the top of the drive gear that you may want to replace to keep the oil from going up into the clutch. Now its time to clean all of the years of gunk out of the case and gears. When you are ready, fill the bottom half of the gearcase with oil, about half a quart. To seal the case, I used a ultra blue silicone gasket sealer in a tube from my local auto parts store or sealant can be purchased from PartSelect. I used it on the top half of the gearcase case. Slide the top case over the shaft and evenly tighten the bolts. Reinstall the clutch to the gearcase shaft and install into the washer. I found that the motor bearings needed to be lubed, so I used white lithium grease in an aerosol can. Reinstall motor and don’t forget to put the electrical plug back into the motor and the wires that go to the capacitor and pump h
Other Parts Used:
-
Greg from Hemet, CA
-
Difficulty Level:Easy
-
Total Repair Time:1- 2 hours
-
Tools:Pliers, Screw drivers, Socket set
148 of 162 people
found this instruction helpful.
Was this instruction helpful to you?
Thank you for voting!
Washer would not Agitate or spin out. Also noticed an oil leak.
I followed instructions provided from Parts Select for removing and replacing the coupler assembly, and also instructions for changing the clutch assembly. I also took it's transmission apart (socket set and flat screwdriver required), drained the old oil, cleaned it, added new 90W gear oil. The instructions covered the swapping of parts very well. Cleaning up the oil spill took as long as changing the parts.
Other Parts Used:
-
Jonathan from BRANDON, VT
-
Difficulty Level:Really Easy
-
Total Repair Time:More than 2 hours
-
Tools:Nutdriver, Pliers, Screw drivers, Socket set
10 of 10 people
found this instruction helpful.
Was this instruction helpful to you?
Thank you for voting!
- < Prev
- 1
- Next >
Questions and Answers
We're sorry, but our Q&A experts are temporarily unavailable.
Please check back later if you still haven't found the answer you need.
- < Prev
- 1
- Next >
Sort by:
Search filter:
Clear Filter
Your search term must have 3 or more characters.
Keep searches simple. Use keywords, e.g. "leaking", "pump", "broken" or "fit".
Sorry, we couldn't find any existing answers that matched.Try using some different or simpler keywords, or submit your new question by using the "Ask a Question" button above!
Michael
December 1, 2022
Is this the correct seal for this washer
Wtw5000dwi
For model number Wtw5000dw1
Hello Michael, thank you for your inquiry. This part does not fit your model. Your model does not have this part. We hope that helps, let us know if you have further questions!
Was this helpful?
Thank you for voting!
- < Prev
- 1
- Next >
Related Parts
Model Cross Reference
This part works with the following models:
PartSelect Number: PS334494
Manufacturer Part Number: 285352
Brand
Model Number
Description
Kenmore
10682872600
Washer
- Kenmore Washing Machine Model 106.82872600 (10682872600, 106 82872600) Parts
Kenmore
1101050299
Washer
- Kenmore Washing Machine Model 110.1050299 (1101050299, 110 1050299) Parts