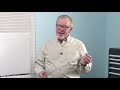
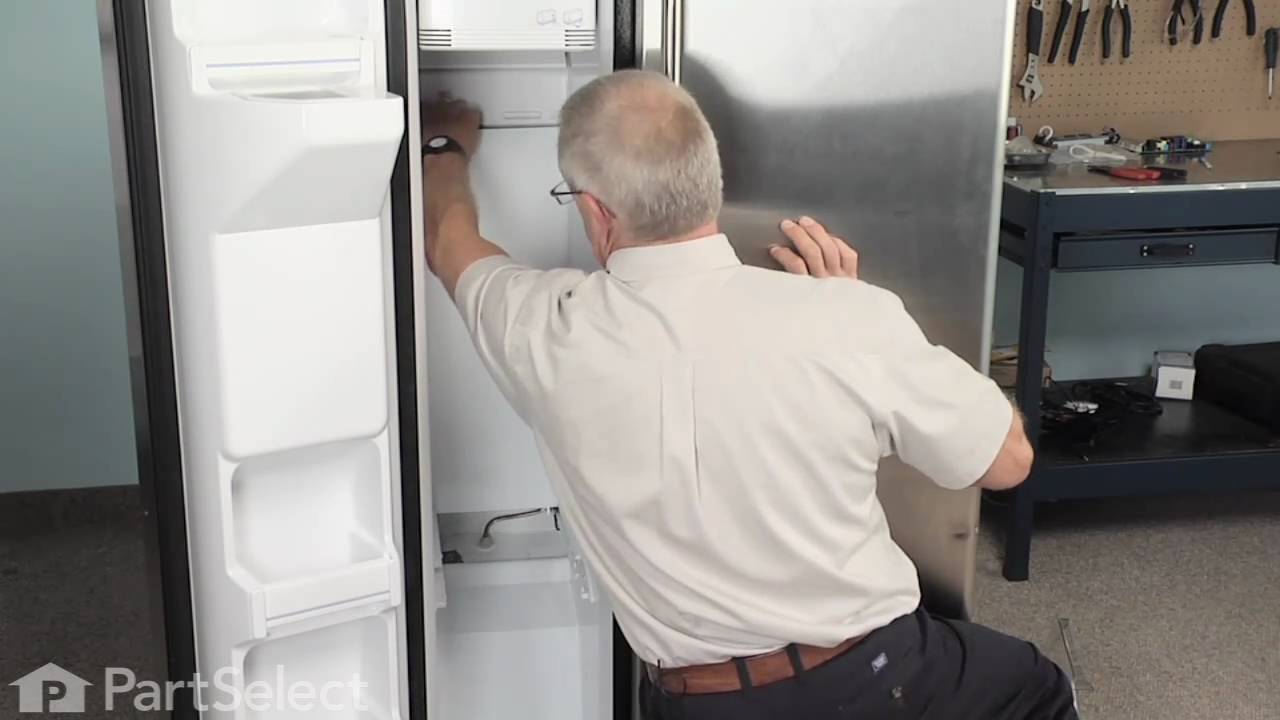
Replacing your General Electric Refrigerator Defrost Heater
Troubleshooting
This part fixes the following symptoms:
Fridge too warm | Freezer not defrosting | Freezer section too warm | Frost buildup
This part works with the following products:
Refrigerator.
This part works with the following products:
General Electric, Hotpoint.
Part# WR51X10038 replaces these:
AP2639820, 880036, WR51X10051
Customer Reviews
Average Rating:
★★★★★
★★★★★
2 Reviews
4.5
Filter By Rating:
5 Stars
1
4 Stars
1
3 Stars
0
2 Stars
0
1 Star
0
< Prev
1
Next >
Sort by:
Search filter:
Clear Filter
Your search term must have 3 or more characters.
Keep searches simple. Use keywords, e.g. "leaking", "pump", "broken" or "fit".
Sorry, we couldn't find any existing reviews that matched. Try using some different or simpler keywords.
★★★★★
★★★★★
Harold W - February 23, 2019
Verified Purchase
Good job.
Part was easy to install and worked immediately.
★★★★★
★★★★★
Gordon B - November 19, 2018
Verified Purchase
Great part; work as expected.
The part was received in good condition.
< Prev
1
Next >
Customer Repair Stories
Average Repair Rating: 2.9 / 5.0, 9 reviews.
What's this?
< Prev
1
Next >
Sort by:
Search filter:
Clear Filter
Your search term must have 3 or more characters.
Keep searches simple. Use keywords, e.g. "leaking", "pump", "broken" or "fit".
Sorry, we couldn't find any existing installation instruction that matched.
Freezer cold, but Refrigerator not cooling. Iced up coils.
After determining that it was the defrost system, I ordered the thermostat. Make sure you look closely. Mine had two thermostats, and so I had to wait a couple of days for the extra part. 1. Remove ice maker if installed. 2. Remove center casing on ceiling and back wall. There may be two screws that need removed. 3. Locate and remove two screws on upper back wall. 4. Remove back wall carefully, revealing coil system. 5. If this was the problem, the coils will be iced over and need thawed. Either time or a hair dryer... 6. The thermostats clip onto the copper tubing, simply pull them off, keeping close attention to the color of the wires. 7. Be very careful touching the bottom of the coils as the defrost conductor coils are along the bottom and encased in easily breakable glass. If you need to replace this as well, remove the center brace (wire)by pulling towards you and then down. remove wire attachments at both ends and rotate coil out of end braces. 8. Replacing thermostats...you must CUT the wires, and attach new thermostats with wire couplers or wire nuts and then wrap with electrical tape that is rated for the cold. 9. Re-attach all parts and replace back wall and coverings. 10. Enjoy!
Refrigerator and freezer compartments were not getting cold enough. Frost was building up on the back of the freezer compartment.
Tried manually defrosting several times and the unit would work for a couple of weeks and then get frosted over again. Using this web site I easily found and identified the parts I needed. I ordered both the heating element and the heater thermostat (If I am going to take apart the unit I only want to do it once). Both parts arrived very quickly and were exact replacements for the parts in the unit. I removed the ice maker by loosening two screws and unplugging the cable. The top part with the light came down by removing two screws. The vent at the back slid up and was removed. The back panel was removed by removing two screws. I could now access the evaporator coil. The evaporator coil was removed by removing two screws. The old heater element was on the bottom of the evaporator coil and the heater thermostat was on the upper right of the coil. I disconnected the wire at each end of the heater element. I removed the retaining clip at the bottom center of the coil. The heater element was removed by bending a tab at each end of the element and then sliding it down. I unclipped the thermostat from the coil and snaked the wires around the coil to the front so I could work on them easier. I cut the thermostat wires, stripped the ends, connected the new thermostat matching the wire colors, soldered both connections and sealed with some liquid electrical tape. I then snaked the wires behind the coil and snapped the thermostat onto the coil. The heating element slid up into the bottom of the coil and I bent the tabs back into place and reinstalled the retaining clip. I reconnected the wires to the element. Putting everything back together was a few more minutes. Total repair time was about 4 hours from starting to empty the freezer to when I turned the unit back on. By far the longest activity was defrosting. The actual repair itself was about half an hour. Emptying, defrosting and cleaning up were the other 3 and a half hours.
No instructions came with new parts. Access to element was impossible until I accidentally discovered that the two styrofoam cushions at the ends of the coils were removable. Once removed, access to the heater and thermostat was very easy.
Unplug appliance, remove freezer shelf, cold air ducts, back of freezer, disconnect light, (My model does not have ice maker. This may also need to be disconnected.) 1.Remove styrofoam cushions at end of coils 2.Locate element between bottom two coils 3.Disconnect the male/female connections 4.Remove support clip under center of element 5.Remove element 6.Replace new element in reverse
Connecting the thermostat wires was challenging because they were somewhat behind the coils.
1.With styrofoam removed, unclip thermostat from coil 2.Carefully cut wires (leave enough to connect new wires) 3.Connect new thermostat wires (color of wires matched on my fridge) 4.Clip new thermostat in place 5.Replace styrofoam 6.Button it all up
With these steps, this job would take maybe 30 minutes; somewhat longer if your model has an icemaker.
After several defrost sessions I realized we had a component problem. Freezer and frig would cool up and maintain for a week or so but then the frog would go warm and the freezer would be ice cold. SO it was then I knew it was a defrost sequence matter. Thanks to Parts Select and their part to culprit algorithm it provided me the several most likely parts to be at fault. Since not having a voltage tester it was R/R time so I started with defrost timer and then went on from there. So all in told the bill for parts was around $120 still cheaper than a repair service call and obviously buying a new unit. Replacing the parts was simple, the most difficult being the defrost heater element but nothing to throw your hands up. My advice is just stay patient, do plenty of research and tackle it, you will save hundreds of dollars. Living without a frig for several days can be uncomfortable but I was absolutely determined to salvage the frig and save money and it was all worth it.
First, using a nut driver, I removed icemaker and back panel inside freezer. I unhooked the wire connectors at each end of the heater defrost element and replaced with new element. I reinstalled the back panel and the icemaker. Second, using the same nut driver I removed the casing located inside fridge on the top. I pulled the casing down & unhooked the wiring harness. I removed the control temp switch which was held in by two clips. I replaced with new switch, plugged harness back in, reinstalled casing and BINGO....it is as good as new....beats buying a new refrigerator anyday!!!! THANK YOU Bernard S.!!!!!!!!!!!!!! Sincerely, Mom of three boys
I noticed that if I unplugged the refrigerator and plugged it back in a while later it would start working but eventually would stop. I deduced the problem was likely the defrost thermostat. I ordered the thermostat but it was in a difficult place behind the evaporator coil which I could not remove. While I was trying to work it into position my hand pressed against the defrost coil and shattered the glass sheath. I ordered the coil and finally managed to get it and the thermostat installed. The refrigerator seems to work fine now.
Other Parts Used:
Clifford from Melbourne, FL
Difficulty Level:
A Bit Difficult
Total Repair Time:
More than 2 hours
Tools:
Nutdriver, Pliers, Screw drivers
9 of 13 peoplefound this instruction helpful.
Was this instruction helpful to you?
Thank you for voting!
Fridge Section Not Cooling Evap. Coils Frozen Up
Thanks to the very fine posts on this site, and availablity of parts, I didn't have to call in a repair man. Due to the near-10 year age of unit, I first ordered a new fridge for the kitchen and moved the GE to the garage. Let it manually defrost. Figured based upon comments posted here I was dealing with the defrost system problem so ordered the temperature sensors for top and botton, the defrost thermostat, and the defrost heater. As a wise poster said, if I am going to pull the damn thing apart, I'm going to make sure I have all three parts in case I need a particular one. Do not have the skill or gauges to troubleshoot electrical components. Parts arrived from Parts Select in great time, and excellent packaging protection. Parts Select also has great diagrams of the unit, although I could not find written repair instructions anywhere. At first I was going to wait for the parts to arrive and replace everything, but since there was a dely in getting the new fridge in, and the freezer section of the old fridge worked fine, once I had defrosted the old fridge, and cleaned up a few of the rusted over connections, I put everything back together, to await new fridge and receipt of parts for old fridge. Well, as is the story of my Karmic life, once fridge defrosted, and I put everything back together, plugged old unit in inside garage, everything came back up working perfectly on the recommended settings for both freezer and fridge sections. Has continued to maintain correct temps for over a week now. Also have new fridge. Don't recommend the top freezer Maytag one for about $700, as construction is cheap, and temps fluctuate all over the place. Had Home Depot exchange out for the LG $740 top freezer model, and am really impressed with its construction and performance so far. (Both units are recommended buys by ConsumerRepots.Org) Not sure how long old unit will keep running correctly, nor what caused it to come back to life after the defrost. Perhaps a simple clogged drain tube, or shorted out rusted electrical connections that I cleaned. Anyway, am keeping Part Select parts on hand for possible future breakdown, and enjoying having both fridges running. We needed additional freezer space, and got the peace of mind of a new unit for the kitchen.
diagram from part select matched my fridge perfect. i ordered all parts that involve defrosting coils. ( defrost heater 618, defrost thermostat 620, defrost thermostat 627 ). two wires involved with thermostat, just removed all old parts and replaced with new. Part Select videos helped demonstrate the projects well.
Ask our experts a question about this part and we'll get back to you as soon as possible!
8 questions answered by our experts.
< Prev
1
Next >
Sort by:
Search filter:
Clear Filter
Your search term must have 3 or more characters.
Keep searches simple. Use keywords, e.g. "leaking", "pump", "broken" or "fit".
Sorry, we couldn't find any existing answers that matched.Try using some different or simpler keywords, or submit your new question by using the "Ask a Question" button above!
Jorge
December 15, 2017
I have my appliance almost 10 years, the freezer is building up by the door freezer, do you think is the gasket door is not closing right?
For model number ETS22XBPBRWW
Hi Jorge, Thank you for the question. Yes, This sounds like an issue with the gasket in the door. If the gasket is not sealing properly, it can case the frost and ice build up and temperatures inside the appliance can be off. You can also check to see if the door is sitting level. If the door is good, I suggest having the gasket replaced, Part Number: PS296762. Good luck with the repair!
Hello Angel, Thank you for the question. The reading should never be in the hundreds. It should always be closer to 10-30 ohms. Hope this helps!
2 people found this helpful.
Was this helpful?
Thank you for voting!
Jessica
February 22, 2018
What cause an Hotpoint refrigerator evaporator to keep freezing up\ frost buildup in freezer
For model number HTS16BBMBRWW
Hello Jessica, thank you for your question. The evaporator will freeze/frost up if the Defrost Control
PartSelect Number: PS288216, Defrost Thermostat PartSelect Number: PS1155320, or Defrost Heater
PartSelect Number: PS303768 are not working. The heater and thermostat can be tested with a multimeter, if these are tested and function correctly you know the defrost control is the issue! I hope this helps!
1 person found this helpful.
Was this helpful?
Thank you for voting!
Janet
May 29, 2019
Need help in removing defrost heater. Glass is broken and freezer was building up with frost and fridge was warm. Is there a video i could watch?
For model number GTS22IBMARCC
Hello Janet, Thank you for the question. Here is a link to a How To Video that may help. Good luck with the repair!
https://www.youtube.com/watch?v=32dvdtzVxRY&t=224s
1 person found this helpful.
Was this helpful?
Thank you for voting!
Jeff
September 30, 2017
Hi, my GE garage refrigerator is no longer evaporating the liquid that comes off the coils. It drains into the freezer and into the bottom of the refridgerator. I was thinking it was the heater element but maybe not.
For model number GTS18DCPWLWW
Hi Jeff,
Thank you for your question. I would suggest that you should take a look at your coils but you could first take a look at your defrost thermostat. It could be that part is reading the wrong temperature and so it is not evaporating correctly. Good luck with your repair.
Was this helpful?
Thank you for voting!
Andy
December 18, 2021
I’m in Toronto. In the freezer, the frost build up and in the fridge, the temperature increase. What part problem is it? Thanks for your help.
For model number GTR22KSWARSS
Hello Andy, thank you for your question. Freezer frost occurs when moisture comes into contact with the evaporator coils inside your freezer and then freezes. The most common reason that frost builds up is a damaged or worn-out door seal: Your freezer's door seal (also called a gasket) keeps cold air in and warm air out. Inspect the freezer door gasket and replace it if it is damaged. Part number PS296765. We hope this helps.
Was this helpful?
Thank you for voting!
Durrell
7 days ago
How to stopFrost build up in freezer?
Refrigerator works ok
For model number GTH18XCTZRBB
Hello Durrell, thank you for your inquiry. According to our research, we would recommend checking the defrost thermostat. If it is fine, then the issue is most probably with the control defrost module, part number PS10065388. You may need to replace it to fix the issue. We hope this solves your problem!
Was this helpful?
Thank you for voting!
Phil
September 2, 2019
I have a GE refrigerator gth18ctzrww, the coil unit in the freezer keeps freezing up, i replaced the evaporator coil fan motor, the defrosting coil in the glass tube and the defrost thermostat that snaps on the tubing on the top of the evaporator coil, it lasted about 2 weeks and froze up again, i am not sure what to do next. Phil krause.
For model number GTH18XCTZRWW
Hello Phil, thank you for your question. We would recommend replacing the defrost control unit Part #: PS10065388. I hope this helps!
Was this helpful?
Thank you for voting!
< Prev
1
Next >
✖
Ask a Question
Ask our experts a question on this part and we'll respond as soon as we can.