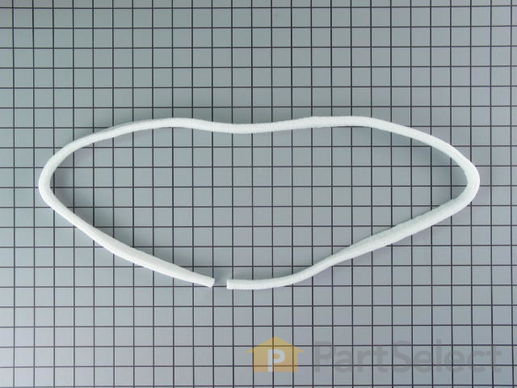
Part Location Diagram of WE9X105 GE Lower Felt Seal
See part 1221 in the diagram
( Grid squares measure 1x1 inch )
Customer Service Representative

Get in touch, we're here to help!

Daily 8am - 9pm EST

customerservice@partselect.ca

Lower Felt Seal

$48.04
  Special Order
PartSelect Number PS268338
Manufacturer Part Number WE9X105
Manufactured by GE
Troubleshooting
This part fixes the following symptoms:
Noisy | Marks left on clothes
This part works with the following products:
Dryer, Washer Dryer Combo.
This part works with the following products:
General Electric, Hotpoint.
Part# WE9X105 replaces these:
AP2043044, 277130, WE09X0105
Back to Top
Customer Repair Stories
 Average Repair Rating: 3.0 / 5.0, 7 reviews. What's this?
  • 1
Sort by:
Sorry, we couldn't find any existing installation instruction that matched.
loud squeak/burnt edges of clothes
I used the puddy knife at the top of the front panel seam. I pushed in the knife till I heard the top panel release. I then did the other side of the front panel till I heard the same sound.I now could raise the top of the dryer. Inside the front panel(on the left and the right) are two philips head screws that I loosened and took off, releasing the front panel,however I had to use the needle-nose pliers to take off two electr. connections to the door switch. After I took off the front panel, there it was ,THE PROBLEM. The top glide and bottom felt were shot and worn out. I did as the directions told me, and with a 1" chissal, I gently scraped off the old glide and felt, without scratching the metal. Cleaned off the residue of old glue with Goo-Gone. Now I put glue on the top part of the portal(which I marked before I removed it) waited a minute for it to get tacky and layed the new top glide on, gently pressing down to insure adhesion. It dried right away. I did the same with the lower felt glide.I did all the reinstallation of the panels in reverse order and everything fit perfectly and smoothly. I waited about an hour to make sure all was dried (glue) and turned it on.It was alittle stiff running at first, but then it ran smooth as silk and no more squeaking or burning of my clothes.Thank you partselect!!!!
Other Parts Used:
Top Drum Glide Kit
  • Philip from Irmo, SC
  • Difficulty Level:
    Really Easy
  • Total Repair Time:
    15 - 30 mins
  • Tools:
    Screw drivers
15 of 15 people found this instruction helpful.
Was this instruction helpful to you?
Thank you for voting!
Replace upper drum-glide & felt. Also replaced lower felt
Unplugged and raised the top of the dryer (This allows access to the screws that attach the front of the dryer to the body of the dryer). 2nd- removed the two screws inside the front and down approx 5 inches on each side of the front. Also remove the small plastic tie-wrap that holds the wiring to the top of the dryer. It will be on the right hand side if facing the front of the dryer. Unplug the two plastic wire plugs that attach the wiring to the controls. Use a flat screw driver to pry the front away from the body of the dryer (this will unattach clips that hold the front in place. Remove the felt guide. The factory glue will keep some of the felt attached to the housing. This is where I used the utility blade to remove the rest of the felt. Then I used the soft wire-wheel to remove the rest of the residue of the glue. Probably not necessary. I replaced the top felt first with the teflon guides on it. I used spring loaded clamps to hold it in place. The clamps were probably not necessary either because the glue holds very well. Next I replaced the lower felt. While the front of the dryer was removed this was a good time to use the nozzle on the sweeper to remove the lint that was built up inside of the dryer. Reverse your steps and put your dryer back in service. You may need to reach through the door to align the drum over the felt in order to re-attach the front of the dryer.
Other Parts Used:
Rotary Selector Knob Top Drum Glide Kit
  • Jeffrey from Washington, PA
  • Difficulty Level:
    Easy
  • Total Repair Time:
    1- 2 hours
  • Tools:
    Screw drivers
8 of 9 people found this instruction helpful.
Was this instruction helpful to you?
Thank you for voting!
My dryer was eating our clothes. Clothes getting stuck in the front of the dryer between the drum and the front of the dryer.
The only part of the this repair that I struggled with was researching how to pull the front and top of my dryer loose. A putty knife and good instructions solved the problem.
I removed the guides and bottom felt from the diameter of the drum and cleaned the surface by scraping with a razor knife.
I applied the glue and placed the new guides and felt along the drum, securing them with small clamps.

I left the clamps in placed while I cleaned up the inside and behind the dryer.
I reassembled the dryer and let it sit until the next day.
All is well and our drawer are no longer being gobbled up!
Other Parts Used:
Top Drum Glide Kit
  • Donald from Panama City Beach, FL
  • Difficulty Level:
    A Bit Difficult
  • Total Repair Time:
    30 - 60 mins
  • Tools:
    Screw drivers
7 of 7 people found this instruction helpful.
Was this instruction helpful to you?
Thank you for voting!
Dryer drum making a lot of noise
The felt liner between the drum and the front door was worn out. The plasitc glides were all torn apart. Clothes would catch in the rim of the dryer.

Anyways, just lift the lid and tilt the front of the dryer down (after unplugging the control panel). Although only the top of the felt was messed up, i replaced the whole thing. I used the paint stripper to take off the glue residue from the previous felt.

Once it was clean it was easy to glue the felt pieces in place, easy reassembly and the dryer is good as new.

The design of this dryer sucks. This is the 2nd time the felt was repaired. The first time cost well over $300.
Other Parts Used:
Top Drum Glide Kit
  • Philip from Lake Forest Park, WA
  • Difficulty Level:
    Easy
  • Total Repair Time:
    30 - 60 mins
  • Tools:
    Screw drivers
5 of 5 people found this instruction helpful.
Was this instruction helpful to you?
Thank you for voting!
clothes were getting caught between front cover and drum . Tearing softer material and staining the other.
used a putty knife to press in the font clips removed top then front panel . pulled off the old felt and glids what was left of them. then used a 2'' air grinder with a 3m scuff pad to remove the old glue and remaining felt then glued the new ones back in place gave it about 30mins to set up then put it back together and works good as new
Other Parts Used:
Top Drum Glide Kit
  • heath from winterville, NC
  • Difficulty Level:
    Easy
  • Total Repair Time:
    1- 2 hours
  • Tools:
    Screw drivers
5 of 7 people found this instruction helpful.
Was this instruction helpful to you?
Thank you for voting!
Dryer sounded like a stuck pig
I ordered the rear bearing kit from the local supplier here in Marsh Harbour, Abaco the Bahamas. Delivery for the kit was 3 to 4 weeks from my local supplier.NOT PARTSELECT.
While waiting I found this site and after reading the VERY helpful instructions from your customers, I realised that I would probably need additional parts, top and bottom front felt seals, maybe a new drive belt.
I ordered these online and had the parts deliverd to a friends address in West Palm Beach Florida. The parts arrived in about 2 days. My wife was already there and brought the parts back.

Installation was very straight forward. Read the other installation reports and you will not have a problem.
The only thing I can add is, DO NOT LOOSE THE SMALL BALL BEARING. I did and it took me about an hour to find it.
My suggestion is to do a dry run installation of the bracket WITH OUT the small ball bearing. Tape the backing plate?that keeps the ball breaing inplace to the outside of the back panel with duct tape so that the screw hole will line up. Once this is done put some grease (Supplied with the kit) in the hole on the nylon bracket and attach with the two screws, do not over tighten. Grease up the area where the rear bearing shaft support will sit.

Installation of the rear bearing shaft support was straight forward. This is on the dryer drum. Extra hands are must for this.

I was very pleased with Partselct.
Dryer works like new.
Other Parts Used:
Drum Belt Top Drum Glide Kit
  • Christopher from Palm Beach Gardens, FL
  • Difficulty Level:
    A Bit Difficult
  • Total Repair Time:
    30 - 60 mins
  • Tools:
    Pliers, Screw drivers
3 of 10 people found this instruction helpful.
Was this instruction helpful to you?
Thank you for voting!
Lots of noise from the drum scraping inside front of dryer and clothes being pinched.
First you need two people to get dryer to a location with plenty of elbow room. Then we just followed the instructions on the parts page. At our residence we take the dryer apart at least once a year to give it a good cleaning. During the year lots of dust accumulates inside the dryer box. This time upper and lower felt needed replacing; it is an easy fix just remove the old parts and install new the ones. Removing the old glue was the only slow down, but don't hurry this step you want a good clean surface to glue new felt on. While repairing the felt we discovered the insulation was cut away on one wire leading to the gas igniter. We repaired the wire and reassembled the dryer. We used the dryer the next day and discovered the wire harness was not reconnected. Another reason to have 4 hands and four eyes for this repair.
Other Parts Used:
High Temperature Adhesive Top Drum Glide Kit
  • Mark from SEABROOK, TX
  • Difficulty Level:
    Easy
  • Total Repair Time:
    1- 2 hours
  • Tools:
    Screw drivers, Wrench (Adjustable)
1 of 2 people found this instruction helpful.
Was this instruction helpful to you?
Thank you for voting!
  • 1
Questions and Answers

Be the first to ask our experts a question about this part!

Related Parts
Model Cross Reference
This part works with the following models:
PartSelect Number: PS268338
Manufacturer Part Number: WE9X105
Brand
Model Number
Description
General Electric
DBL333EA0AA
Dryer - Electric
General Electric
DBL333EA0CC
Dryer - Electric
General Electric
DBL333EA0WW
Dryer - Electric
General Electric
DBL333EB0CC
Dryer - Electric
General Electric
DBL333EB0WW
Dryer - Electric
General Electric
DBL333EY0AA
Dryer - Electric
General Electric
DBL333EY0WW
Dryer - Electric
General Electric
DBL333GA0AA
Dryer - Gas
General Electric
DBL333GA0CC
Dryer - Gas
General Electric
DBL333GA0WW
Dryer - Gas
General Electric
DBL333GB0CC
Dryer - Gas
General Electric
DBL333GB0WW
Dryer - Gas
General Electric
DBL333GY0AA
Dryer - Gas
General Electric
DBL333GY0WW
Dryer - Gas
General Electric
DBR453EA0WW
Dryer - Electric
General Electric
DBR453GA0WW
Dryer - Gas
General Electric
DCB330EB0KC
Dryer - Electric
General Electric
DCB330EB0WC
Dryer - Electric
General Electric
DCB330EY0AC
Dryer - Electric
General Electric
DCB330EY0WC
Dryer - Electric
General Electric
DCB330GB0KC
Dryer - Gas
General Electric
DCB330GB0WC
Dryer - Gas
General Electric
DCB330GY0AC
Dryer - Gas
General Electric
DCB330GY0WC
Dryer - Gas
General Electric
DCB330GY1AC
Dryer - Gas
General Electric
DCB330GY1WC
Dryer - Gas
General Electric
DCCH43EA0WW
Dryer - Electric
General Electric
DCCH43GA0WW
Dryer - Gas
General Electric
DCD330EB0KC
Dryer - Electric
General Electric
DCD330EB0WC
Dryer - Electric
Customer Service Representative

Get in touch, we're here to help!

Daily 8am - 9pm EST

Contact Customer Service