The flat style gas oven igniter included in this kit has a body length of 3-3/4". This kit comes with a mounting bracket and a wire connector with a plug. *Please note: the connector plug might need to be removed and spliced to range wiring using porcelain wire nuts. This part is used to heat your oven.
How Buying OEM Parts Can Save You Time and Money
Part Videos
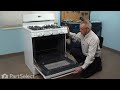
Replacing your General Electric Range Flat Style Oven Igniter Kit
Troubleshooting
This part fixes the following symptoms:
Gas igniter glows | but will not light | Little to no heat when baking | Will Not Start
Keep searches simple. Use keywords, e.g. "leaking", "pump", "broken" or "fit".
Sorry, we couldn't find any existing reviews that matched. Try using some different or simpler keywords.
★★★★★
★★★★★
Rosanna B - July 26, 2023
Verified Purchase
Easy repair
The part was easily installed and defferred the cost of a replacement stove.
★★★★★
★★★★★
Kristie S - February 22, 2023
Verified Purchase
Very happy
Product was easy to find and order. Pretty easy to replace too. Shipping was EXTREMELY fast. Would recommend
★★★★★
★★★★★
Binda T - November 24, 2022
Verified Purchase
Quick service!
Ordered our part at 7pm, had it at 4 the next day - crazy! Had it installed and tenants are very happy!!!!
★★★★★
★★★★★
Jonathon M - July 17, 2022
Verified Purchase
Perfect fit
I'm shocked how fast my part arrived. Part was a perfect match.
★★★★★
★★★★★
Douglas D - April 7, 2022
Verified Purchase
Repair went well
Part was good and repair went well. Thank you!
★★★★★
★★★★★
Diane M - November 29, 2020
Verified Purchase
Easy repair
Oven is working now. Part came in two days after ordering.
★★★★★
★★★★★
Hermann K - October 13, 2020
Verified Purchase
Part worked perfectly
Part arrived next day. Had oven back operating same day.
★★★★★
★★★★★
Mario G - July 28, 2020
Verified Purchase
Easy repair
Perfect fit. Working fine
★★★★★
★★★★★
Michel D - July 8, 2020
Verified Purchase
Wiring too short.
Thanks for the part. The wiring was too short. I had to modify using the wire from the old part. Couldn't find additional fireproof connectors though. So I am using regular plastic ones and keeping my fingers crossed.
★★★★★
★★★★★
Kyle J - May 27, 2020
Verified Purchase
Finally the oven works!
I have a GE model JGB500SEP3SS perfect part and fixed my issues. One thing I ran into was the repair it’s self my model didn’t have access to the back or was able to pull the connection through the front. I had to cut out the old one from underneath and snake my new part around to plug in. Perfect part and fast shipping, just took some extra diy experience.
< Prev
1
2
Next >
Customer Repair Stories
Average Repair Rating: 3.8 / 5.0, 122 reviews.
What's this?
< Prev
1
2
3
Next >
Sort by:
Search filter:
Clear Filter
Your search term must have 3 or more characters.
Keep searches simple. Use keywords, e.g. "leaking", "pump", "broken" or "fit".
Sorry, we couldn't find any existing installation instruction that matched.
The igniter glowed, but never got hot enough to ignite the propane, so I did smell propane.
First, I removed the two screws that held the heat shield in place. Second, I removed the one screw that held a small wire covering. That covering kept the wires inside the back wall of the range. Third, I removed the two screws that held the Igniter Kit, and unplugged it from the back of the range. I then carefully put the new igniter in, and reassembled everything in reverse order. It only took about 30 minutes to do the repair, and 30 minutes of cleaning and wiping of the broiler area. (It is amazing what you see when you take things apart). I should have been wiping things up over the past few months. Overall, a very easy repair. I ordered the part at 12:30 in the afternoon, and FedEx delivered it the next morning at 11:30, all for the regular shipping price of $6.95. VERY HAPPY.....
Other Parts Used:
Sidney from Marysville, CA
Difficulty Level:
Really Easy
Total Repair Time:
30 - 60 mins
Tools:
Nutdriver
671 of 718 peoplefound this instruction helpful.
Was this instruction helpful to you?
Thank you for voting!
oven would not light or keep temp.
first I thought it was a faulty gas valve, so I pulled it out, started researching for a replacement part, found your site and started research. I discovered thhat the igniter was the culprit, that info. saved me about a week of time and a 100 bucks, so I installed the gas safety valve back in the oven, patience is the word for the day, you cross thread this and you are done! any way ordered ignighter and it shipped to my house in about 4 days, New York to Calif. had it installed in about 15 minutes fired off the oven and ...IT worked hurray...10-9-2010,
Other Parts Used:
zack from corning, CA
Difficulty Level:
Really Easy
Total Repair Time:
15 - 30 mins
Tools:
Nutdriver, Screw drivers, Socket set, Wrench set
448 of 461 peoplefound this instruction helpful.
Was this instruction helpful to you?
Thank you for voting!
Oven wouldn't heat. This degraded over several weeks.
1. Pulled the 110V power plug. It was not necessary to turn off the gas; just be careful not to stretch or pinch the flexhose behind the stove. 2. Removed the oven door by opening a couple of inches then lifting upward. 3. Removed the warming drawer by pulling out to the stop, then pushing the small levers on the side of the track to release. 4. Removed two flathead screws at the back of the oven to free up the oven bottom panel. 5. Removed the bottom panel by lifting up the pack until the front edge clears the overhang. 6. Removed the two screws on the side that hold the igniter to the burner tube. Be sure not to let the screws drop into the gaps in the oven floor. Note the position of the bent tab with the holes to ease aligning the new part. 7. Reached through the warming drawer to release the plug by squeezing the tabs on the end. 8. Pulled the plug up through the gap in the oven floor (where the wires went through) and connected it to the other connector. 9. Ran the new wire down through the oven floor. 10. Aligned the new igniter and tightened them. Had trouble getting the screws started so I used a toothpick to align one hole while starting the other screw. 11. Replaced the oven bottom panel. It needed a little jockeying to get the screws and holes aligned. 12. Replaced the door. 13. Replaced the oven drawer.
This turned out to be a good time to clean all those dusty places that don't get cleaned that often.
Other Parts Used:
Durwood from Suffield, CT
Difficulty Level:
Easy
Total Repair Time:
15 - 30 mins
Tools:
Nutdriver, Screw drivers
307 of 402 peoplefound this instruction helpful.
Was this instruction helpful to you?
Thank you for voting!
On Thankgiving Day with company coming and the turkey in the oven, my kenmore stove decided to act up. The oven burner started to smell awful and start carboning up due to improper burning at the burner tube. We then abandoned our attempts to roast the turkey in the oven for that day.
After removing the bake tube and ignitor assembly the following day for a close inspection which involved removal of the bottom pan, racks etc. and disconnecting the ignitor / tube assembly by unscrewing the sheet-metal screws holding them in place, I discovered that the ignitor had burned a hole in the bake tube which could not be seen without unscrewing the ignitor from the tube first. This caused the air / propane ratio to dramaticly change causing the oven to have a strong odor, start to carbon up the bake tube and effect the temperatures and cook time and the possibility of monoxide fumes effecting the chef. The parts that partselect.com supplied, which were in stock ,worked perfectly and saved my Christmas goose. Happy Holidays!
Step 1. Pull oven out disconnect power,turn off gas & remove gas line from stove. Step 2. Remove broiler drawer,locate igniter & safety valve. Step 3. Disconnect 2pin molex connector for igniter and faston connectors from valve. Step 4. Use nut driver remove fasteners that hold igniter and valve remove gas line and feed from valve. Step 5. Replace valve and igniter.Repeat steps 4-1 and start baking.
Note: You may only need a igniter and not a valve,both were bad on my unit. Most often it's just the igniter that goes out.
First I removed the two screws that hold the element in place. I then pulled the element out about three inches and disconnected the wires. I had tried to get a replacement element from Sears but their new element did not have the proper connecter and was missing the flange on the side that the screws went. I am very pleased that I was able to get the exact replacemen part.
Other Parts Used:
Billie J. from Western Grove, AR
Difficulty Level:
Really Easy
Total Repair Time:
15 - 30 mins
Tools:
Nutdriver
35 of 36 peoplefound this instruction helpful.
Was this instruction helpful to you?
Thank you for voting!
oven would not ignite
1. removed old oven glow igniter using nut driver socket--it wasn't that tight so I didn't have to use the actual driver. The igniter was now loose hanging from its 2 wires. 2. on the web I read that the new part would have to be spliced to the old, however I was able to push the old igniter through a hole in the oven wall and then pull it out of an adjoining hole on the right hand side. With some effort I detached the old igniter from a plug receptacle that leads back up to the main wiring junction of the oven. 3. I then plugged the new igniter into the receptacle, pushed it back into one hole, then fished it out of the other hole. I could then reattach the new igniter onto the gas delivery tube. Turned the oven on and it worked.
Other Parts Used:
Kwatei from Nutley, NJ
Difficulty Level:
A Bit Difficult
Total Repair Time:
15 - 30 mins
Tools:
Nutdriver, Wrench (Adjustable)
29 of 33 peoplefound this instruction helpful.
Was this instruction helpful to you?
Thank you for voting!
Oven came on by itself, finally burning out the igniter
Once I figured out how to get the top off it was not too bad. all of the screws and igniters for the burners had to be removed. The actual install of the thermostat was simple after that. The igniter was also an easy install. Overall, it takes more time to disassemble the stove to get to the problem than to install the part.
1. Pull the oven out to access the connector in the back of the oven near the bottom center to disconnect the connector to the ignitor. Then push the connector and wire through the hole in the back of the oven. 2. Removed the broiler drawer to access the ignitor. 3. Removed the two screws holding ignitor to the burner bar, then pull wire the remaining way through the rear hole. 4. Installed the new part with the two screws to the burner bar. 5. Insert the wires with connector througth the hole in the rear of the oven to reconnect to the plug at the back outside of the oven Reconnect the connector at the back of the oven. 6. Push the oven back in place and it is ready to use.
Other Parts Used:
Keith from Osceola, IN
Difficulty Level:
Really Easy
Total Repair Time:
Less than 15 mins
Tools:
Nutdriver
20 of 23 peoplefound this instruction helpful.
Was this instruction helpful to you?
Thank you for voting!
Oven would not ignite
1. Moved oven from the wall. 2. Unplugged the stove from the electrical outlet. 3. Removed over racks and bottom panel. 4. Located wires leading from the igniter in the back of the stove. 5. Disconnected the wires from the ignitor. 6. Used socket set to remove screws from ignitor. 7. Cut connector plug from new ignitor. 8. Stripped about a half inch of insulation from wires of new ignitor to be able to connect it to stove. 9. Carefully handled new ignitor and screwed it into place. 10. Attached wires of new ignitor using new caps. 11. Put bottom panel and racks into place. 12. Plugged oven into electrical outlet - Oven ignited and made a good dinner.
Other Parts Used:
Jeffery Jankowski from Bronx, NY
Difficulty Level:
Easy
Total Repair Time:
15 - 30 mins
Tools:
Screw drivers, Socket set
19 of 24 peoplefound this instruction helpful.
Was this instruction helpful to you?
Thank you for voting!
< Prev
1
2
3
Next >
Questions and Answers
Ask our experts a question about this part and we'll get back to you as soon as possible!
47 questions answered by our experts.
< Prev
1
2
3
Next >
Sort by:
Search filter:
Clear Filter
Your search term must have 3 or more characters.
Keep searches simple. Use keywords, e.g. "leaking", "pump", "broken" or "fit".
Sorry, we couldn't find any existing answers that matched.Try using some different or simpler keywords, or submit your new question by using the "Ask a Question" button above!
Joan
December 13, 2017
If the oven is not coming on but broiler does is this the igniter? You can hear it trying to make contact!
For model number JGP75AEY1AA
Hi Joan, Thank you for your question. It sounds like it may just be your igniter that is the issue. You should be able to test that part with a multi meter to see if it is working correctly or not. It should read somewhere between 50 - 1100 ohms of resistance. Good luck with your repair.
26 people found this helpful.
Was this helpful?
Thank you for voting!
Travis Long
February 2, 2018
My oven won't turn on when i turn the oven nob, nothing.
For model number JGBS22BEA1AD
Hello Travis, Thank you for your inquiry. We would recommend checking the following parts to fix your issue: flat style oven igniter kit, safety valve, burner tube, spark module, oven thermostat and pressure regulator. You can test the parts with a multimeter. If you are unfamiliar with how a multimeter functions, there are YouTube videos available to assist you. Hope this helps!
17 people found this helpful.
Was this helpful?
Thank you for voting!
George
December 3, 2018
When we light the oven it makes a loud boom.
For model number Jgbp36bej1bb
Hello George, thank you for your question. We would recommend replacing the igniter. Usually when this happens it means the igniter is taking too long to light. I hope this helps.
14 people found this helpful.
Was this helpful?
Thank you for voting!
Terry
November 18, 2017
My oven works fine but the broiler igniter will not glow. Does the broiler and oven have the same igniter? What part number would work for the broiler igniter?
For model number JGB281DER1BB
Hello Terry,
Thanks for your question. The flat style oven igniter is used for heating your oven, but there are two other igniters commonly associated with the broiling element. Thankfully, all of these can be tested relatively easily. If they glow for 90 seconds without generating heat, they are faulty and should be replaced.
I hope this helps.
Ordered and changed igniter wb13k21 as per recommended solution of low heat in oven still low heat,400 at 550,300 at 400.Cycles on and off but at a lower bake temp.Any recommendations would be appreciated. Thanks
For model number JGB605det2ww
Hi Hank, Thank you for the question. I recommend replacing the Temperature Sensor, PartSelect Number PS2374070.The sensor maintains the temperature inside the oven to the set degrees, when defective the oven might not obtain the correct temperature you set or will over heat. Hope this helps!
My oven lights all the time but we get a gas smell first. I had GE here on a service call, but it worked perfectly. Lit every time and no gas smell. He said it could be the igniter. What are the other possibilities
For model number pgb930set3ss
Hi Anthony, thank you for your question. The igniter might be the issue where it is not igniting right away and so you smell gas before it actually ignites. The only other part that I could think of being the issue might be the safety valve or regulator. I hope that helps. Good luck with your repair.
7 people found this helpful.
Was this helpful?
Thank you for voting!
Scott
November 3, 2017
What should the omhs be reading for that part number
For model number Ps231270
Hi Scott,
Thank you for your question. This part should read anywhere between 0 and 1100 ohms of resistance. If the meter does not move then your igniter will have to be replaced. Good luck with your repair.
6 people found this helpful.
Was this helpful?
Thank you for voting!
Bruce
November 21, 2017
Old stove..wires go thru back of stove.. cannot find connection
For model number JGBS23GEV6WH
Hi Bruce,
Thank you for your question. Here is an installation video to help you with the installation: https://youtu.be/qTn1LxM5Rc4 . If the connection wires have fallen back into the stove, you will have to pull your appliance out, take off the back and push the wires back through the hole. Good luck with your repair.
5 people found this helpful.
Was this helpful?
Thank you for voting!
Reginald
January 15, 2018
Kenmore gas oven. The oven will come on but will not reach high temperatures. The ranges on top will all light up.
For model number 362.75498990
Hello Reginald, Thank you for your inquiry. We would recommend checking the following parts to fix your issue: burner with igniter, pressure regulator, dual oven safety control valve, probe/sensor, and oven control board. You can test the parts with a multimeter. If you are unfamiliar with how a multimeter functions, there are YouTube videos available to assist you. Hope this helps!
5 people found this helpful.
Was this helpful?
Thank you for voting!
El
January 16, 2018
The oven does not heat at all. There is no clicking sound.
For model number JGBS23WEL1WW
Hi El,
Thank you for your question. There could be a few parts that are causing that issue. I would suggest testing your igniter first. You could also test your temperature sensor as well. You can test both of those parts with a multi meter to make sure that they are working correctly. If both of those parts are fine you may want to also check your spark module. If that part is also working, it may be your control board that is the issue. I hope that helps. Good luck with your repair.
5 people found this helpful.
Was this helpful?
Thank you for voting!
< Prev
1
2
3
Next >
✖
Ask a Question
Ask our experts a question on this part and we'll respond as soon as we can.