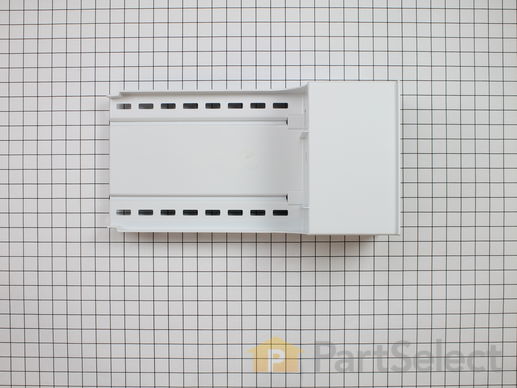
Part Location Diagram of 61005619 Whirlpool Ice Enclosure
See part 20 in the diagram
( Grid squares measure 1x1 inch )
Customer Service Representative

Get in touch, we're here to help!

Daily 8am - 9pm EST

customerservice@partselect.ca

Ice Enclosure

★★★★★
★★★★★
3 Reviews
$175.91
  Special Order
PartSelect Number PS2060964
Manufacturer Part Number 61005619
Manufactured by Whirlpool
Product Description

Ice Enclosure Specifications

This is the part that holds the ice bin and houses the auger motor which is sold separately.
How Buying OEM Parts Can Save You Time and Money

How Buying OEM Parts Can Save You Time and Money

Troubleshooting
This part fixes the following symptoms:
Ice maker won’t dispense ice | Ice maker not making ice
This part works with the following products:
Refrigerator.
This part works with the following products:
Maytag.
Part# 61005619 replaces these:
AP4071512, 901798, 61005619, 61005375, 61005619
Back to Top
Customer Reviews
Average Rating:
★★★★★
★★★★★
3 Reviews
5.0
Filter By Rating:
  • 5 Stars
    3
  • 4 Stars
    0
  • 3 Stars
    0
  • 2 Stars
    0
  • 1 Star
    0
  • 1
Sort by:
Sorry, we couldn't find any existing reviews that matched. Try using some different or simpler keywords.
  • 1
Customer Repair Stories
 Average Repair Rating: 3.4 / 5.0, 26 reviews. What's this?
  • 1
  • 2
  • 3
Sort by:
Sorry, we couldn't find any existing installation instruction that matched.
ICE Maker stopped making ice.
I removed the failed ice maker and performed a post-mortum to detemine the root-cause of the failure. Removal began with me reaching behind the icemaker and disconnecting the power to the icemaker. Then I removed the single screw that attached the supporting "L" bracket located on the bottom of the icemaker unit. I then carefully lifted the bottom of the icemaker away from the wall. This move disengaged the two plastic latching features that anchored the top of the icemaker to the refrigerator wall. I could then pull the unit out so that I could inspect it for the problem.

I have had experience with failed icemakers of similar design in the past and there is a fundamental weakness in their design. The small electric motor that is used to activate the various steps involved in making the ice moves a set of copper finger contacts around a circular track. During this movement, these contacts frequently make and break the electrical circuit that turns on the small heating element that is used to lightly thaw the ice so that the extraction fingers can more easily sweep the latest batch of ice cubes from the ice making tray. This making and braking of contacts can occur several times a day. Over the lifespan of the icemaker, this making and braking of the contacts erodes the contact fingers and also builds up a residue of carbon that ultimately results in the loss of electrical contact between the fingers and the copper track that it normally rides upon. Once the electrical contact is lost, the icemaking process comes to a grinding halt.

Installing the replacement icemaker was a breeze. I just reversed the order of the previous steps and after reconnecting the power cable to the icemaker, it was back in the icemaking business. Of course there was a waiting period of approximately one hour before any ice was forthcoming since the new icemaker had to cold soak before it was ready to make the first batch. It has made ice consistenly since the installation.
Other Parts Used:
Replacement Ice Maker
  • harry from Tullahoma, TN
  • Difficulty Level:
    Easy
  • Total Repair Time:
    15 - 30 mins
  • Tools:
    Nutdriver
607 of 732 people found this instruction helpful.
Was this instruction helpful to you?
Thank you for voting!
Plastic broke where motor mounts to dispense ice so motor was just lying on the back of the enclosure.
Removed Enclosure, removed solenoid, removed yoke from motor, installed motor and installed solenoid. Then re installed enclosure.

The difficulty was removing yoke from motor shaft, left hand threads that were hard to identify. No place to hold shaft so it turned when trying to remove yoke.

Some minor difficulty re attaching electrical harness for motor and solenoid as I had to do it by feel. Removal was easy as the motor was just hanging and I removed the solenoid before removing the enclosure.
Other Parts Used:
  • Thomas from Chandler, AZ
  • Difficulty Level:
    A Bit Difficult
  • Total Repair Time:
    15 - 30 mins
  • Tools:
    Nutdriver, Pliers, Wrench (Adjustable), Wrench set
35 of 40 people found this instruction helpful.
Was this instruction helpful to you?
Thank you for voting!
The motor that drives the ice auger, broke out of the plastic
I won't repeat the removale process, straight forward. The issue is removing the U shaped driver on the motor. You have to trun it clockwise (looking at it from the front) to remove it from the drive shaft in order to install the motor on the new shelf. The problem is the motor wants to turn as well. I used skinny plyers to hold the shaft but still could not get enought presure to stop the shaft from truning. Finally decided to have my wife hold the plyers and I tapped the auger blade with a small hammer. Success. Reinstallation was simple enought.
One important key: You are not done. Once it is all reinstalled, be sure empty out the ice bin, dry all the parts as best you can, and activate the dispenser every 15 min or so for the first hour. Otherwise it will freeze up and you will think it is broken again.
Other Parts Used:
  • Bill from Statesville, NC
  • Difficulty Level:
    A Bit Difficult
  • Total Repair Time:
    30 - 60 mins
  • Tools:
    Pliers, Screw drivers
23 of 25 people found this instruction helpful.
Was this instruction helpful to you?
Thank you for voting!
ice dispenser won't dispense ice - auger not turning
Found the problem to be a broken plastic housing supporting the auger motor — which also acts as the ice bucket shelf

I purchased a new housing/shelf and went about changing it out.

1. Lift the arm that shuts the ice-maker off.

2. Remove the ice bin. I transferred the ice to a pan
and sat it in the lower areas of the freezer.

3. Remove the screw that secures the shelf to the
left side ot the freezer. It's located on the bottom
left side of the shelf. I used a socket driver for
this.

4. Simultaneously from both the back and front of
the shelf, lift the shelf up to clear the round
supports on both sides of the freezer
compartment and then begin to pull it towards
the front of the freezer. When the back of the
shelf clears the rear round supports, let the rear
part of the shelf drop down.

5. Reach to the back left and squeeze the top and
bottom of the wiring clip, which releases it from
the back refrigerator wall. Pull it towards you as
you do this. The shelf is now totally clear to pull
out the front of the freezer.

6. Close the freezer door to protect the contents.

7. Remove the auger yoke from the motor shaft at
the front of the housing enclosure. If you have
any problems, this is the place. To begin with,
you need to know that the yoke is left-hand
threaded. Personally, I found it very difficult to
remove. I pursued another path that was not at
all helpful, so I will omit it here, but forget about
anything involving disassembly of the motor.
What you have going for you is that the motor
does not turn well from this end of the device
because of gearing. Use something long (for
leverage) screwdriver or similar item that you
can pass between the forks of the yoke and pry
it off moving it in a clockwise direction (when
viewed from the front).

8. From the rear of the housing, make note of the
configuration of the electrical connections before
proceeding. Then remove the 4 screws holding
the motor. I used a cordless drill with a phillips-
head bit in it. I left 2 screws almost loose, but not
quite, so I could remove them by hand and hold
the motor and housing at the same time.

9. ) In a similar manner remove the 4 screws
holding the solenoid and the 3 parts that it
operates. Note closely the arrangement of the
parts before removal.

10. Reinstall the motor and solenoid items in a new
shelf/housing combo and reinstall by following
these instructions in reverse order.
Other Parts Used:
  • Rick from KANSAS CITY, MO
  • Difficulty Level:
    Really Easy
  • Total Repair Time:
    15 - 30 mins
  • Tools:
    Nutdriver
21 of 23 people found this instruction helpful.
Was this instruction helpful to you?
Thank you for voting!
Broken Enclosure
This was not a difficult project at all.
I removed the ice bin and then unplugged the wiring hareness.
With the old enclosure removed I first removed all of the screws holding the solenoid (look at the way it is mounted before removing all screws). I then removed the drive motor for the ice crusher/dispenser.
The yoke on the drive motor has a left hand thread.
Grip the motor shaft behind the yoke with a thin pair of channel locks or pliers and tap on the yoke in a counterclockwise direction with a small hammer to loosen and remove the yoke.
I then reattached the motor and reinstalled the yoke and then reinstalled the solenoid.
It was a bit of a trick to plug in the wiring harness, but if you use a small mirror you can do it with ease.
Be sure and align the drive motor yoke with the couple on the ice bin at a 90 degrees from the yoke on the motor. Also make sure the dispensing mechanisim on the ice bin moves freely. If not remove all ice from the bin and locate where the ice is jammed and remove it.
Trust me this will save the new enclosure you just installed.
Other Parts Used:
  • Roger from Skiatook, OK
  • Difficulty Level:
    Easy
  • Total Repair Time:
    15 - 30 mins
  • Tools:
    Pliers, Screw drivers
10 of 13 people found this instruction helpful.
Was this instruction helpful to you?
Thank you for voting!
motor mounts broken loose from enclosure
Removed frozen foods and ice container to get to enclosure. Removed single screw with 1/4" nut driver. Disconnected wiring harness from behind housing after lifting up and out a bit. Removed components from back of old housing, reinstalled in new. Tapped prong loose from motor shaft to pull in though piece of old broken housing.(reverse threaded) Screwed back into place and replaced motor in proper location. Reinserted housing, replugged wiring harness, replaced 1/4" screw to secure. Placed ice tray back in line with prong and frozen food (still frozen)back in shelves. Quick, easy and auto ice in the door again! And for less than 80 bucks. Is this a great country or what?
Other Parts Used:
  • Tom from Stockton, CA
  • Difficulty Level:
    Really Easy
  • Total Repair Time:
    30 - 60 mins
  • Tools:
    Nutdriver, Screw drivers
7 of 7 people found this instruction helpful.
Was this instruction helpful to you?
Thank you for voting!
Ice enclosure cracked
Remove ice maker. Remove single screw from under enclosure. Unplug wiring harness from refrigerator. Remove Ice enclosure. Removed metal yoke (left hand thread) with light tap from rubber hammer then removed all screws holding motor assembly and yoke assembly. Reverse the procedure to install components. Plug in wiring harness and install enclosure. Align ice dispenser with metal yoke on enclosure and install ice dispenser.
Other Parts Used:
Yoke Guide
  • Paul from kansas city, MO
  • Difficulty Level:
    Easy
  • Total Repair Time:
    30 - 60 mins
  • Tools:
    Nutdriver, Screw drivers
4 of 6 people found this instruction helpful.
Was this instruction helpful to you?
Thank you for voting!
The drive motor for ice cubes, and solenoid had broken off from the enclosure
Empty freezer

Shut off power

Use two striaght screw drivers to hold the electrical connector clamps open

Remove connector, noting which wire colors were from top to bottom

Remove clamp screw under the enclosure

Remove the Yoke from the motor. It is attached by a left handed thread. Tapping with a small hammer may be necessary to free the locked position. Keep the washer safe.

Remove screws from ther motor, the solenoid, and the plastic solenoid armature cover.

Fit the motor and solenoid to the new enclosure, using existing screws.

Fit the Yoke on to the motor shaft.

Attach the solenoid to the enclosure.

Slide the armature into the solenoid, and screw the armature guide and cover into place.

Test movem,ent of the solenoid armature by hand, to ensure free movement.

Attach a string loop to the end of the connector so that it stays at the top while the enclosure is put into place.
Slide the enclosure in, reconnect, add retaining screw.
Other Parts Used:
  • Maureen Murray from Rochester, WA
  • Difficulty Level:
    A Bit Difficult
  • Total Repair Time:
    1- 2 hours
  • Tools:
    Nutdriver
3 of 3 people found this instruction helpful.
Was this instruction helpful to you?
Thank you for voting!
Motor separated from encloser (broken plastic)
Disconnected power to frig.
Had to wait for "ice block to defrost in ice bin and enclosure before removal. Caused by water from a frozen water tube overflowing into bin. This in turn "locked" the screw in place causing the motor to break from its mount on enclosure when trying to get ice.
Removed broken enclosure,one screw on left side and lift out leaving motor hanging. Disconnected wiring marking where they would reattach removed other part from enclosure. Unsnapped wiring harness from back wall.
Removed yoke from motor. Easier than I thought . A light tap with a hammer (right side with yoke facing you) it spun right off.
Attached wiring to parts and then installed parts to enclosure. Tapped yoke with hammer again. Repositioned encloser and from under reached up and plugged in the harness into the back wall.
Mounted encluser and ice maker.
Ice maker is up and running.
Will pay more attention when screw is bound up and not from blocked dispenser.
Thanks for Part and How to section..
Other Parts Used:
  • Michael from Cedar Key, FL
  • Difficulty Level:
    Easy
  • Total Repair Time:
    1- 2 hours
  • Tools:
    Nutdriver, Screw drivers
3 of 3 people found this instruction helpful.
Was this instruction helpful to you?
Thank you for voting!
Back of the Ice Enclosure was broken so motor drive for ice despincer was pushed in
First I removed the 1 screw holding the Ice Enclosure in place. The enclosure would then pull out. However the wire in back was plugged in and you could not see how the female plug was locked to the male plug. By squeezing the top and bottom edges of the plug you will release the lock and plug will release with a pull.
Then I removed the unit from fridge.
after removing the 8 screws holding the motor and other fixture, I tried to install in replacement enclosure.
unfortunately, the u-drive that is attached to the gear box shaft and is used to turn the Ice despincer worm, was on so tight I could not remove it. (tried everything)
I then took a Dremal tool with disc cutter and where the shaft hole is I cut a rectangular hole large enough for the u-drive to fit through. Be careful not to cut the plastic braces behind the panel.
The motor and gear box then fits in the slots and you can screw in place.
Note: the green ground wire and red wire are tape together. the ground wire to gorund a red wire to closest terminal. White wire to terminal on bottom.
Slid unit part way back in freezer, reach in back and connect plug. (only connects one way)
Then slide rest of the way in, insert screw to hold in place. Good Luck, mine works great.
Other Parts Used:
  • Neil from Webster, MA
  • Difficulty Level:
    A Bit Difficult
  • Total Repair Time:
    1- 2 hours
  • Tools:
    Screw drivers, Wrench set
3 of 4 people found this instruction helpful.
Was this instruction helpful to you?
Thank you for voting!
  • 1
  • 2
  • 3
Questions and Answers

Ask our experts a question about this part and we'll get back to you as soon as possible!

1 question answered by our experts.
  • 1
Sort by:
Sorry, we couldn't find any existing answers that matched.Try using some different or simpler keywords, or submit your new question by using the "Ask a Question" button above!
Jill
October 9, 2019
Does this fit my model. There is everything but GE at the end in the parts section
For model number MZD27766GE
PartSelect logo
Hello Jill, thank you for inquiring. Yes, this Ice Enclosure is the correct replacement for your model. Good luck with your repair!

2 people found this helpful.

Was this helpful?
Thank you for voting!
  • 1
Model Cross Reference
This part works with the following models:
PartSelect Number: PS2060964
Manufacturer Part Number: 61005619
Brand
Model Number
Description
Maytag
AZ2727GIHB
Refrigerator
Maytag
AZ2727GIHW
Refrigerator
Maytag
GZ2727GEHB
Refrigerator
Maytag
GZ2727GEHQ
Refrigerator
Maytag
GZ2727GEHW
Refrigerator
Maytag
MZ2727EEGB
Refrigerator - Side-by-side
Maytag
MZ2727EEGW
Refrigerator - Side-by-side
Maytag
MZD2752GRB
Refrigerator - Side-by-side
Maytag
MZD2752GRQ
Refrigerator - Side-by-side
Maytag
MZD2752GRS
Refrigerator - Side-by-side
Maytag
MZD2752GRW
Refrigerator - Side-by-side
Maytag
MZD2766GEB
Refrigerator - Side-by-side
Maytag
MZD2766GEQ
Refrigerator - Side-by-side
Maytag
MZD2766GES
Refrigerator - Side-by-side
Maytag
MZD2766GEW
Refrigerator - Side-by-side
Maytag
MZD2768GEB
Refrigerator - Side-by-side
Maytag
MZD2768GEQ
Refrigerator - Side-by-side
Maytag
MZD2768GEW
Refrigerator - Side-by-side
Customer Service Representative

Get in touch, we're here to help!

Daily 8am - 9pm EST

Contact Customer Service