Keep searches simple. Use keywords, e.g. "leaking", "pump", "broken" or "fit".
Sorry, we couldn't find any existing reviews that matched. Try using some different or simpler keywords.
★★★★★
★★★★★
Brad M - October 28, 2023
Verified Purchase
Noisy dryer pulley Replaced
This was an easy fix...pulley as described and perfect fit....replacement took less than 15 minutes. I wonder what an appliance repair company would have charged?
★★★★★
★★★★★
Damon S - December 10, 2020
Verified Purchase
great part worked as required
The part arrived as expected and after installing the part I have been able to have saved $800.00 Thanks PartSelect could not have done this with out having googled and saw your site
★★★★★
★★★★★
Victor W - March 24, 2020
Verified Purchase
Worked beauty!
All went According to plan. From ordering, shipping, receiving and then install. No complaints!
< Prev
1
Next >
Customer Repair Stories
Average Repair Rating: 2.9 / 5.0, 68 reviews.
What's this?
< Prev
1
2
3
Next >
Sort by:
Search filter:
Clear Filter
Your search term must have 3 or more characters.
Keep searches simple. Use keywords, e.g. "leaking", "pump", "broken" or "fit".
Sorry, we couldn't find any existing installation instruction that matched.
Squeeling/Screeching
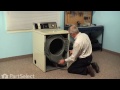
First I read all of the other stories about this problem so I would have the correct parts. At $6 a roller, decided to get all 3 & a belt. Pulled the lower panel off (2 bolts), then the door (2 bolts). Marked the door switch wires. Took 2 bolts out of the top & tilted it back. I found this the easiest way to access the drum. Mark 2 wires before disconnecting them from the top. All bolts are 5/16". Removed the plastic piece that connects the lint trap to the blower (3 screws). Have to access these from inside the drum. Removed the belt, then the drum. The bad roller was the belt tension roller. Can't get to the snap ring from the front of the dryer for this roller. The 2 rollers in the back you can get to without removing the drum completely. Very easy to replace all rollers with the drum out. Also very easy to re-assemble. Buy or borrow a good set of snap ring pliers. Make sure you diagram the proper belt route if you don't have a picture. I printed a picture off this web site. Have someone hold the drum up so you can get the belt on, otherwise the entire repair is a 1 person job. Went back together in about 10 minutes. Total cost $40.00 parts & shipping.
Pulled off the lower panel with 5/16 socket.Pulled off the door assembly by removing the two screws at the bottom of the door assembly. I pulled down a little and then out. be carefull of the wires. Other posts said to remove. The wires were long enough I did not have to remove them. I just leaned it against the wall. I then removed the 4 screws that hold the front piece in.pulled it off replaced brackets , installed self adhesive felt(stuck good) and then glides. Mine were thin but not the problem. I then reached under the drum and released the belt from the tensioner. I then pulled the whole drum out.This is the time to vacum out good. I could get to the rear rollers very easy. The left roller was shot and the shaft half wore into(the problem). I pulled off the two screws holding the roller support. Normally You have to remove the wheel with snap ring pliers first to remove the support. In this case snap ring long gone. Replaced support shaft, installed thrust washers and roller with grease for both sides. The right support shaft was still good. Removed tensioner pulley and inspected. It was just as good as the new one. Cleaned and greased and reinstalled. Put new belt on the tub and slid it back in. Be carefull to get the belt on the proper side of the tensioner. I then installed the front supprt in place to support the tub with the 4 screws. Spun the tub(felt good) then reached under and reinstalled belt to motor and tensioner. Spun again to check for belt alignment. (Check) Reinstalled door an lower panel. Test Quiet Sounds like new. Very easy! I hope this helps someone just as the other post has helped me. Blessings to all.
Dryer would make hmming noise and motor was loud like there was some resistance. Dryer would overheat and shut down
I removed the covers, released the belt, pulled the drum, replaced rollers, glides, idler pulley and motor. The motor was the main issue but I replaced the rollers, idler and glides while I was in there. My biggest challenge was the clips that hold the motor in place. The hooked over a metal ear. I was able to use a big strait slot with downward pressure to release and reinstall.
The illustratations on the web site made ordering the correct part easy and the part fit perfectly so this repair job could have been accomplshed by anyone with very basic mechanical understanding.
Nutdriver, Pliers, Screw drivers, Socket set, Wrench set
90 of 156 peoplefound this instruction helpful.
Was this instruction helpful to you?
Thank you for voting!
Washer on spin cycle would shake, rattle, and roll. Walking accross the floor.
Damper kit and Springs corrected the problem. Follow the instrutions listed on this web site and all went well..The only problem was with the damper kit. The "kit" did not include the glue needed to replace the damper pads. This cost a delay on a day and trip to a local parts store that I did not want to make. So be sure to order glue for the damper pads.
To make working on the dryer easier we tipped the dryer back, about 45 degrees, removed the bottom panel, the door panel, note: make sure to mark the inside chassis or case with a sharpie where the wires go by color, etc… note: this makes it easy to place every thing back in order. I removed three screws on the bottom left side, to allow the more room for me to remove the drum. You can not remove the drum just yet but until the rubber belt is removed. I went below where the tension wheel is… it’s back behind the motor… incidental the tension wheel and the arm was the problem, it had warn to one side. Now release the rubber belt around drum. I pulled the drum out. The motor assembly is all one piece so it’s easy to remove. Don’t forget to unplug the plastic Molex plug and mark where you wires go. Two screws in front on the motor assemble and the whole assemble comes out. From here I could do a good job of cleaning the motor assemble and replacing the parts without any difficulty. Re-assembly was really easy, just one issue with placing the rubber belt took some time, and I need some help. I was finished in less than two hours. Bingo fixed!!
Removed the screws holding the bottom to the sides (but after taking it all apart, I think I could have done the repair by just taking the front off :-(. Removed the screws holding the front to the sides. Noted the wiring (three wires go to the front door switch). Removed the wires from the switch (they are quick connects, so no tools necessary). Removed the front. Pull the drum out. Disconnected the spring from the idler pulley lever. Removed the bolt and nut holding the idler pulley lever assembly to the bottom. (The old pulley had basically frozen in place which caused the belt to break). Put the new washers, wheel assembly and retaining ring on the new idler pulley lever. Bolted it back in place. Connected the spring. Put the new belt around the drum and slid the drum into place. Put the belt around the motor pulley and past the idler wheel (make sure it is on the correct side so this takes up the tension). Put the bottom screws back in. Connected the wires back up to the front. Put the front in place. (Make sure that the drum is properly seated in back so the front goes on and the drum will turn). Put the front screws back on.
The pully wheel was completely worn down as the belt had cut into it over time. I'm not sure if the lever and shaft needed replacing but since the part was inexpensive I decided to replace it as well as the wheel. The easiest way to access the parts was to turn the dryer on its side and remove the bottom panel of the dryer. This eliminated the need to remove the drum. It was then easy to reach in with a wrench and remove nut and bolt that held on the pulley lever. I also had to remove the spring which was attached to the lever. Next I put the new pully wheel on the shaft of the new pulley lever. The most difficult part of the job was installing retainer clip which holds the wheel on the shaft. This took a little persistance. After this was done it was simple to put the assembly back in place, reattach the spring and tighten the nut and bolt. I then replaced the bottom panel of he dryer, turned it upright and plugged it in. The whole job took just over an hour. One tip: Before removing the old assembly, I took a picture of it with my cell phone camera so I would remember how it went back together.
Dryer drum stopped but all other elements seemed functional; couldn't afford new dryer. Unplugged appliance & moved it to my garage (more room to move about). Undid base plate w/tools and found belt slack - identified broken idler pully wheel as part to fix. Went online & found part-select, located part & was way happy: $7.00 part + $7.00 shipping; got part 3 days later. Removed broken pully wheel (take off lock-washer, put wheel on, reinstall lock washer). Cleaned out venting elements (huge lint-ball & some sand in blower intake area). Re-attahced base. Back on-line to see "replace dryer belt" instruction sequence; opened lid of machine (while verticle) and positioned belt properly. Located access port (sealed) at base, knocked out the circular metal plate so I could reach in & thread the dryer belt back around motor & idler pulley wheel. Did test spin (manually) to make sure belt properly threaded, in place. Move appliance back to proper location, plugged in & hooked up venting to outside; ran test & SUCCESS!!!! It even seemed to dry better because of the now cleaned venting area. Labor cost = $0, Part cost < $15.00, Time (actual work) bit over 3 hours total.
Other Parts Used:
Leif from Brighton, CO
Difficulty Level:
Difficult
Total Repair Time:
More than 2 hours
Tools:
Pliers, Socket set
15 of 16 peoplefound this instruction helpful.
Was this instruction helpful to you?
Thank you for voting!
High pitched squealing noise for about 5 minutes when I first turned the dryer on. As the problem worsened, the squealing became more prevalent and annoying.
Removed the two sheet metall screws on the front foot panel, removed the four screws holding the door assembly, wrote down the wiring placement for the front door, removed the blower bulkhead assembly by removing one screw in the bottom of the dryer. Removed two screws and propped the dryer top panel up at a 45 degree angle to gain additional clearance. Removed the drum and belt from the front and back seals by applying simple outward pressure. Removed the screw in the bottom of the motor assembly allowing me to reposition the assembly for easy access. Removed bolt holding old Idler arm assembly. Assembled new Idler pulley referring to old assembly. Reversed the process to complete the repair. Note: I found it easier to simply hang the dryer belt over the dryer drum when replacing the drum in the dryer. First you need to place and align the drum then route the belt back to the moter pulley and then over the idler pulley. if you try to put the belt over the motor and then align the drum, it is difficult to keep the belt on the pulley. It might help to draw a diagram of the belt route or obtain the belt route diagram from the website for reference. Very easy job.
Unplug the dryer. Remove bottom panel by removing the two retaining nuts. Unplug the motor cable connections. Remove the blower unit. Remove the two screws holding the motor down. Release the belt by slipping it off the tension pulley. Slide the motor out carefully.
I had to replace the idler pulley shaft. The pulley had scored the shaft and was digging into it causing the excessive noise. Reinstall the new shaft and pulley. You will need to remove and re-attach the retaining ring.
I took the opportunity to then blow out the motor unit. It was filled with lint. I then decided to replace the original belt.
You need to unscrew the rear retaining clips and use a putty knife or (I ended up using a small tire tool) to lift and separate the top. I then slide the belt up to the front of the drum. I unscrewed each bolt from the drum and removed the belt at each corner. By doing this it kept the drum aligned with the unit. Then just reverse the process to install the new belt.
Re-install the parts in order of removal. Done. Total repair took about 45 minutes. Would have been quicker except I forgot to re-attach the power clip to the motor and had to remove the unit again.
Noise is gone, dryer runs like a champ, hopefully for another ten years.
Ask our experts a question about this part and we'll get back to you as soon as possible!
5 questions answered by our experts.
< Prev
1
Next >
Sort by:
Search filter:
Clear Filter
Your search term must have 3 or more characters.
Keep searches simple. Use keywords, e.g. "leaking", "pump", "broken" or "fit".
Sorry, we couldn't find any existing answers that matched.Try using some different or simpler keywords, or submit your new question by using the "Ask a Question" button above!
Patti
October 16, 2017
Drum will not spin, have to manual start it then it turns, also noisy. What do I need?
For model number ale643rbw
Hi Patti, Thank you for the question. I would start by removing the front cabinet so you can see the drum and the motor. Check to make sure the belt is not damaged or wore down and needs to be replaced. Also check the pulley the belts slips onto. Check the roller wheels the drum rests on to see if they are wore down as well. If everything checks out fine you may need to replace the Motor, PartSelect Number PS11739459. Hope this helps!
2 people found this helpful.
Was this helpful?
Thank you for voting!
Bob
April 2, 2018
Electric dryer was making a squealing noise like a belt or bearing. Then drum stopped turning. Now, when start, drum moves only slightly then stops. I opened panel and belt is intact. Your thoughts on the problem? Thanks.
For model number ALE643RBW
Hi Bob,
Thank you for your question. If the dryer is not tumbling, there are some parts that you will need to check to see which ones are causing the issue. You will need to check the belt, the idler pulley wheel with bearing, the drum support rollers and the motor. I hope this helps. Thank you and have a great day!
2 people found this helpful.
Was this helpful?
Thank you for voting!
Joyce
February 28, 2019
Will this fit my performa gas dryer ?Should i replace the drum support rollers and idler pulley wheel?
For model number PDGT920AWW
Hi Joyce, thank you for your question. This part would not work for your appliance. I have listed the correct idler pulley for you down below. You could replace those parts if you see that they are worn down. I hope that helps. Good luck with your repair.
Hello Charles, Thank you for contacting us. I have researched the model you have provided and have found the part you are looking for is PartSelect Number: PS11757553. We hope this helps.
1 person found this helpful.
Was this helpful?
Thank you for voting!
Cary
September 28, 2021
Is the idler pulley wheel pretty free spinning with belt removed or is it kind of tighter to spin by hand? Looks like it is chewing up belt. Thanks much
For model number LEA80AL
Hello Cary, thank you for your question. Turn the pulley wheel by hand. If the wheel barely turns or does not turn at all, the bearing is bad. If the bearing is bad, remove the pulley bracket from the dryer. Unhook the spring and slide out the bracket. Add a few drops of bearing oil where the axle and the wheel meet. Do this on both sides. Turn the wheel by hand and if the bearing is salvageable, it will begin to turn freely after several turns. If it does not turn freely, the pulley wheel must be replaced. We hope this helps.
1 person found this helpful.
Was this helpful?
Thank you for voting!
< Prev
1
Next >
✖
Ask a Question
Ask our experts a question on this part and we'll respond as soon as we can.
This dryer drum belt from Amana has five ridges and is 93-3/8" inches in length, and 3/8 of an inch wide. It is flat, black in color, and is made entirely of rubber.
Model Cross Reference
This part works with the following models:
PartSelect Number: PS11757553
Manufacturer Part Number: WPY54414