Keep searches simple. Use keywords, e.g. "leaking", "pump", "broken" or "fit".
Sorry, we couldn't find any existing reviews that matched. Try using some different or simpler keywords.
★★★★★
★★★★★
John S - July 17, 2022
Verified Purchase
Finally clean dishes
I am a mechanical engineer and I want to congratulate you on the both the simplistically of selecting the right part the fast delivery and the how to you tube video. I have never hired a serviceman or trade to do anything however the effort you have made to make servicing and parts replacement is nothing short of brilliant. WELL DONE!
★★★★★
★★★★★
Jarrett G - February 29, 2020
Verified Purchase
Site support is excellent
Site helped me determine what part I required as well as had a very competitive price and a top notch explanation video that walked me through everything
★★★★★
★★★★★
Ian A - February 5, 2019
Verified Purchase
Great part - work as expected
Part was in good condition, came fast, a bit of a challenge to change but a couple hours later, dishwasher was like brand new
★★★★★
★★★★★
Daniel V - November 7, 2018
Verified Purchase
super
I am a handyman without training I did not have any difficulty
to change the defective piece and she was exactly as described
to the original parts
★★★★★
★★★★★
Paul B - October 25, 2018
Verified Purchase
Sump & Motor Assembly Installation
Received the part in good condition but disappointed in the time it took to arrive. It was exactly what we needed to get rid of the screeching noise. I took the motor apart and found the front bearing in pieces caused by water infiltration. I didn't need the sump assembly but wanted to have everything new. The dishwasher works very well with the new parts. The installation was extremely difficult. The assembly wouldn't stay centered after we laid the dishwasher on its side after so many attempts. I finally managed to get it done with the dishwasher standing and installing the wedges from under. Thank you PartSelect for your excellent videos, even it makes it look easier than it is.
★★★★★
★★★★★
Cameron H - September 11, 2018
Verified Purchase
replace pump assembly
easy repair, video was very helpful and exactly right. repair worked !
★★★★★
★★★★★
Vincent B - September 4, 2018
Verified Purchase
worked as expected .. like a new dishwasher
like a new one
< Prev
1
Next >
Customer Repair Stories
Average Repair Rating: 2.6 / 5.0, 15 reviews.
What's this?
< Prev
1
2
Next >
Sort by:
Search filter:
Clear Filter
Your search term must have 3 or more characters.
Keep searches simple. Use keywords, e.g. "leaking", "pump", "broken" or "fit".
Sorry, we couldn't find any existing installation instruction that matched.
motor noise over a six month period suddenly stop running.
Removed washer from the cabinet by unscrewing anchor screws at the top of washer. But first I removed both dish racks. Shut off power and water to washer. Unhooked water line to washer. Lowered front adjustable feet so I could easily pull washer free from the cabinet. Disconnected wiring from the wall box to allow room to allow for more working room. Drain hose was plenty long on my washer so didn't have to disconnect. Before laying on side, I disconnected the lower and upper spray units. Lower spinner is attached with a hand tightened screw in the middle of spayer. This is a left hand thred. So I had to turn it to the right to loosen. The upper spray unit is simply removed by uncliping the clips from the long flat tube that runs from the lower unit to the top. There is a set of clips in the back of the tub and a set on top. After the clips are free, turn the flat tube to your right to unlock from the bottom spinning unit. Remove and lay the washer on its side. Also before I did that I unhooked the springs at the bottow of the door so to free the door from springing back up after opening the door while on side. Good idea too to have some towels handy to absorb spilled water from the washer. I used one under the open door while on side to protect the door and floor. There are three wire disconnects under the washer that hooks to the motor, etc. There are three vinal wedges that secure the motor and punp into the bottom of the tub. Remove them, disconnect the outer pump from the motor (made it easier for me to remove the unit through the hole in the bottom of the tub. This is a little tricky. Disconnect by turning the small pump to the end of the motor to your left to unlock. The small pump is a little stubborn to losen, but will break loose with presure persistence. After removing, simply push the whole unit up through the bottom of the tub to remove. Now you are ready to reinstall everything in reverse order. It is a good idea to have someone to assist with installing the motor and punp in the tub. I securely pressed it into the hole and the second person press the vinal wedges back into the bottom of the tub to secure the unit. Putting it all back together from there was a snap. A big plus is the quick delivery. Regular delivery 3 - 5 days will do. I ordered my parts one day and received them the next by Fedx. Didn't even pay the extra for next day delivery. Everything worked perfectly. Just like a new one again. Very happy with the helps posted and service and parts provided by PartSelect.
Dishes on the top rack weren't getting clean -- Motor was weak
This was a fairly easy repair. It took me a little over an hour to complete. First I flipped the circuit breaker for the dishwasher; then I removed the dishwasher from the cabinet and disconnected the supply, and return lines. I removed both racks from dishwasher, the lower washer arm, and the plastic conduit that supplies water to the upper rack. I then turned the unit onto it's side, and pulled the three or so cables that went to the motor, along with the three plastic wedges that held the motor in place. I then pushed the old motor through, into the interior of the dishwasher. This required me to disconnect some additional components to get it to fit through the opening, including the large silver capacitor. I then compared the old motor to the new one, and transferred some of the parts from the old motor to the new one that weren't included with the new one. I then pushed the new motor through the opening. This required a second person, who replaced the plastic wedges, while I pushed on the motor. The cables, supply lines, drain lines, and components that wouldn't fit through the opening were then replaced; the interior of the dishwasher was also reassembled.
Dishwasher is about 3 years old, motor started makeing load noises.
Cut power and turn off water. Pulled the dishwasher out of the cabinet. Removed internal spray unit. Lay a plastic bag on bottom of tub in case a screw falls from upper spray assembly while removing. Disconnected and drained all hoses. Put down plastic lined tarp on floor. Lay dishwaser on its side onto tarp. Removed hose from recirculation pump, removed water sensor and recirculation pump from housing and detach electric connection. Removed 3 plastic push clips and removed entire motor-pump unit from tub. Position new motor-pump unit into tub. Replace 2 push clips into position, then used a flat screwdriver to put some tension and position plastic pump assembly so I could insert 3rd push clip into position. Replaced all components & reconnect hoses. Turn on water & power. A relatively simple repair. Too bad the original motor-pump only lasted 3 years. Not built like the used to. Thank goodness for Part Select.com Great schematics and descriptions. Excellent website, service, delivery and excellent Part! Thank You!
Other Parts Used:
Joseph from Greenlawn, NY
Difficulty Level:
Easy
Total Repair Time:
1- 2 hours
Tools:
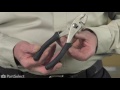
Pliers, Screw drivers
10 of 11 peoplefound this instruction helpful.
Was this instruction helpful to you?
Thank you for voting!
Motor starting making a terrible racket after installation 15 months earlier
Be sure to shut off power at circuit breaker and disconnect drain and water supply. Remove the dishwasher from the cabinet, lower it on its side. Remove three electrical connections from motor to various sensors. Remove three plastic wedges that secure the motor gasket to make a tight seal. The motor pops into the body of the dishwasher for removal. The replacement motor goes in just as you took it out. It took two people to set the motor right to ensure the good seal on the gasket for re-installation. Then turn it back upright and secure it in place. Couple suggestions, be sure to have ample towels around for leakage from water and drain lines. Be sure to cover the bottom of the dishwasher during disassembly and reassembly of the wash manifold. I dropped a screw in there and it took me some time to fish it out. All in all, it went well. Don't pay a plumber for this job. I'm a clod and if I did it, you can.
Other Parts Used:
David from Andover, MA
Difficulty Level:
Easy
Total Repair Time:
More than 2 hours
Tools:
Pliers, Screw drivers, Wrench (Adjustable)
5 of 5 peoplefound this instruction helpful.
Was this instruction helpful to you?
Thank you for voting!
pump mmotor would not run
First I would like to say I was concerned about undertaking a dishwasher repair ,as I now am legally blind and I was concerned that my vision impairment might cause me a problem. My dishwasher pump motor was not running and from the humming sound I could tell it was cycling power off on the thermo switch overload. The pump can be removed by turning it counter clockwise,however it would not move and I could not rotate the motor manually, IT appeared that the impeller must be jammed,so I removed the complete ascribe..After I removed it the motor still could not be removed for replacement. I ordered the complete assembly from PartSelect.com an was supervised how fast it was delivered. The hardest part was getting the seal to go in place as it was new and a tight fit. The Partsselect.com video's ,on repair instructions were very helpful. I reinstalled the dishwasher and everything worked fine.Thanks for thefast delivery of my order.
Motor was making a loud noise for several months, then quit
Killed the power and shut off the water. Unhooked and unplugged power, hot water and drain connections to move washer to middle of floor for easy access to all sides. Taking out the the main pump/motor assembly (the "Assembly")required taking out the flat white hot water tube that feeds the upper and middle sprayers. So, I started by taking out the two trays. Then, took out the lower, middle and upper sprayers. Then, tipped the dishwasher onto its front and disconnected the hoses and several electrical connections from the Assembly. Also, unhooked the drain pump motor and impeller from the Assembly since these are not included with the new Assembly. Took out the three sliding retainers to release the Assembly from the bottom of the dishwasher. Took a little gentle coaxing to release the seal between the Assembly and the tub bottom. Took the Assembly apart and found that the problem was the shaft bearing (ball bearings) between the motor and the impeller had rusted and subsequently failed. Therefore, buying just a new motor would have not helped. Inserted the new Assembly into place from inside the tub. Because of the tight seal, the Assembly had to be carefully placed into the tub opening and the seal gently pushed into place by working all the way around in 1 inch intervals. Took about three trips around the seal of the Assembly to ensure a tight, even fit. Otherwise, working unevenly around the perimeter will bind the Assembly and you'll have to remove it and restart. Once in and seated evenly in its place, reconnected the hoses and electrical connections. Installed the drain pump motor and impeller onto the new Assembly. Tested the unit for proper operation and leaks. Found no problems. Then re-installed the water tube, sprayers and trays inside the machine. Helps to jot down steps taken to disassemble so you retrace steps to re-assemble.
Other Parts Used:
Donald from Princeton, MA
Difficulty Level:
A Bit Difficult
Total Repair Time:
1- 2 hours
Tools:
Nutdriver, Pliers, Screw drivers, Socket set, Wrench set
4 of 6 peoplefound this instruction helpful.
Was this instruction helpful to you?
Thank you for voting!
The dishwasher is has been in service only 18 months and the seal between the motor and pump leaked, destroying the front motor bearing.
Rather than just replacing the motor and seal, I figured it would be just as easy to replace the sump and pump assembly also. It makes sense because the extra cost is minimal and I have a completely new unit now. The repair is quite simple. Just three clips holding the sump and a few electrical connectors and the unit comes right out.
Other Parts Used:
thomas from owls head, ME
Difficulty Level:
Really Easy
Total Repair Time:
15 - 30 mins
Tools:
Nutdriver, Pliers, Screw drivers, Socket set, Wrench set
3 of 4 peoplefound this instruction helpful.
Was this instruction helpful to you?
Thank you for voting!
Getting the large rubber gasket of the Sump / Motor Assembly to seat fully.
After struggling with the Sump / Motor Assembly for over an hour, I applied a generous coating of silicone lube to the rubber gasket, seated the Assembly and put in 2 of the retention clips. Then, with the aid of a 20 weight to hold the Assembly in its fully seated position, I was able to insert the 3rd retention clip. This method worked well but the company video does not show doing anything like this. Without the lube and weight installation is probably a two person job. All the rest of the assembly went easy. The Dishwasher now works like a brand new one.
Popped out the old motor and put in the new. Took some tinkering to understand all the hookups but was not too dificult. I am handy but other shouldn't have trouble either. Must dedicate a couple of hours at least.
Other Parts Used:
Sean from Tampa, FL
Difficulty Level:
Easy
Total Repair Time:
1- 2 hours
Tools:
Nutdriver, Pliers, Screw drivers
2 of 3 peoplefound this instruction helpful.
Was this instruction helpful to you?
Thank you for voting!
The motor started make a noise and finally quit.
I turn the electric at the fuse box. Iturned the water off, I remove the disk washer from under the counter. I disconnected the electric wire,water line and drain. I turnered washer on the side remove the 3 sensor plugx plugs and drain tub from the motor sumo unit. I removed the Plastic wedges holding the motor sump unit . To get motor work space I placed unit upright on 4 by 4 s. I set the sump unit in places carful to set the gasket. this took a little time. I put the plastic wedge in the back. I held the unit place with one hand put thre wedge under the door next. The third wedge was next and was less of a struggle.. I connected the Plugges and draind and other parts I had to take from the old unit. I installed electric water and drain.
Other Parts Used:
Donald from Kennedell, PA
Difficulty Level:
Easy
Total Repair Time:
1- 2 hours
Tools:
Pliers, Screw drivers, Socket set
2 of 3 peoplefound this instruction helpful.
Was this instruction helpful to you?
Thank you for voting!
< Prev
1
2
Next >
Questions and Answers
Ask our experts a question about this part and we'll get back to you as soon as possible!
8 questions answered by our experts.
< Prev
1
Next >
Sort by:
Search filter:
Clear Filter
Your search term must have 3 or more characters.
Keep searches simple. Use keywords, e.g. "leaking", "pump", "broken" or "fit".
Sorry, we couldn't find any existing answers that matched.Try using some different or simpler keywords, or submit your new question by using the "Ask a Question" button above!
Robert
December 3, 2017
My Maytag dishwasher suddenly started making a loud buzzing noise that is concurrent with the flow of water through the armatures. (when it buzzes, i hear water moving inside, and when the buzzing stops, the water also stops moving.) otherwise, the dishwasher appears to be working fine. I'm guessing that the problem will either be fixed by replacing the circulation pump & motor (partselect number: Ps11757388), or the sump and motor assembly (partselect number: Ps11757411). The later looks like it includes the circulation pump & motor. Is that right? What do you suggest?
For model number MDB8959SBS3
Hi Robert,
Thank you for your question. Yes, everything within that larger dotted line comes within this part. I hope that helps. Good luck with your repair.
5 people found this helpful.
Was this helpful?
Thank you for voting!
Edward
December 28, 2017
Does the sump and motor assembly include everything within the dotted line?
For model number MDC4809PAW0
Hi Edward,
Thank you for your question. The sump and motor assembly includes everything within the largest dotted line. I hope that helps. Good luck with your repair.
2 people found this helpful.
Was this helpful?
Thank you for voting!
John
February 5, 2018
My dishwasher is not draining the water out. I took the drain motor out and it was clean inside. It seams the motor is running but the water is not draining. I saw one of the responses to check the sump pump check valve to see if it is open. Can you tell me where this is located?
For model number 665.13269K114
Hi John,
Thank you for your question. I believe that check valve should be located in your inside of the pump itself. I hope that helps. Good luck with your repair.
1 person found this helpful.
Was this helpful?
Thank you for voting!
Mike
February 5, 2019
The dishwasher fills and drains ok and completes it's cycle. What i have diagnosed is the circulation pump is not working. With water in the tub there is soap left in dishwasher tub after the cycle. With spray tubes and arms removed there is no noise indicating that water is being sprayed in the dishwasher, and there is a soapy film on the dishes in the lower rack after the cycle is complete.Does this indicate a circulation motor/pump issue? Is this the correct motor/pump for this model, Whirlpool gu2500xtps7?
For model number GU2500XTPS7
Hello Mike, Thank you for the question. Yes, it does sounds like the Circulation Pump and Motor, PartSelect Number PS11757388 is defective and should be replaced. Thank you for your inquiry, good luck with this repair!
Dishwasher not cleaning well. Removed the lower spray arm to clean it, and then the metal clips on each end. The arm doesn't seem to want to come apart, but i think it should. Why else have the clips?
For model number DWU9200AAX
Hello David, Thank you for contacting us. I actually suggest checking PS11747618 Pump Housing Filter. There could be a blockage in the filter prohibiting proper water circulation and cleaning. The spray does not come apart once you have removed it from the bottom of the dishwasher. Have a great day!
1 person found this helpful.
Was this helpful?
Thank you for voting!
Fred
August 1, 2019
How do I know the chopper assembly is working. Or and how does a chopper assembly engage?
For model number KUDC101XWH2
Hi Fred,
Thank you for your question. If the dishes in the dishwasher are being cleaned correctly and there are no clogs in the pump then the chopper assembly is working. If it is not doing this, the nylon teeth may be worn and it will need to be replaced. Here is a link to a repair video from our website that you may reference for more information, https://www.partselect.com/PS11722146-Whirlpool-W10083957V-Chopper-Assembly.htm?SourceCode=4&SearchTerm=KUDC10IXWH2&ModelNum=KUDC10IXWH2. I hope this helps. Thank you and have a great day!
1 person found this helpful.
Was this helpful?
Thank you for voting!
Art
December 30, 2019
Does the sump and motor assembly also include the turbidity sensor?Thanks
For model number kuds30fxss9
Hello Art, Thank you for the question. The Sensor PartSelect Number: PS11757214 is not included. We hope this helps!
Hi i'm about to replace the pump assembly on my very noisy, but still cleaning dishwasher . Please tell me if this part is compatible with my machine ? Part # wpw 10780877 thanks alot
For model number DU1048TPS4
Hi Rich,
Thank you for your question. Yes, this part is compatible with your model number. Good luck with your repair.
1 person found this helpful.
Was this helpful?
Thank you for voting!
< Prev
1
Next >
✖
Ask a Question
Ask our experts a question on this part and we'll respond as soon as we can.