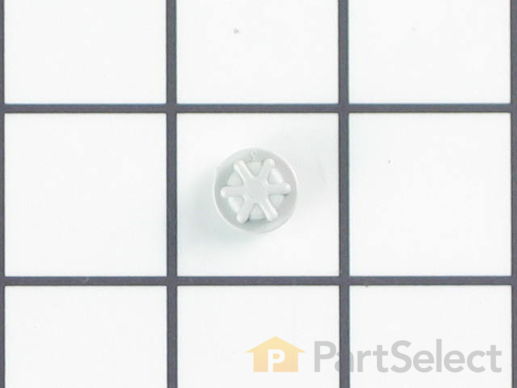
Part Location Diagram of WP99002654 Whirlpool Wash Arm Cap
See part 1 in the diagram
( Grid squares measure 1x1 inch )
Customer Service Representative

Get in touch, we're here to help!

Daily 8am - 9pm EST

customerservice@partselect.ca

Wash Arm Cap

$14.73
  In Stock

Get this part fast! Average delivery time for in-stock parts via standard shipping: 1.8 days.

PartSelect Number PS11747698
Manufacturer Part Number WP99002654
Manufactured by Whirlpool
Product Description

Wash Arm Cap Specifications

This part is the replacement wash arm cap, also known as the spray arm nut, for your dishwasher. It is made of white plastic and is approximately ½ an inch in diameter. The wash arm cap fastens the lower spray arm to the pump housing. If the arm cap is damaged or missing, the arm can wobble or fall off during operation, and this can make it extremely difficult to wash your dishes effectively. To replace the wash arm cap, simply remove it from the spray arm, and replace it with the new cap. This part is an authentic OEM part from the manufacturer, and is sold individually.
How Buying OEM Parts Can Save You Time and Money

How Buying OEM Parts Can Save You Time and Money

Troubleshooting
This part fixes the following symptoms:
Not cleaning dishes properly | Noisy
This part works with the following products:
Dishwasher.
This part works with the following products:
Maytag, Amana, Jenn-Air, Magic Chef.
Part# WP99002654 replaces these:
99002654
Back to Top
Customer Repair Stories
 Average Repair Rating: 3.8 / 5.0, 7 reviews. What's this?
  • 1
Sort by:
Sorry, we couldn't find any existing installation instruction that matched.
Wash Quality Was Getting Bad
The upper arm was held in by a torx screw. The shoulder on the screw held the arm in place. Once removed I simply swapped parts and installed screw. The lower arm was held on by a plastic nut with knurled edges that you can remove by hand. The arm simply lifted off and I swapped arms again. The rollers are held on by a curled plastic lock that grips the wire basket.
Other Parts Used:
Silverware Basket - Gray Docking Station with Flappers Lower Spray Arm - Shield Included Upper Rack Wheel Lower Wheel Assembly Upper Spray Arm
  • CHRISTOPHER from Spalding, NE
  • Difficulty Level:
    Really Easy
  • Total Repair Time:
    15 - 30 mins
  • Tools:
    Pliers, Screw drivers, Socket set
232 of 444 people found this instruction helpful.
Was this instruction helpful to you?
Thank you for voting!
Dishes were coming out dirty with specs of debris on them
I noticed there was a filter type of material in the bottom of the dishwasher that had a small tear in it and figured that was my problem. I removed the nut from the sprayer arm at the bottom of the tub, removed the sprayer arm, removed 3 screws of the plastic cover below that. Removed six screws on the plastic cover below that. Removed one screw fron the center of the black pump spinner wheel that allowed me to lift off that cover. Then I lifted out the flowplate assembly. Placed the new part in and reversed the steps. Works like new again! All for about $30...I am not trianed in any way and have no experience in this kind of thing but am motivated trying to avoid a large service bill for a few screws. I am so happy...Thanks PartSelect!
Other Parts Used:
Accumulator Filter
  • Eric from Newton, WI
  • Difficulty Level:
    Really Easy
  • Total Repair Time:
    15 - 30 mins
  • Tools:
    Screw drivers
32 of 35 people found this instruction helpful.
Was this instruction helpful to you?
Thank you for voting!
Dishwasher wasn't cleaning well, especially top rack
I wanted to get the dishwasher cleaning better and thought that maybe the accumulator needed to be replaced. I figured that I'd swap out all the spray arms as well, just for good measure.

I needed Torx screwdrivers (T15 and T20, I think - not 100% sure on that) and patience because there's really quite a lot of screws to get the accumulator out. Finally got to it and it didn't look damaged, but replaced it anyway.

The spray arms are easy - they just snap in except for the lowest one, that had a plastic nut. I ordered a replacement nut just in case I broke this one (you know how that goes) taking it off. Well, it took pliers, but it came off ok.

In the end, my dishwasher is happy and cleans much better now.
Other Parts Used:
Accumulator Filter Top Wash Arm and Retainer Upper Spray Manifold Lower Spray Arm - Shield Included Upper Spray Arm
  • Casey from Wadsworth, OH
  • Difficulty Level:
    Easy
  • Total Repair Time:
    15 - 30 mins
  • Tools:
    Pliers, Screw drivers
12 of 15 people found this instruction helpful.
Was this instruction helpful to you?
Thank you for voting!
The dishes in the dishwasher weren't getting clean. I decided it would be cheaper to replace the clogged wash arm myself, before calling a repairman.
First, I removed the screw, then I took off the old wash arm, then I replaced the wash arm, and replaced the screw. Nothing could be easier!
Other Parts Used:
Lower Spray Arm - Shield Included
  • Georganne from Carolina Beach, NC
  • Difficulty Level:
    Really Easy
  • Total Repair Time:
    Less than 15 mins
4 of 6 people found this instruction helpful.
Was this instruction helpful to you?
Thank you for voting!
The washer arm was broken
I just took the nut off and replace the washer arm it didn't take any time at all.
Other Parts Used:
  • Monique from CAMDENTON, MO
  • Difficulty Level:
    Very Easy
  • Total Repair Time:
    Less than 15 mins
  • Tools:
    Pliers
1 person found this instruction helpful.
Was this instruction helpful to you?
Thank you for voting!
Previous Wash Arm Cap broke
Lifted the old spray arm off, put the new arm on the spindle, screwed on the cap with my fingers. Good to go.
Other Parts Used:
Lower Spray Arm - Shield Included
  • Shaun from GRANTS PASS, OR
  • Difficulty Level:
    Very Easy
  • Total Repair Time:
    Less than 15 mins
1 person found this instruction helpful.
Was this instruction helpful to you?
Thank you for voting!
Inlet hose refused to seat on faucet (portable dishwasher).
Finally had to remove front foot panel and laminated top. Removed screws on back and one side to get to open cabinet to insert hose properly.
Other Parts Used:
Lower Spray Arm - Shield Included
  • Victpr from Manhattan, KS
  • Difficulty Level:
    Difficult
  • Total Repair Time:
    More than 2 hours
  • Tools:
    Nutdriver, Pliers, Screw drivers, Socket set, Wrench (Adjustable), Wrench set
0 of 1 people found this instruction helpful.
Was this instruction helpful to you?
Thank you for voting!
  • 1
Questions and Answers

Be the first to ask our experts a question about this part!

Related Parts
Model Cross Reference
This part works with the following models:
PartSelect Number: PS11747698
Manufacturer Part Number: WP99002654
Brand
Model Number
Description
Amana
ADB1200AWB
Dishwasher - Tall Tub
Amana
ADB1200AWQ
Dishwasher - Tall Tub
Amana
ADB1200AWS
Dishwasher - Tall Tub
Amana
ADB1200AWW
Dishwasher - Tall Tub
Amana
ADB1500AWB
Dishwasher
Amana
ADB1500AWB0
Dishwasher - DISHWASHER
Amana
ADB1500AWB1
Dishwasher - DISHWASHER
Amana
ADB1500AWB10
Dishwasher
Amana
ADB1500AWB37
Dishwasher
Amana
ADB1500AWB41
Dishwasher - DISHWASHER
Amana
ADB1500AWB46
Dishwasher - DISHWASHER
Amana
ADB1500AWQ
Dishwasher
Amana
ADB1500AWQ0
Dishwasher - DISHWASHER
Amana
ADB1500AWQ1
Dishwasher - DISHWASHER
Amana
ADB1500AWQ10
Dishwasher
Amana
ADB1500AWQ37
Dishwasher
Amana
ADB1500AWQ41
Dishwasher - DISHWASHER
Amana
ADB1500AWQ46
Dishwasher - DISHWASHER
Amana
ADB1500AWS
Dishwasher
Amana
ADB1500AWS0
Dishwasher - DISHWASHER
Amana
ADB1500AWS1
Dishwasher - DISHWASHER
Amana
ADB1500AWS10
Dishwasher
Amana
ADB1500AWS37
Dishwasher
Amana
ADB1500AWS41
Dishwasher - DISHWASHER
Amana
ADB1500AWS46
Dishwasher - DISHWASHER
Amana
ADB1500AWW
Dishwasher
Amana
ADB1500AWW0
Dishwasher - DISHWASHER
Amana
ADB1500AWW1
Dishwasher - DISHWASHER
Amana
ADB1500AWW10
Dishwasher
Amana
ADB1500AWW37
Dishwasher
Customer Service Representative

Get in touch, we're here to help!

Daily 8am - 9pm EST

Contact Customer Service