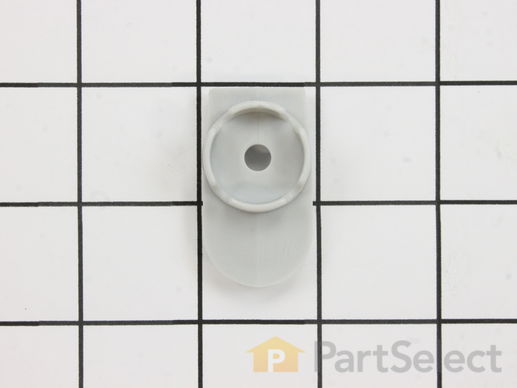
Part Location Diagram of WP8268812 Whirlpool Upper Spray Arm Mount
See part 15 in the diagram
Replacing your Kenmore Dishwasher Upper Spray Arm Mount
( Grid squares measure 1x1 inch )
Customer Service Representative

Get in touch, we're here to help!

Daily 8am - 9pm EST

customerservice@partselect.ca

Upper Spray Arm Mount

$13.15
  In Stock

Get this part fast! Average delivery time for in-stock parts via standard shipping: 1.8 days.

PartSelect Number PS11745466
Manufacturer Part Number WP8268812
Manufactured by Whirlpool
Product Description

Upper Spray Arm Mount Specifications

This part is used to mount the spray arm to the upper dish rack.
How Buying OEM Parts Can Save You Time and Money

How Buying OEM Parts Can Save You Time and Money

Part Videos

Replacing your Kenmore Dishwasher Upper Spray Arm Mount

Replacing your Kenmore Dishwasher Upper Spray Arm Mount
Troubleshooting
This part fixes the following symptoms:
Not cleaning dishes properly | Leaking
This part works with the following products:
Dishwasher.
This part works with the following products:
Kenmore, KitchenAid, Whirlpool, Inglis.
Part# WP8268812 replaces these:
AP6012259, 8268812, 9743194
Back to Top
Customer Repair Stories
 Average Repair Rating: 3.9 / 5.0, 17 reviews. What's this?
  • 1
  • 2
Sort by:
Sorry, we couldn't find any existing installation instruction that matched.
Dishwasher not cleaning well... then leaking
This gets a little lengthy... but it explains where Cascade Dishwashing Powder came up with its brand name - it's been a cascade project.
I started by replacing the Middle Wash Arm Tube as the old tube developed leaks. As others have stated this is a new design but directly replaceable and easy to do.
This didn't solve the cleaning issue so reading the experiences of others on this site realized I also had broken parts in the Upper Spray Arm Assembly and the Upper Wash assembly. I replaced these and the dishes were suddenly much, much cleaner. These were very easily replaced.
I did find that I did not need the Mount for the upper spray arm (PS402277) as a redesign of the Upper Spray Arm Mounting bracket no longer required it - the bracket simply clipped in -the diagram was out of date.
Everything seemed to go well for about 3 loads when the dishwasher started leaking heavily out of the bottom of the door. I then noticed that the lower Wash Arm Bearing Ring and the Seal, Lower Spray Arm had disintegrated so I replaced those but this didn't affect the leaking. Someone had stated that if the lower wash arm assembly had too much 'wobble' that it cause 'waves' that would leak out the front door... mine had some wobble so I added a nylon washer from Ace Hardware that reduced wobble but still leaked.
I then replaced the Door Seal Kit - this was by far the most difficult part as the door needed to be removed and it was somewhat difficult - and it seemed apparent after we had removed the door that these parts weren't the problem but we replaced them anyway.
Also, someone else had noted that they had to attach the door seal (this is NOT the gasket that goes around the door opening) with a sealant - I had the same problem; the original seal fit tightly with friction but the new replacement required an adhesive - I used silicone. Still leaked.
From here on I can't guaratee any useful information: I took the strainer screen out of the bottom of the dishwasher and found one slightly loose screw holding what I believe is the 'pump outlet' according to the diagram. I had also read that the water fill is controlled not by the float at the bottom of the washer but by the electronics and it was suggested that I disconnect the DW from the power to 'reset' the timer, this I did and hit the 'Cancel' cycle a couple of times to make sure that all programs were cancelled. Whether any of this made a difference I have no idea - except that the dishwasher suddenly stopped leaking and hasn't leaked a drop for at least 20 washes. So I don't know, for sure, why it leaked or how I fixed it, but it's working and washing great now - except the tines on the lower rack are beginning to rust out and breaking off. The rack is pretty expensive but so far I've saved a lot of money and my family thinks I'm a dishwasher genius.
Other Parts Used:
Upper Spray Arm Mount Wash Arm Bearing Ring Wash Arm Retainer Nut Middle Spray Arm Kit Upper Wash Assembly Lower Sprayarm Seal
  • Wesley from Lake Elmo, MN
  • Difficulty Level:
    A Bit Difficult
  • Total Repair Time:
    1- 2 hours
  • Tools:
    Screw drivers
29 of 39 people found this instruction helpful.
Was this instruction helpful to you?
Thank you for voting!
The spray arm snapped off from the mounting bracket.
First of all, we were very impressed with the ease of finding the parts, the ordering, and the velocity in which the parts were shipped. We received them the next day. I had to remove one of the screws from the old kit, since the new one only came with one. I looked at the diagram on the website of the assembly, and also remembered what the assembly looked like before I took it apart. The first time I tried it, I could not get the spray arm to spin without hitting the dishwasher rack. Since I had ran out of time, I had to wait until the next day. Once I started, I realized that I had the mounting bracket on backwards. Once I turned it around, I tightened the screws, and it was done within 5 minutes.
Other Parts Used:
Upper Spray Arm Mount Middle Spray Arm Kit
  • Elizabeth from Olathe, KS
  • Difficulty Level:
    Really Easy
  • Total Repair Time:
    15 - 30 mins
  • Tools:
    Screw drivers
12 of 13 people found this instruction helpful.
Was this instruction helpful to you?
Thank you for voting!
upper spray broke off
Removed upper basket and installed the arm. New snap in didn't require phillips screwdriver as old one and new support had split to insert. Replacing upper spray spinner dropped screw down around pump. This caused misery unassembling lower covers to receive Stainless
Steel, so magnet won't help ended up with mirror and hemistat to reach through large screen figures. So make sure to put towel or something in the bottom to catch parts.
Other Parts Used:
Upper Spray Arm Mount Feed Tube Seal Wash Arm Bearing Ring Middle Spray Arm Kit Upper Wash Assembly
  • Rodney from Pleasanton, CA
  • Difficulty Level:
    Easy
  • Total Repair Time:
    30 - 60 mins
  • Tools:
    Pliers, Screw drivers, Socket set
8 of 11 people found this instruction helpful.
Was this instruction helpful to you?
Thank you for voting!
dishwasher arm would not turn
we removed the cracked pieces and attached the new spray arm. it took some time because the new arm looked different than the old,but we did it.... I was the one to order the parts needed i had never done this before my husband said it was broken and we needed to buy a new dishwasher ( he was less than thrilled about that) so i decided to do this myself and find the parts. my husband was very surprised that i did it.... AND SO WAS I... IF I CAN DO IT YOU CAN DO IT!
Other Parts Used:
Pan Slide Track Upper Spray Arm Mount Middle Spray Arm Kit
  • paul from wrentham, MA
  • Difficulty Level:
    Easy
  • Total Repair Time:
    15 - 30 mins
  • Tools:
    Screw drivers
8 of 12 people found this instruction helpful.
Was this instruction helpful to you?
Thank you for voting!
had a broken part
The parts I ordered came in right on time and were easily replaced. Thanks.
Other Parts Used:
Upper Spray Arm Mount Water Inlet Tube Holder
  • Timothy from Merritt Island, FL
  • Difficulty Level:
    Really Easy
  • Total Repair Time:
    Less than 15 mins
  • Tools:
    Screw drivers
6 of 10 people found this instruction helpful.
Was this instruction helpful to you?
Thank you for voting!
The upper rotor mount broke off.
I screwed the rack mount to the spindle using
the extra screw I ordered. I removed the upper dishrack's front stops and slid the rack
out. I clamped the mount to the dishrack. I screwed the rotor to the spindle with the screw that came with the rotor kit. I slipped the feed tube mount over the end of the tube and clamped it on the dishrack. I replaced the rack in the slides and replaced the front stops.

I had a hard time driving the screws. The slots are crossed but do not seem to be standard Phillips. The screws were hard to drive into the holes in the hard plastic. Before I could drive the mount screw all the way, the slot was too stripped to use.
Other Parts Used:
Screw Upper Spray Arm Mount Middle Spray Arm Kit
  • George from Wayside, NJ
  • Difficulty Level:
    A Bit Difficult
  • Total Repair Time:
    1- 2 hours
  • Tools:
    Screw drivers
3 of 4 people found this instruction helpful.
Was this instruction helpful to you?
Thank you for voting!
plastic piece on spray arm broke
a mater of unscrewing the part attached to the upper drawer...........placing new pieces together and srewing them on...............schematic on your web site was perfect.......had pieces sent over night.........wonderful experience
Other Parts Used:
Screw Upper Spray Arm Mount Middle Spray Arm Kit
  • Susan from cooper city, FL
  • Difficulty Level:
    Really Easy
  • Total Repair Time:
    Less than 15 mins
  • Tools:
    Screw drivers
3 of 7 people found this instruction helpful.
Was this instruction helpful to you?
Thank you for voting!
no problem any more
repair was ez I have no idea how old the machine is.
Other Parts Used:
Screw Middle Wash Arm Tube Holder Middle Wash Arm Tube
  • Juan from EMMAUS, PA
  • Difficulty Level:
    Very Easy
  • Total Repair Time:
    15 - 30 mins
  • Tools:
    Screw drivers
1 of 2 people found this instruction helpful.
Was this instruction helpful to you?
Thank you for voting!
Spray arm mount broken and supply tube cracked
First, I compared the parts visually. The mount is a slightly different design. I removed the old mount/spray arm and tube by removing the single screw through the upper mount and un-clipping the rear tube mount. Next I assembled the new parts using the old spray arm as a guide. Note: Installing the new screw for the spray arm into the new mount proved very difficult and I needed to enlarge the pilot hole slightly in order to assemble. I proceeded to attach the new mount to the upper rack and installing the rear tube mount. The new design of the mount eliminated the need for the upper mount and even if I wanted to install it, it will not fit the new design. Overall, an easy repair with a couple of hiccups.
Other Parts Used:
Upper Spray Arm Mount Middle Spray Arm Kit
  • Dennis from Yorktown, VA
  • Difficulty Level:
    Really Easy
  • Total Repair Time:
    Less than 15 mins
  • Tools:
    Screw drivers
1 of 2 people found this instruction helpful.
Was this instruction helpful to you?
Thank you for voting!
Clips were broken and very easy to replace
I pulled the top tray out by unhooking the end clips. Replacing the broken clips that hold the swivel racks was a breeze The top spray arm was replaced with two screws.
Other Parts Used:
Tine row Clip Tine Pivot Clip Upper Spray Arm Mount
  • John from Crownsville, MD
  • Difficulty Level:
    Really Easy
  • Total Repair Time:
    Less than 15 mins
  • Tools:
    Pliers, Screw drivers, Socket set, Wrench (Adjustable)
1 of 2 people found this instruction helpful.
Was this instruction helpful to you?
Thank you for voting!
  • 1
  • 2
Questions and Answers

Be the first to ask our experts a question about this part!

Related Parts
Model Cross Reference
This part works with the following models:
PartSelect Number: PS11745466
Manufacturer Part Number: WP8268812
Brand
Model Number
Description
Kenmore
110773811
Dishwasher
Kenmore
110773812
Dishwasher
Kenmore
110773813
Dishwasher
Kenmore
110773881
Dishwasher
Kenmore
110773882
Dishwasher
Kenmore
110773883
Dishwasher
Kenmore
66515622000
Dishwasher
Kenmore
66515624000
Dishwasher
Kenmore
66515627000
Dishwasher
Kenmore
66515629000
Dishwasher
Kenmore
66515652000
Dishwasher
Kenmore
66515654000
Dishwasher
Kenmore
66515659000
Dishwasher
Kenmore
66515682000
Dishwasher
Kenmore
66515684000
Dishwasher
Kenmore
66515689000
Dishwasher
Kenmore
66515701890
Dishwasher
Kenmore
66515701891
Dishwasher
Kenmore
66515701892
Dishwasher
Kenmore
66515702990
Dishwasher
Kenmore
66515705890
Dishwasher
Kenmore
66515705891
Dishwasher
Kenmore
66515705892
Dishwasher
Kenmore
66515707990
Dishwasher
Kenmore
66515708890
Dishwasher
Kenmore
66515708891
Dishwasher
Kenmore
66515708892
Dishwasher
Kenmore
66515709990
Dishwasher
Kenmore
66515712000
Dishwasher
Kenmore
66515714000
Dishwasher
Customer Service Representative

Get in touch, we're here to help!

Daily 8am - 9pm EST

Contact Customer Service